

User guide
This guide walks you step by step through setting up and using Chronaut – on iPhone, iPad and Mac or on Android. Short answers to single questions are also in the Help.
Guide for:
This page describes both versions. Sections that apply to only one system are marked “Apple” or “Android”.
What Chronaut does
Chronaut is a trash can for your calendar. The app backs up every calendar on your device and remembers every deletion and every change. If an event has disappeared or was changed by mistake, Chronaut shows you – and with the full version you bring it back.
Chronaut works with every calendar your device knows, for example iCloud, Google, Exchange or local calendars. Everything stays on your device. There is no account and no server.
Chronaut works with every calendar Android syncs on your device, for example Google, Exchange or local calendars. Everything stays on your device: the app has no internet access. There is no account and no server.
Installation and first steps
- Download Chronaut from the App Store onto your iPhone, iPad or Mac.
- Open the app. You see three short introduction pages.
- Page 1, “A trash can for your calendar.”: Read briefly what the app does and tap “Continue”.
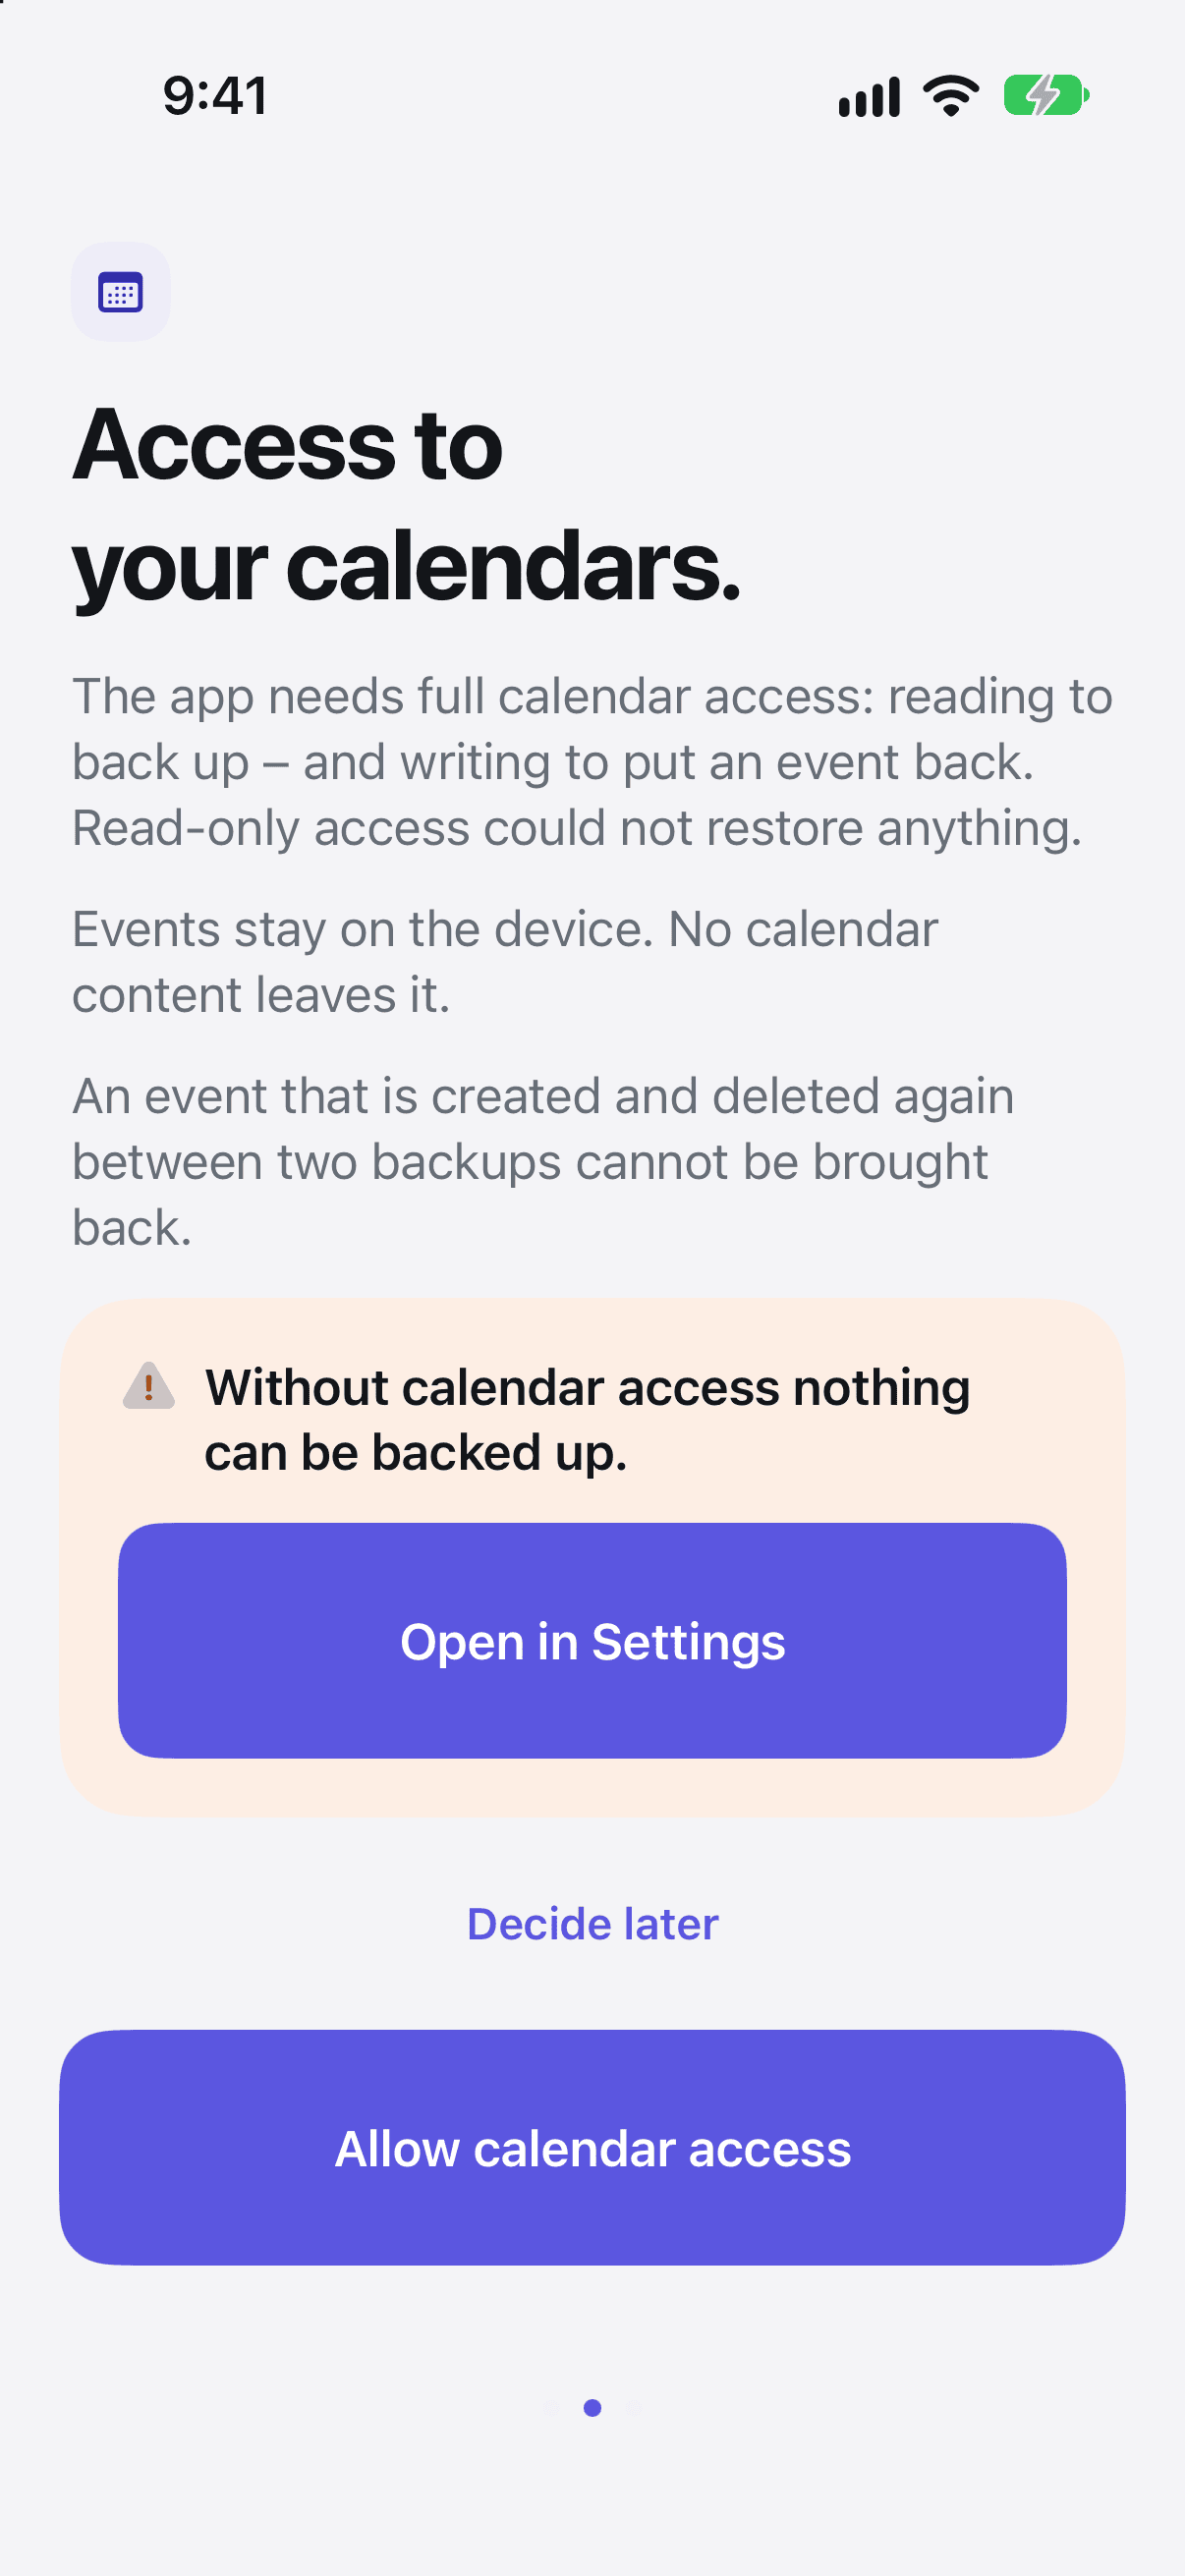
- Page 2, “Access to your calendars.”: Tap “Allow calendar access” and confirm the system prompt (see Allowing calendar access). Then “Access granted · first backup is running” appears. Tap “Continue”.
- Page 3, “So that gaps stay rare.”: Here you can make backups denser – on iPhone and iPad with “Set up automation”, on the Mac with “Launch at login”. This is optional. Tap “Done” or “Set up later”.
- Download Chronaut from Google Play onto your Android device.
- Open the app. You see two short introduction pages.
- Page 1, “A trash can for your calendar.”: Read briefly what the app does and tap “Continue”.
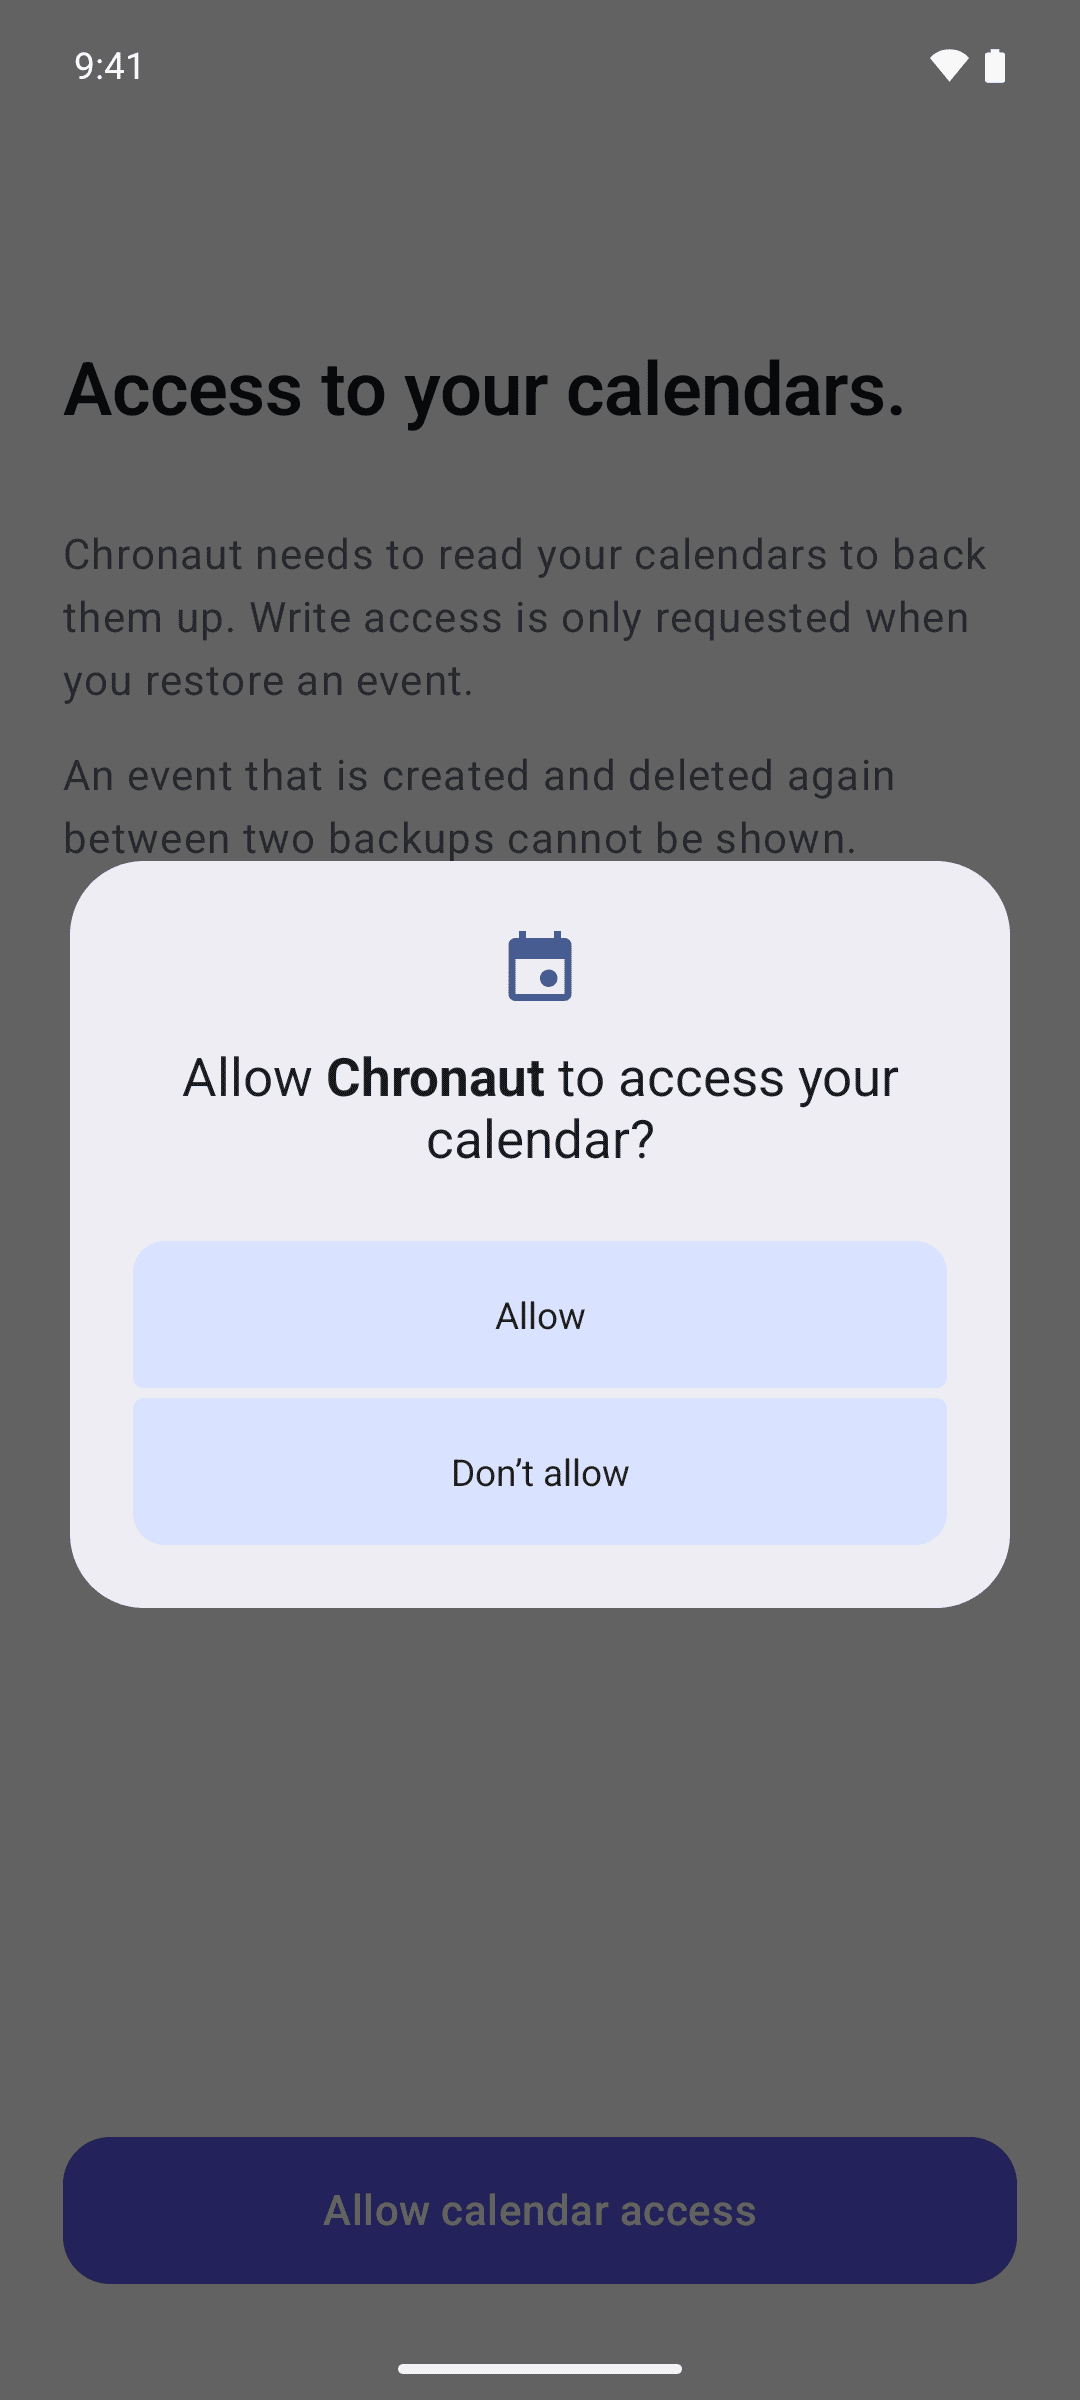
- Page 2, “Access to your calendars.”: Tap “Allow calendar access” and allow access in the Android prompt with “Allow” (see Allowing calendar access).
- Chronaut opens the “Status” tab. While the first backup is running, it shows “First backup is running…”, then “Last snapshot …”. With only a few events this is so quick that you may barely see the first notice.
The first backup is now running. Depending on how many events you have, it may take a moment. From now on Chronaut remembers every change.
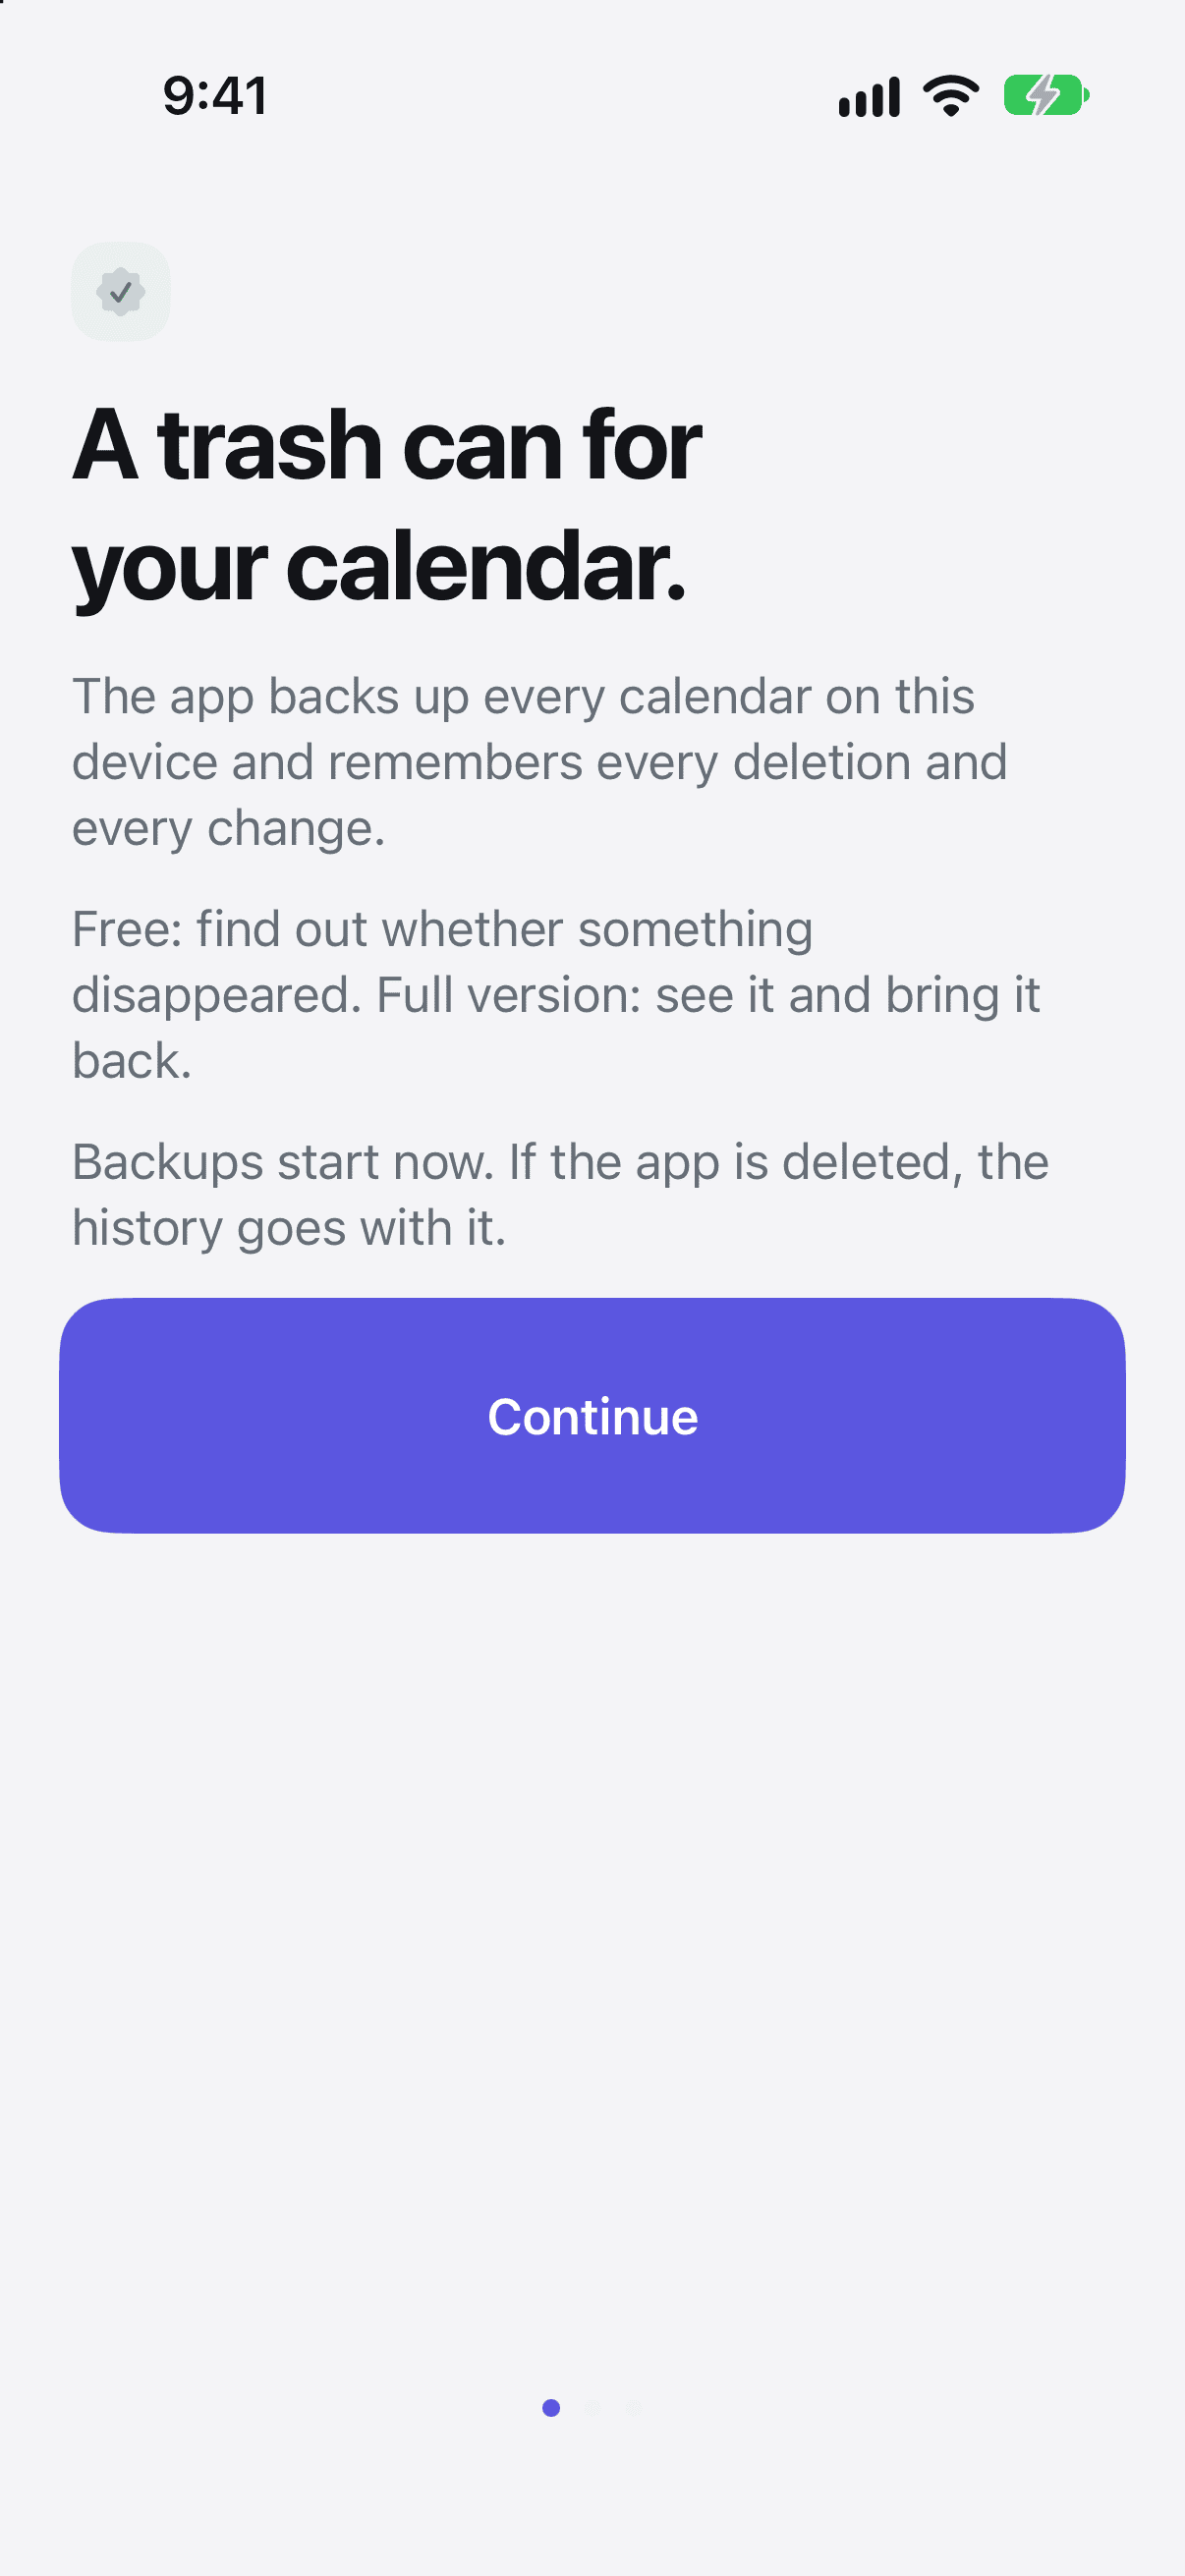
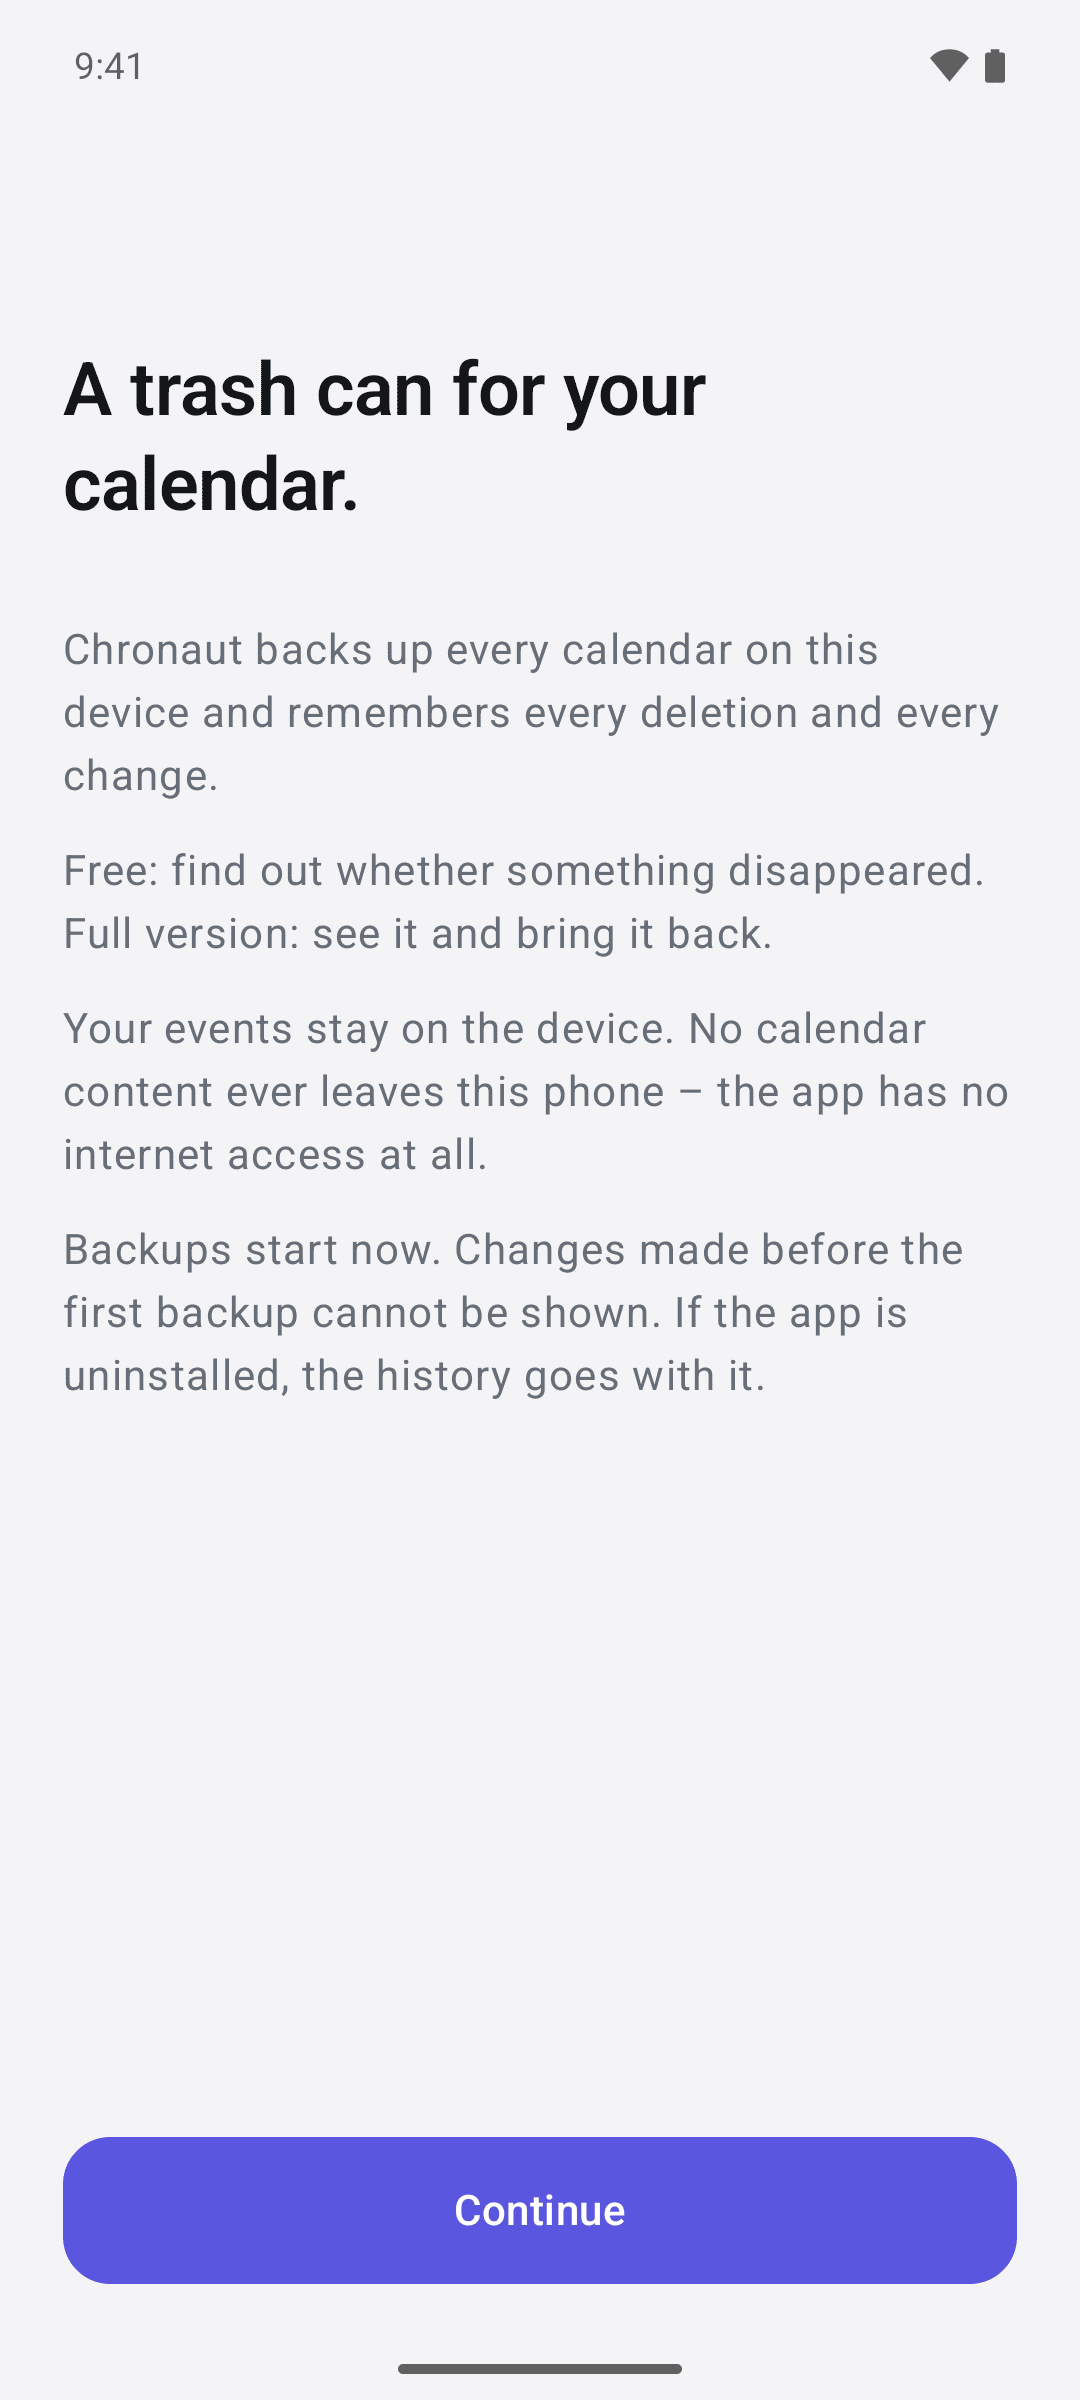
Important: Backups start now. Chronaut cannot know about events that were deleted before it was installed.
Allowing calendar access
Chronaut needs full access to your calendars: reading to back up, and writing to put an event back. Read-only access could not restore anything. Chronaut only writes when you restore an event yourself.
- In the introduction, tap “Allow calendar access”.
- The system asks for access. Allow full access.
- Chronaut shows “Access granted · first backup is running”.
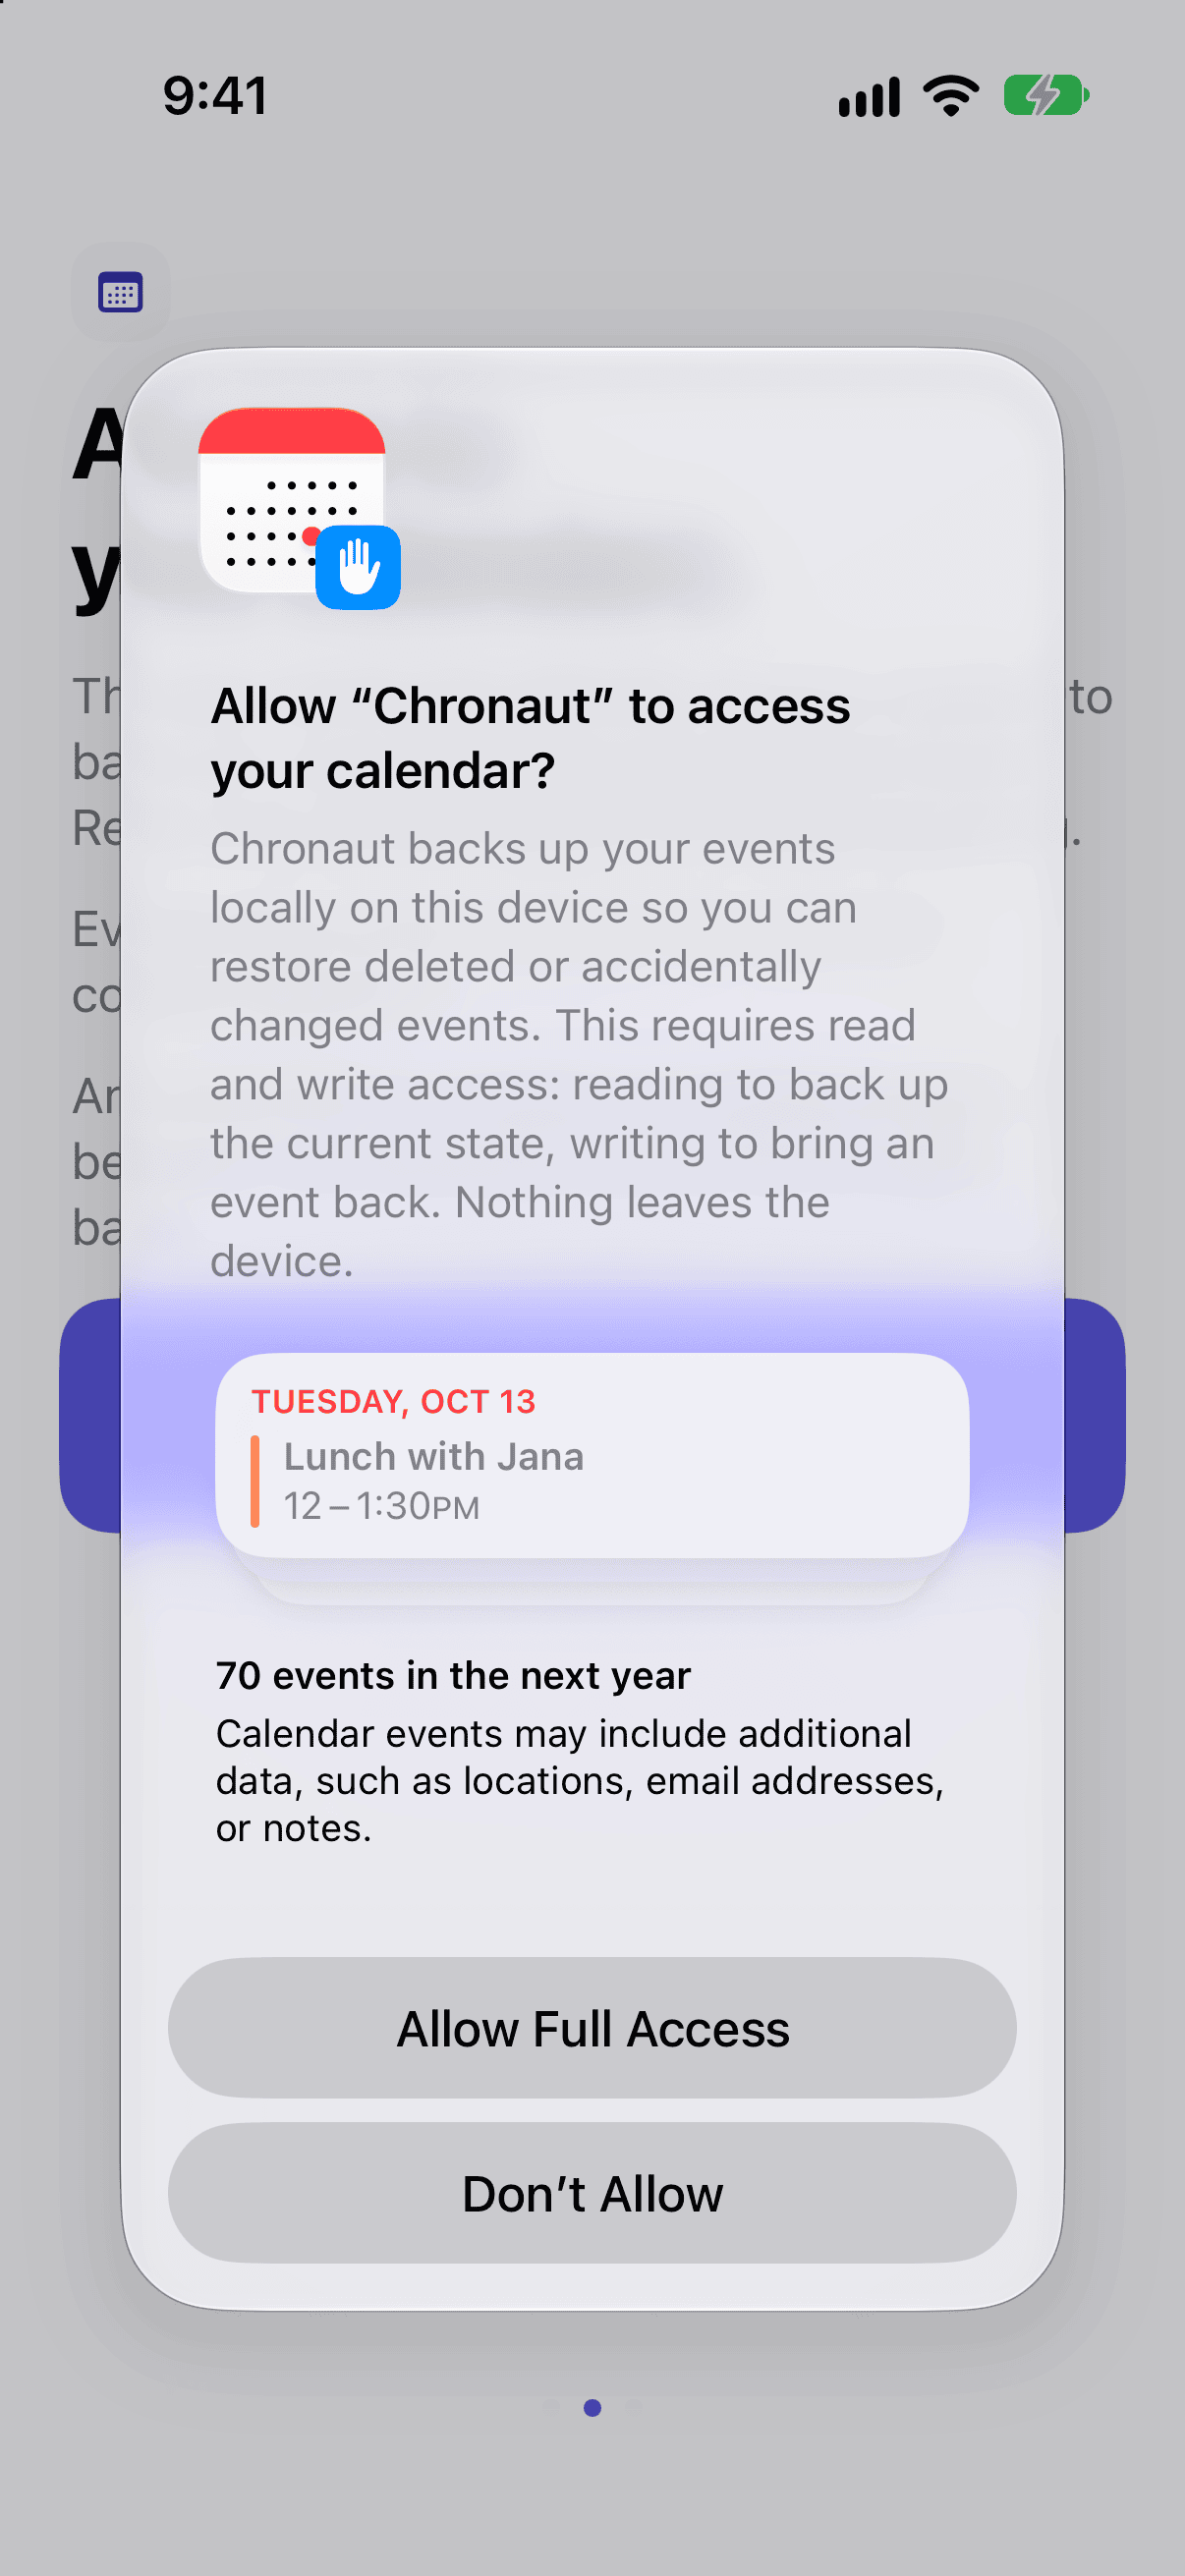
Chronaut first asks only for read access to your calendars, because reading is enough to back them up. The app needs write access only when you restore an event; it asks for it then (see Restoring). Chronaut only writes when you restore an event yourself.
- In the introduction, tap “Allow calendar access”.
- Android asks whether Chronaut may access your calendar. Tap “Allow”.
- Chronaut opens the “Status” tab and starts the first backup.
If you declined access
Without calendar access nothing can be backed up. Chronaut then shows “Without calendar access nothing can be backed up.” or “Backup stopped”. If you only granted write access, it shows “This access only allows writing. Backing up needs full access.” This is how you allow access afterwards:
iPhone and iPad
- In Chronaut, tap “Open in Settings” or “Allow access in Settings”. Or open the Settings app yourself.
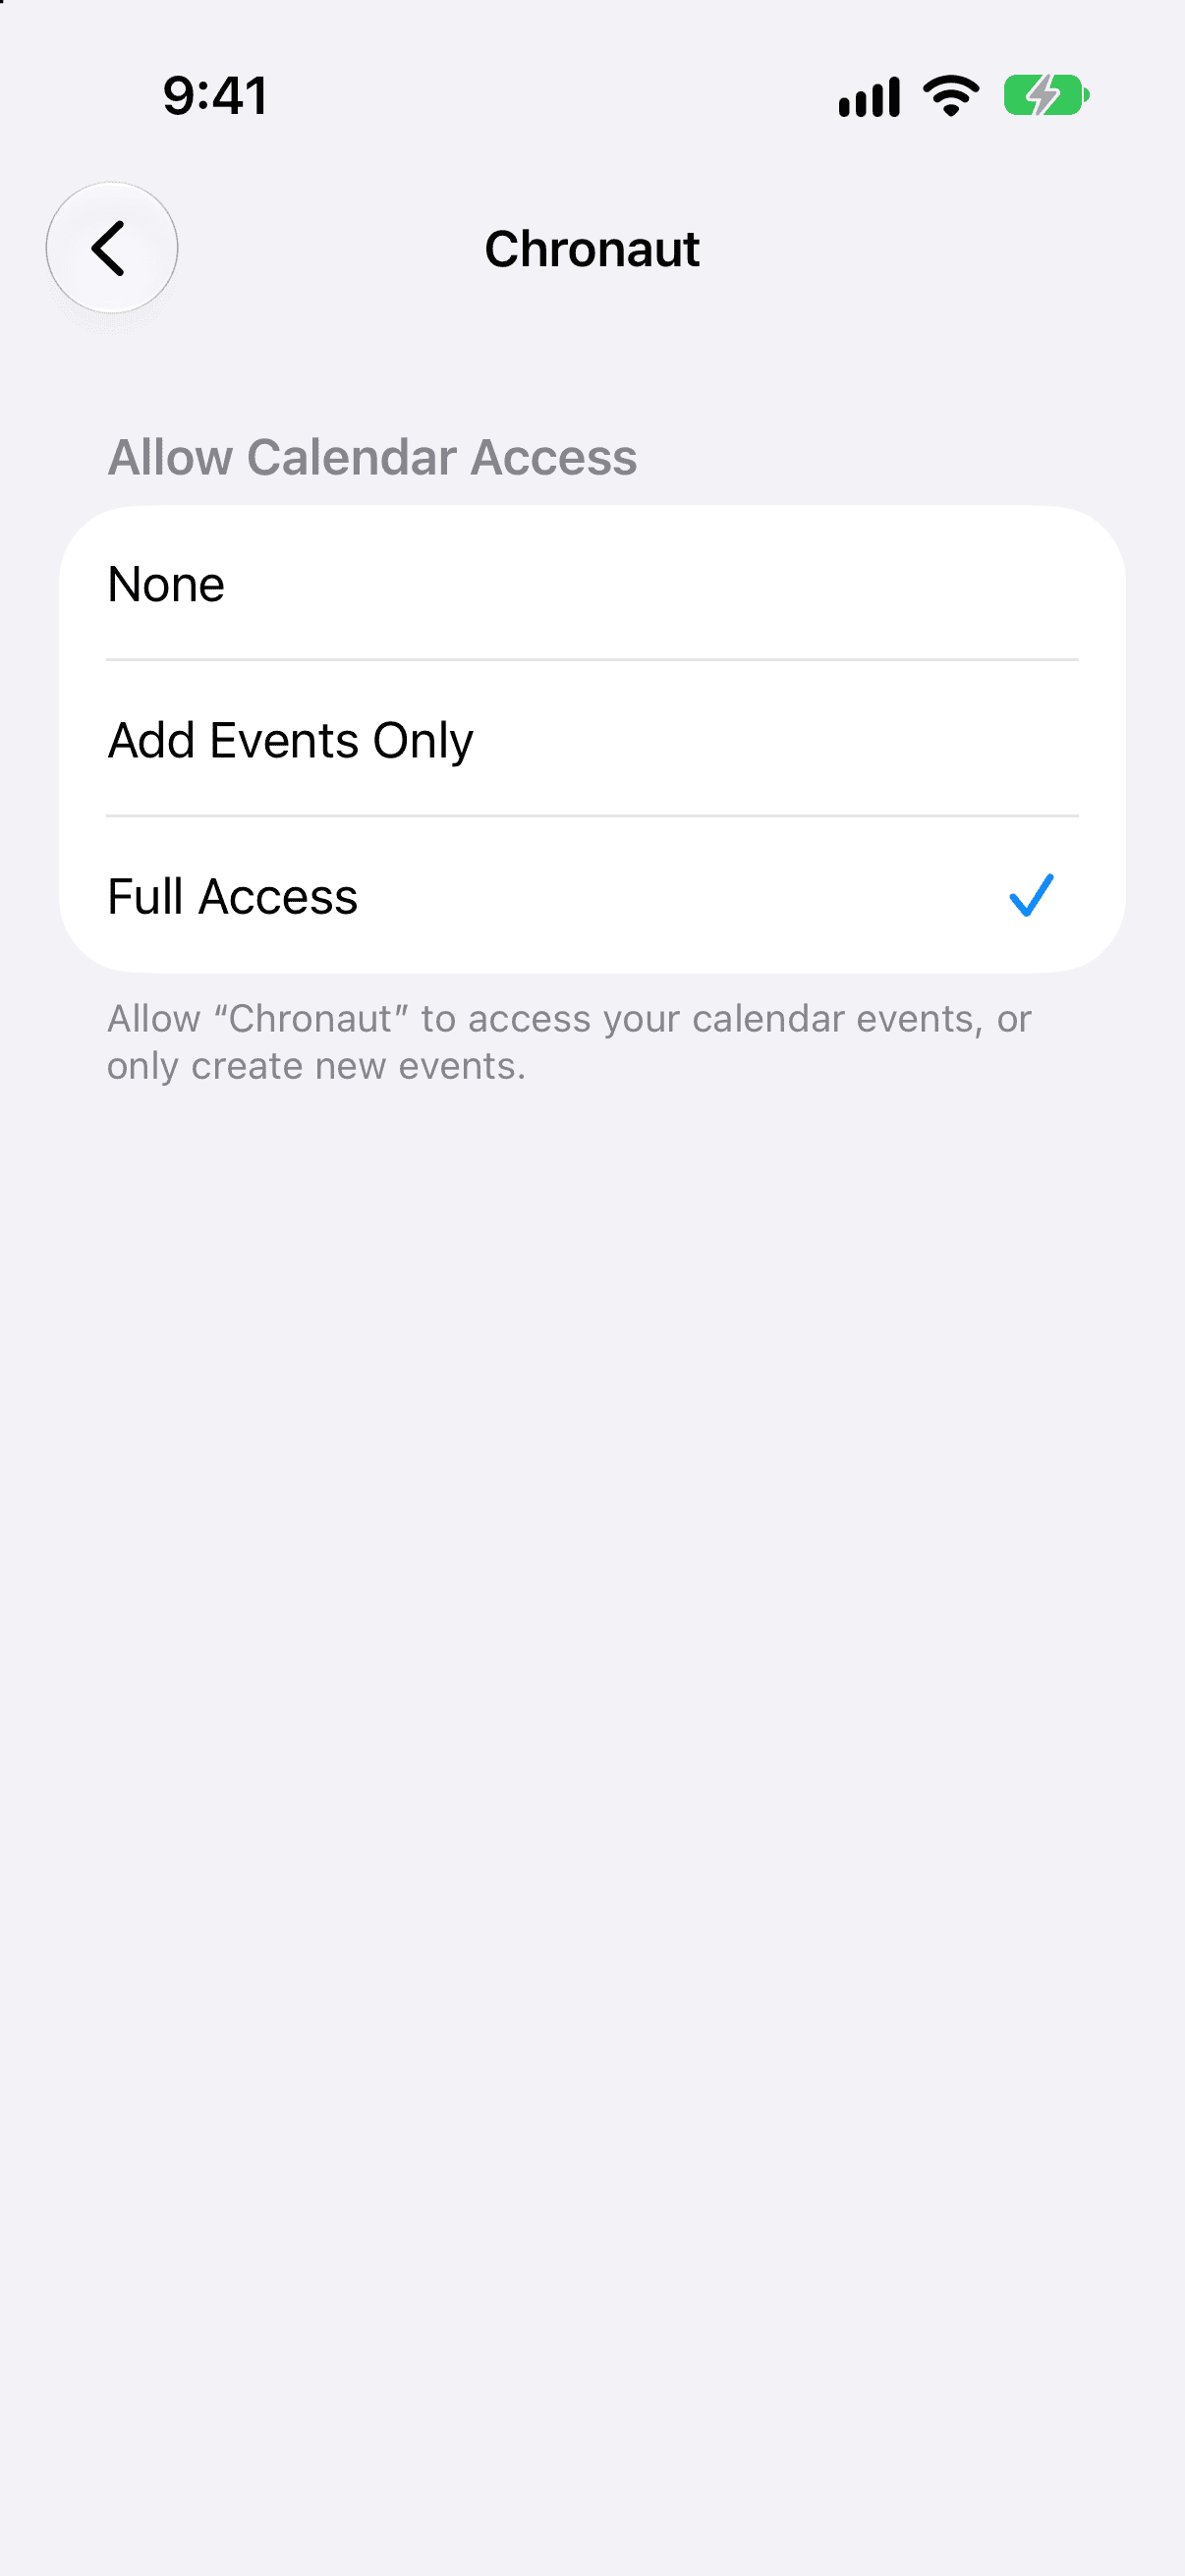
- Go to Privacy & Security › Calendars › Chronaut.
- Choose “Full Access”.
- Switch back to Chronaut. The backup starts the next time you open the app.
Mac
- In Chronaut, click “Open in System Settings” or “Allow access in Settings”. Or open System Settings yourself.
- Go to Privacy & Security › Calendars.
- Give Chronaut full access there.
- Switch back to Chronaut.
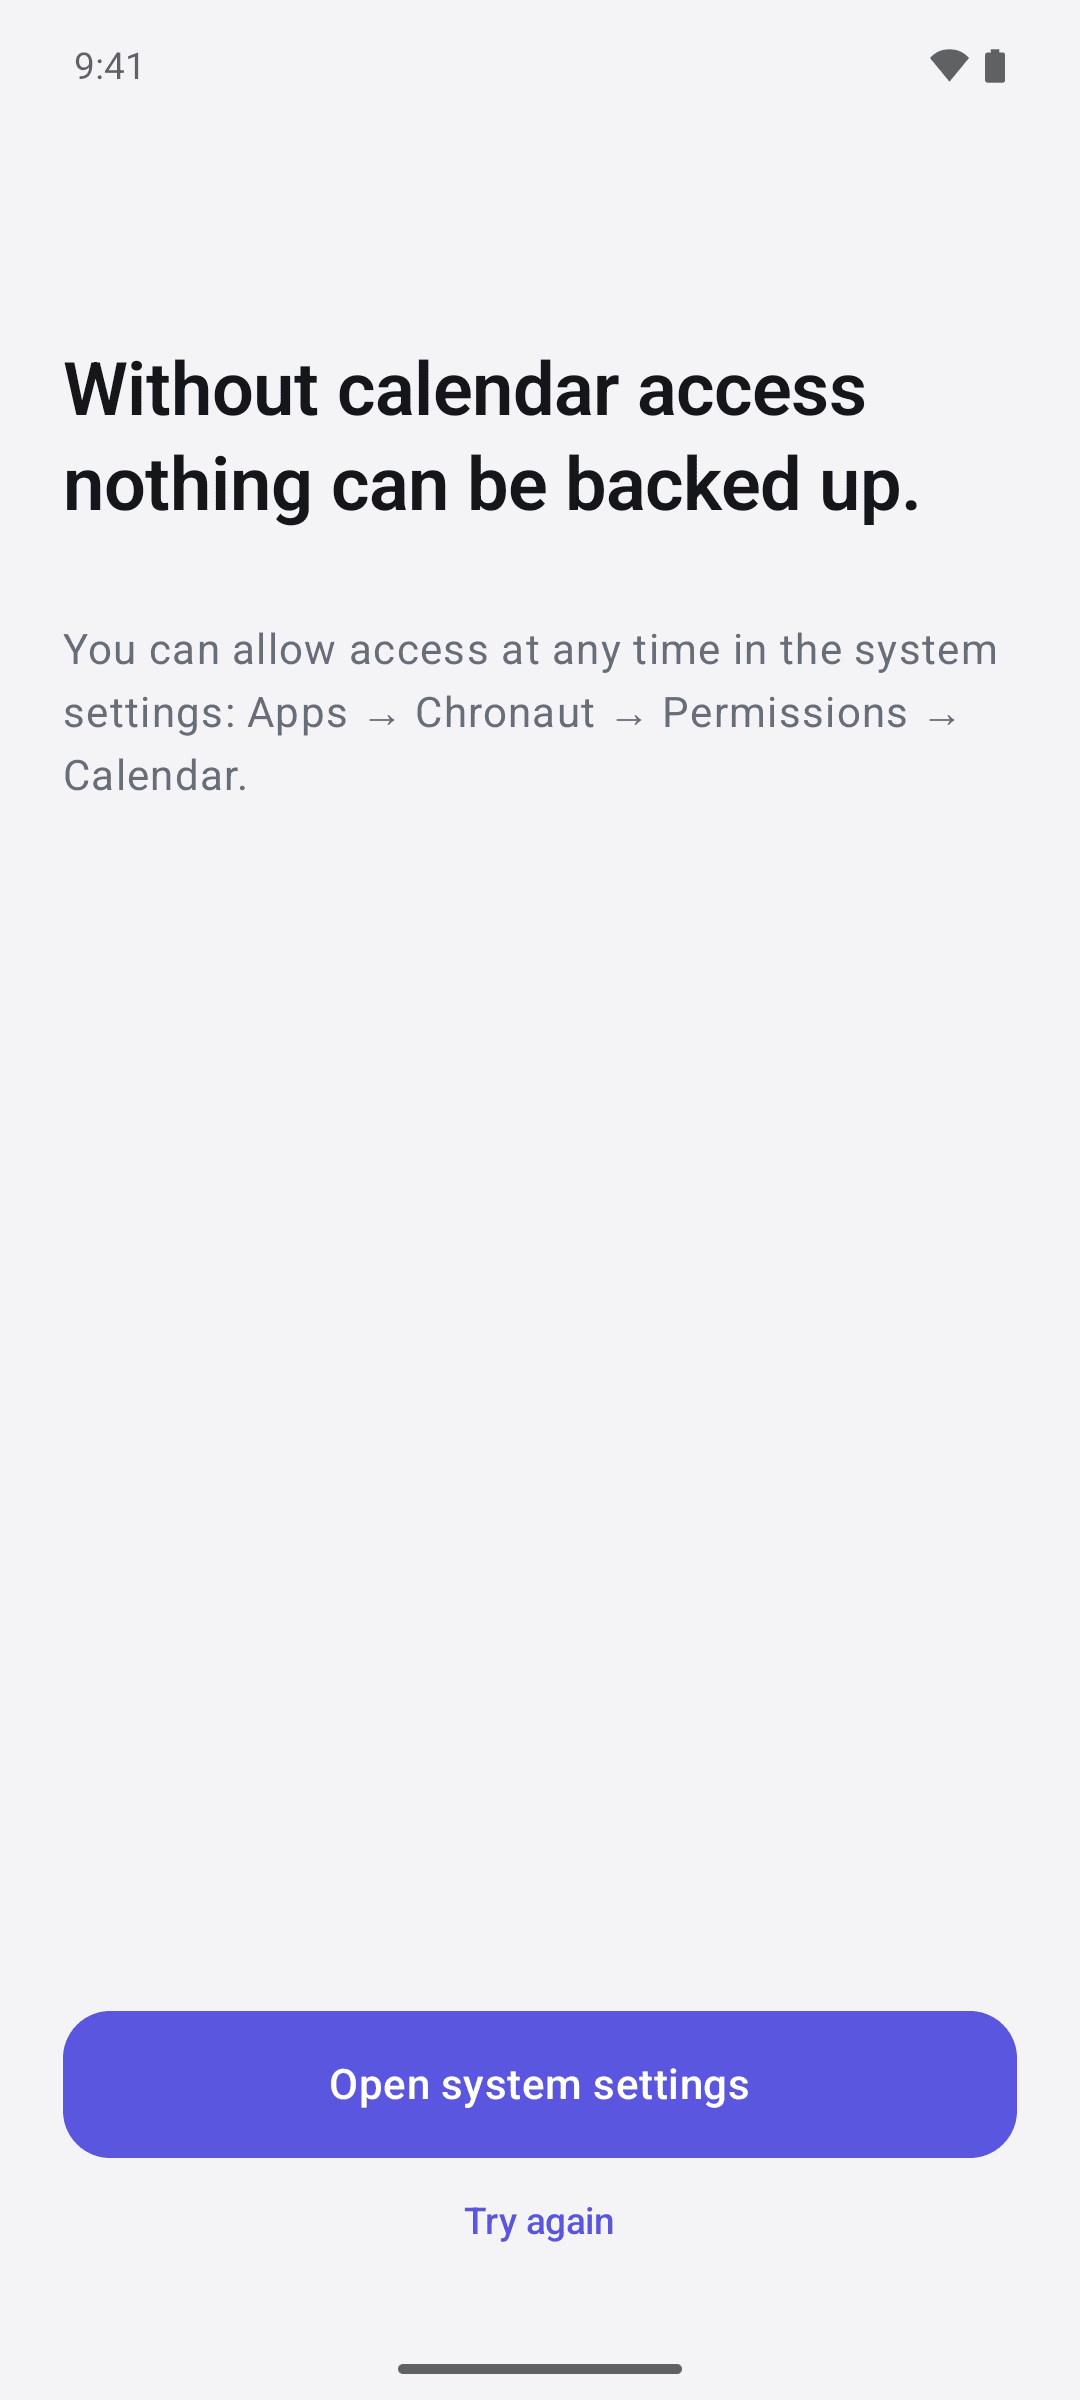
Without calendar access nothing can be backed up. Chronaut then shows “Without calendar access nothing can be backed up.” with the button “Open system settings”. As long as Android may still ask again, “Try again” appears below it as well. This is how you allow access afterwards:
- If “Try again” is shown, tap it and choose “Allow” in the prompt. That is all.
- Otherwise tap “Open system settings”. Android opens Chronaut’s app info. Or open Settings yourself and go to Settings › Apps › Chronaut.
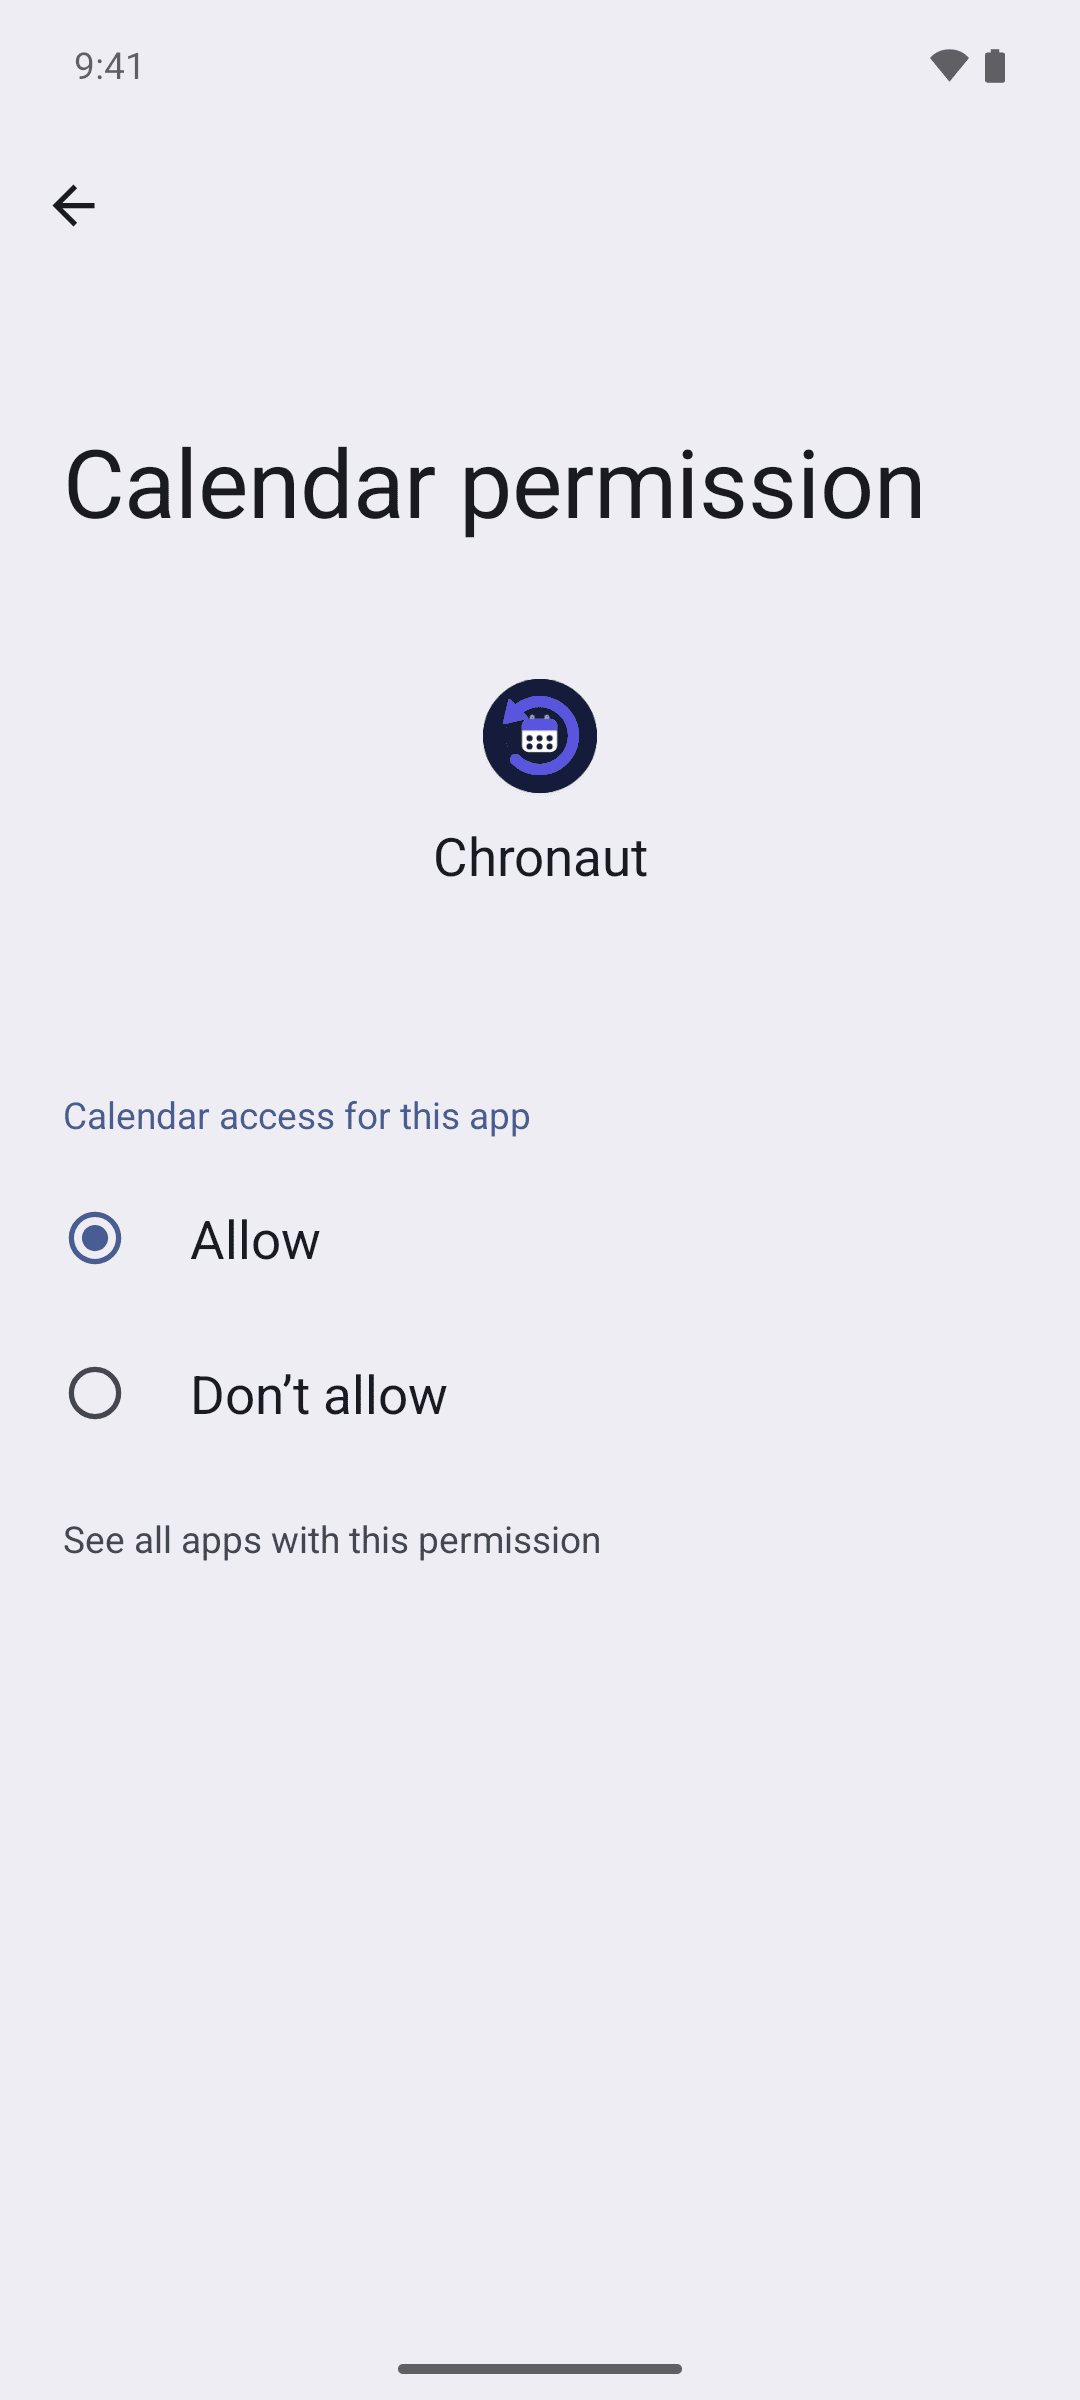
- Tap Permissions › Calendar.
- Choose “Allow”.
- Switch back to Chronaut. The app notices the access and starts the first backup.
If you declined the prompt twice, Android no longer asks by itself; then the only way is through Settings. These paths apply to Pixel phones and Android without a manufacturer skin. On other brands, names and order may differ.
The history already backed up is kept even while access is missing. Nothing new is added, that is all.
How Chronaut backs up
Chronaut records the state of your calendars in individual runs, called snapshots. A snapshot is taken:
- when you open the app,
- when a calendar changes while Chronaut is running,
- on iPhone and iPad also in the background, when the system allows it,
- when you tap “Back up now”,
- on iPhone and iPad, when an automation in Shortcuts runs the “Back up calendars now” action.
On iPhone and iPad, the system decides when an app may run in the background. Chronaut cannot force it. On the Mac, Chronaut backs up continuously while the app is running.
- when you open the app,
- in the background shortly after a calendar has changed,
- regularly in the background, about every 15 minutes, as far as Android allows,
- when you tap “Back up now” – in the “Status” tab, in Settings or through the app shortcut.
For background backups, Chronaut uses Android’s task scheduler. Android decides when they actually run. Battery-saving features can delay them (see Battery and background).
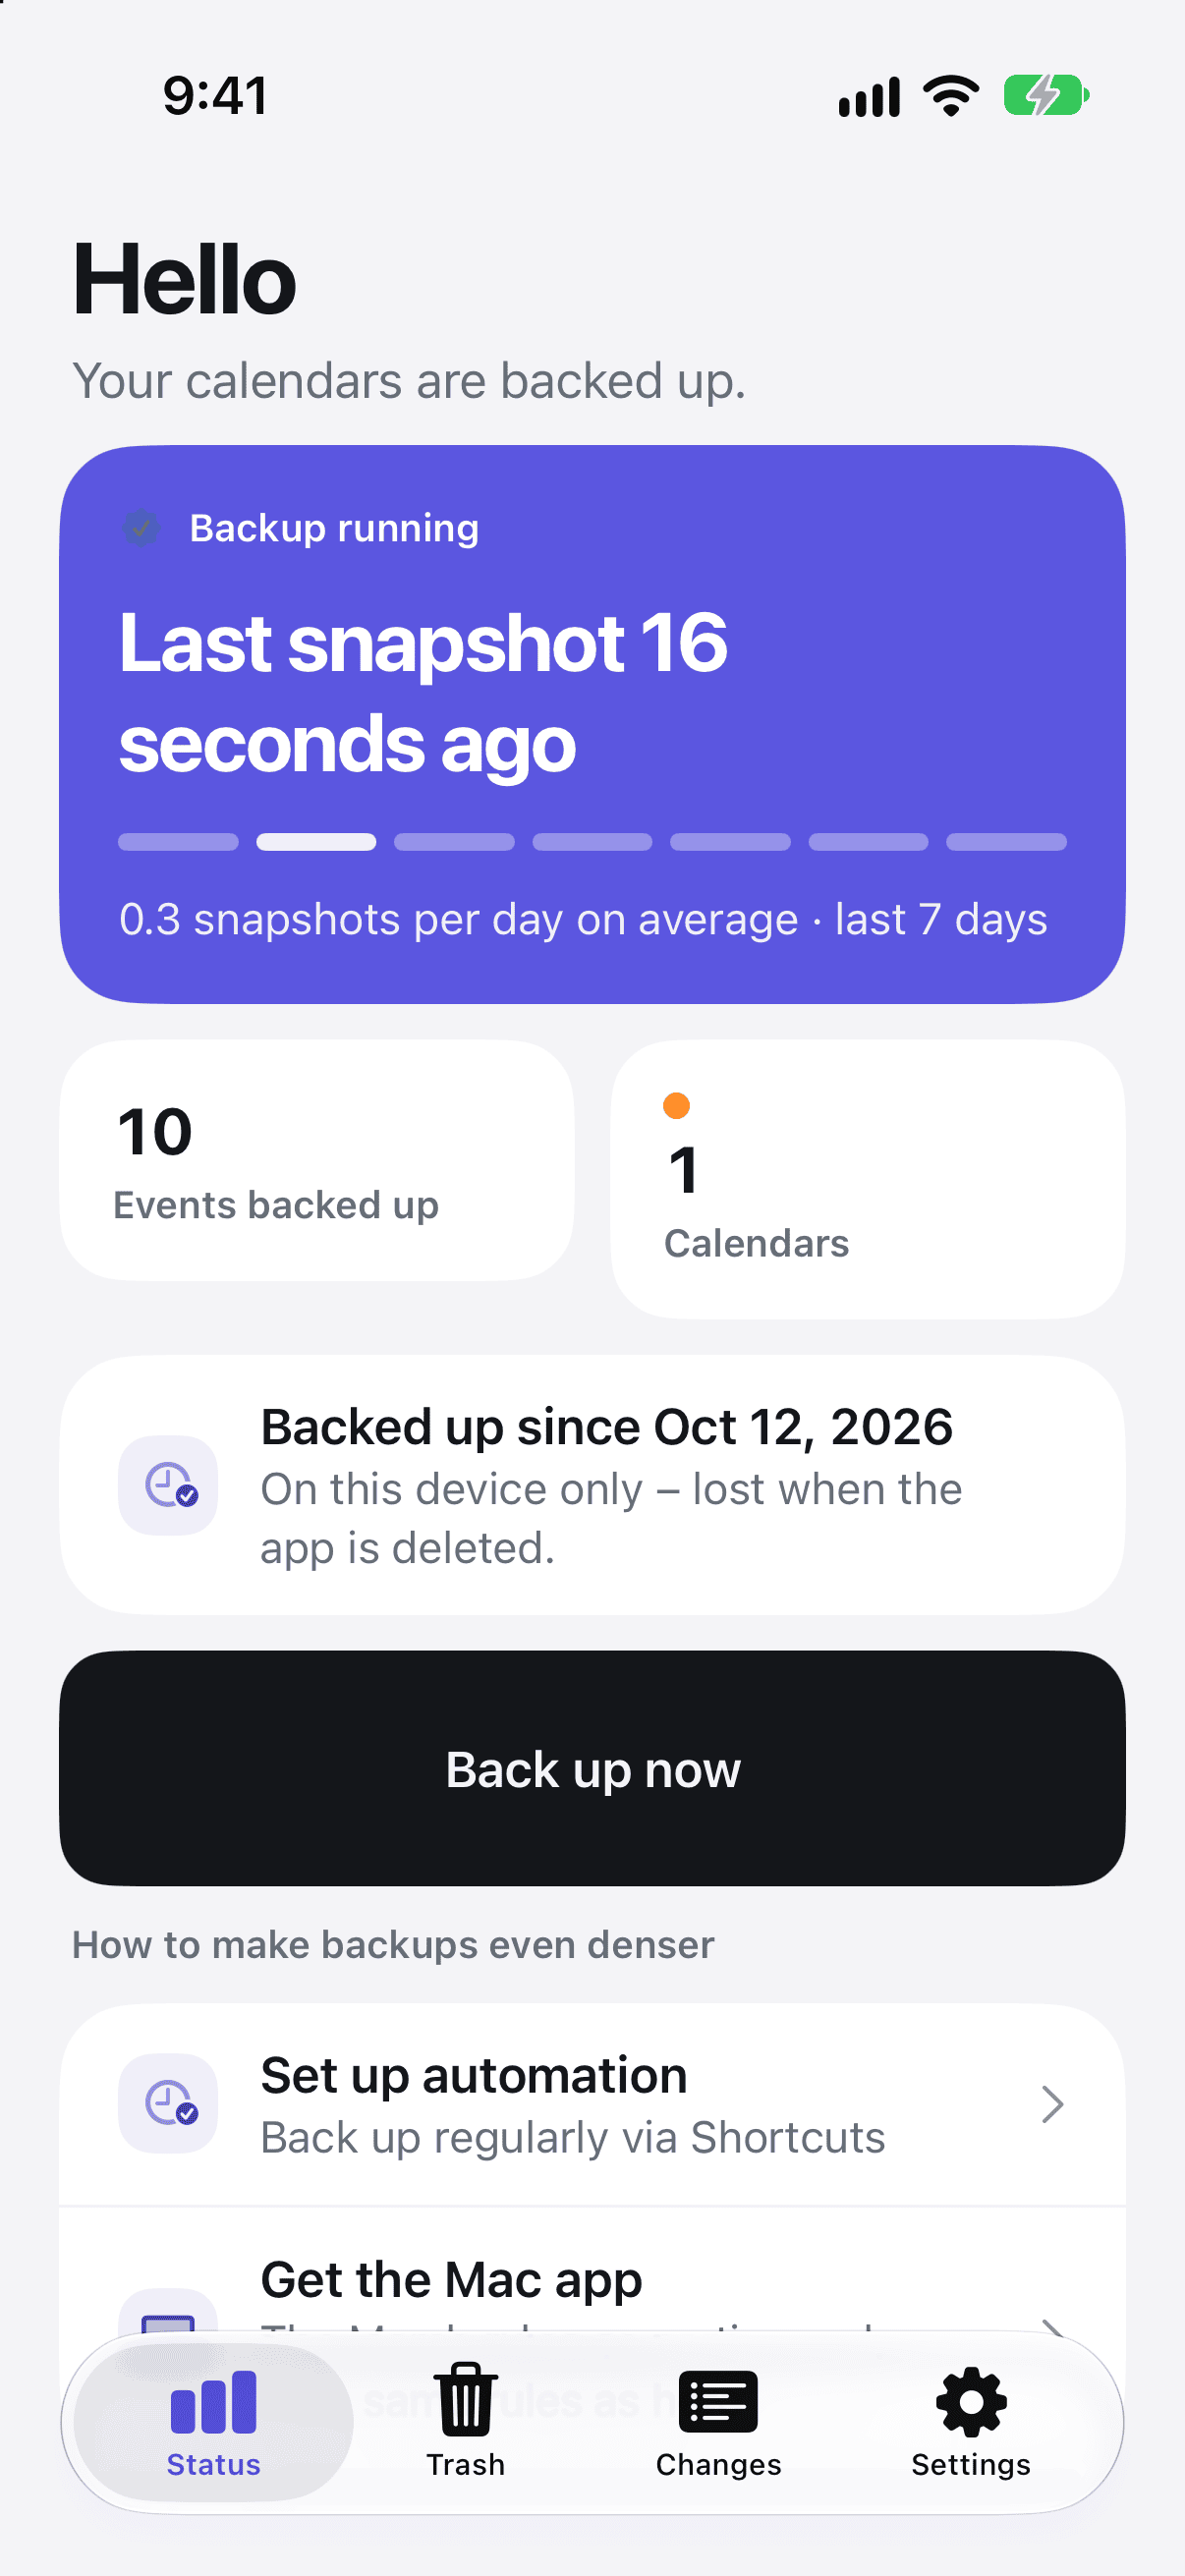
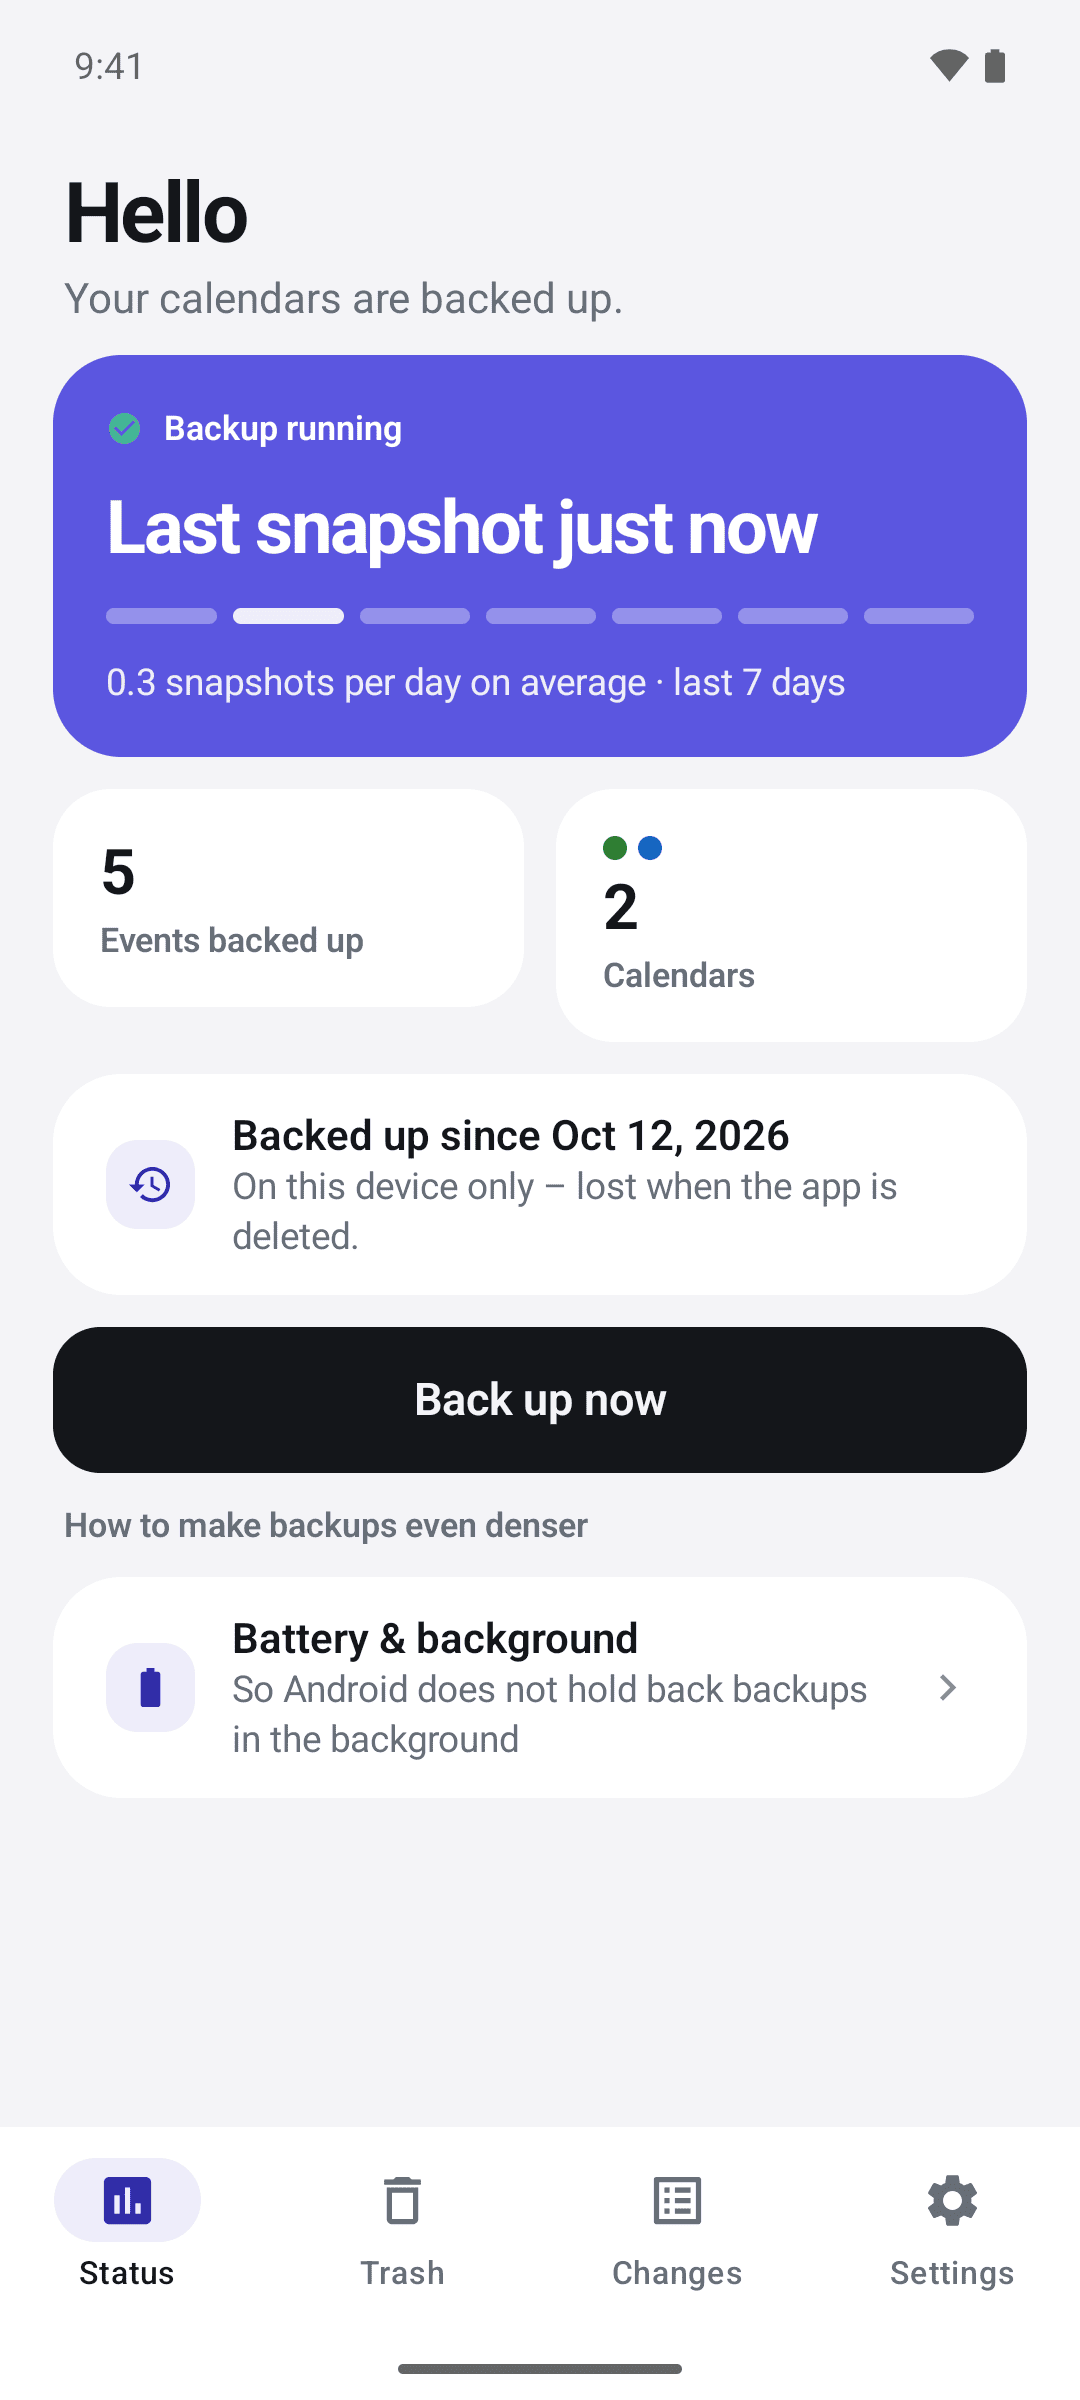
The “Status” tab shows how dense the backups are: the bars show the last seven days, with “… snapshots per day on average · last 7 days” below. In Settings under “Backup” you see “Coverage is good” or “Coverage is thin”, the latter with tips.
Daily backup via Shortcuts (iPhone and iPad)
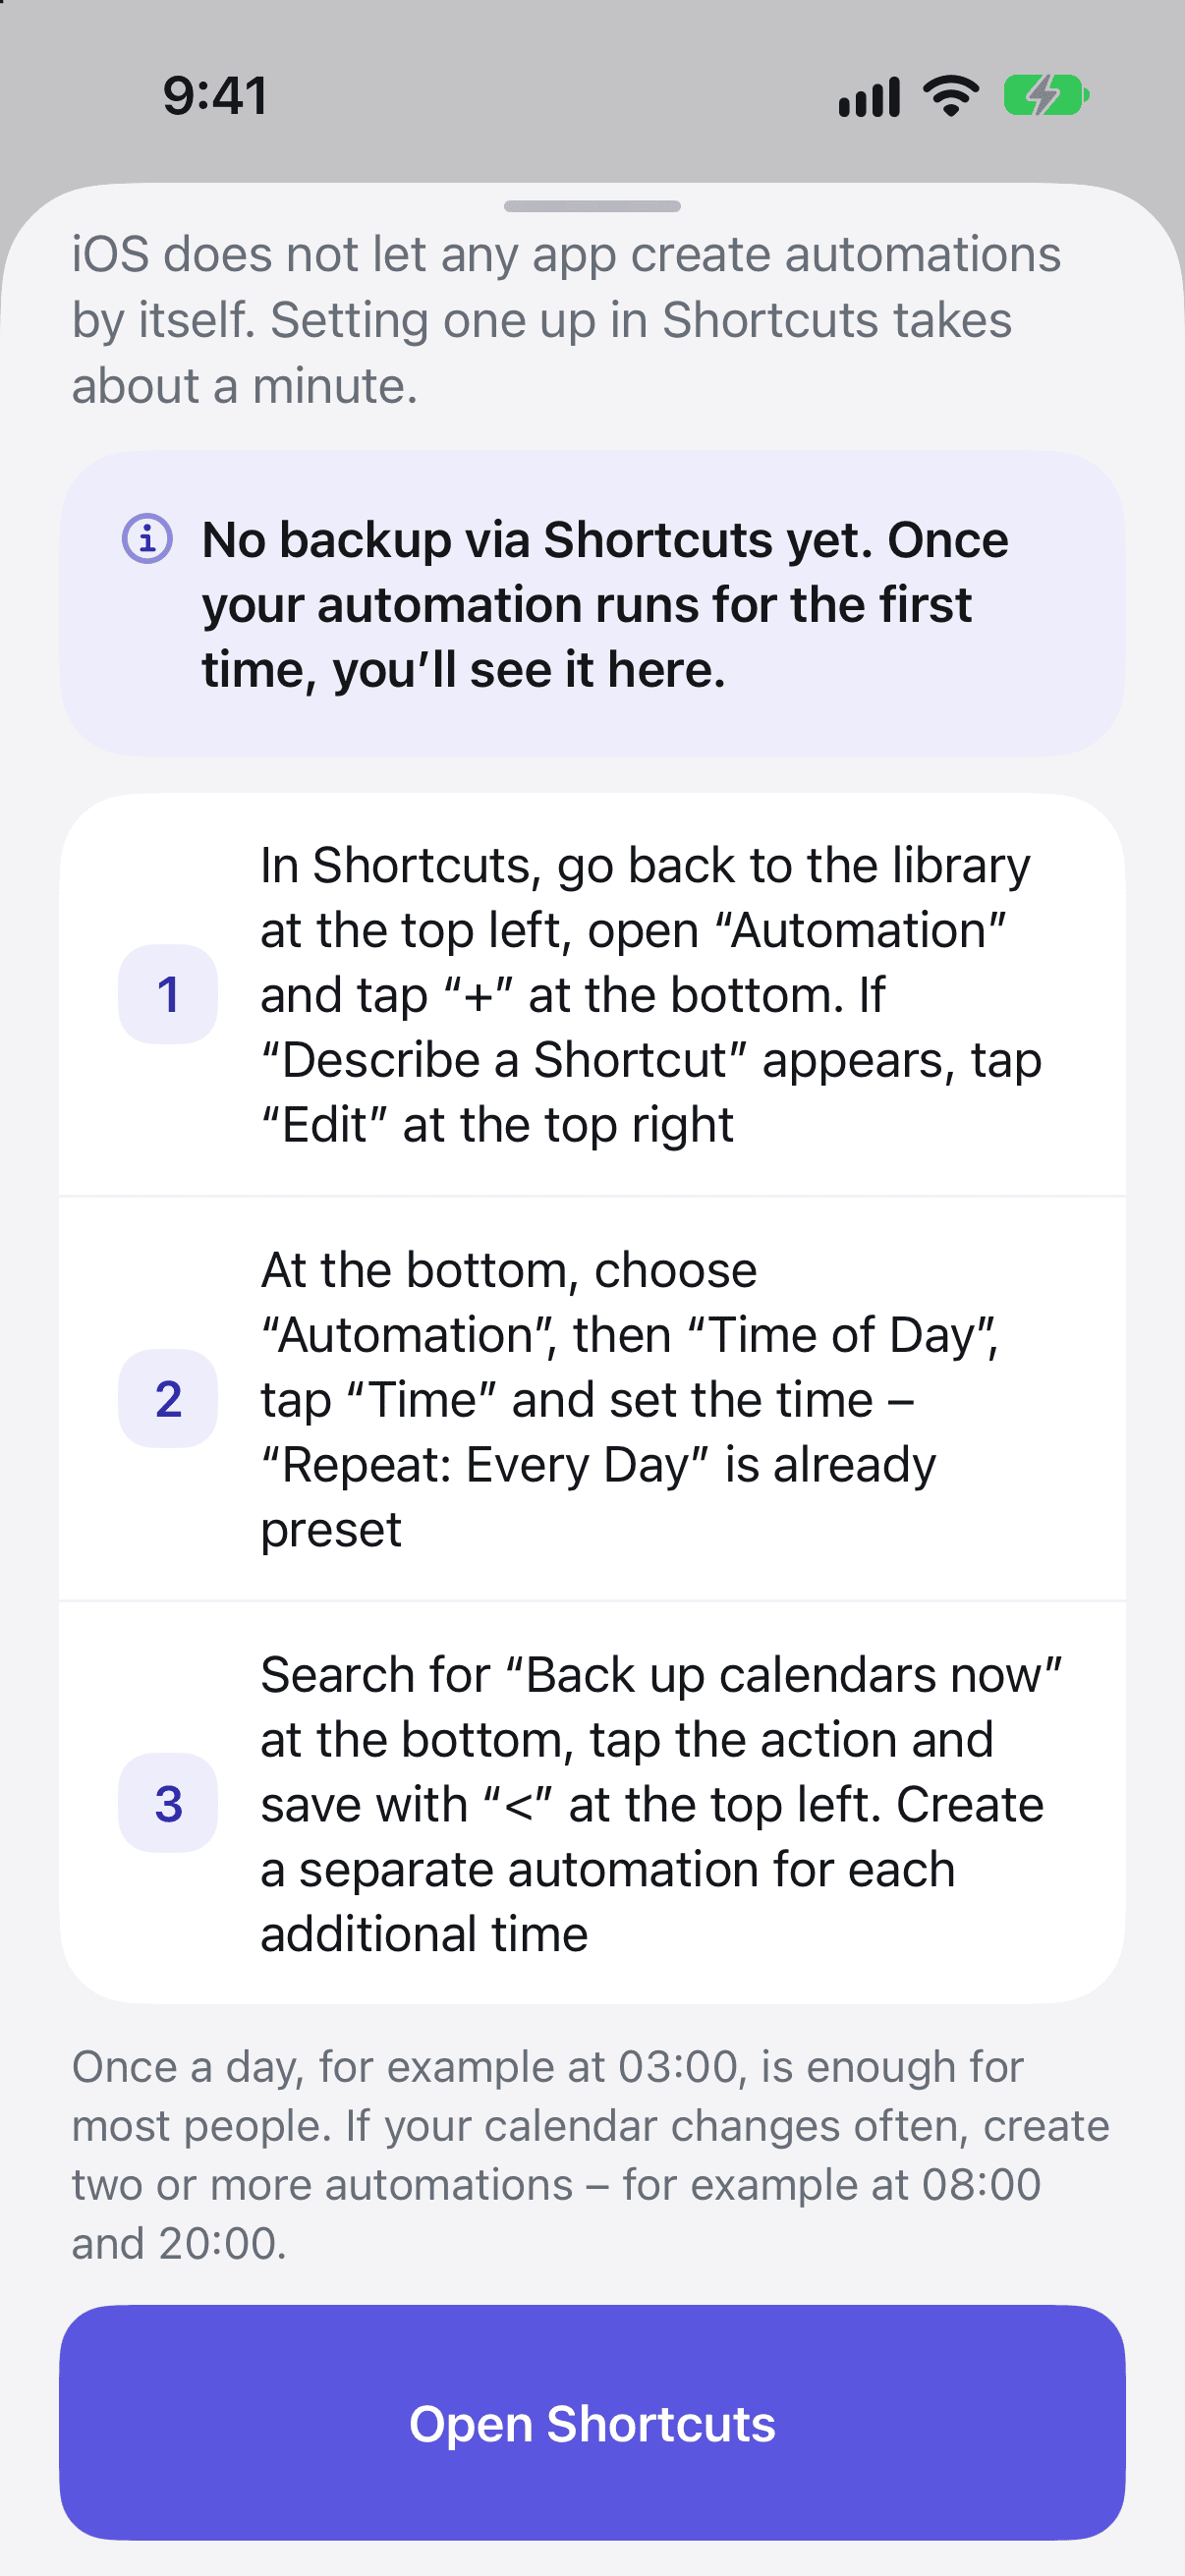
With an automation in the Shortcuts app, backups run at fixed times. iOS does not let any app create automations by itself. So Chronaut explains the setup:
- In the “Status” tab, under “How to make backups even denser”, tap “Set up automation”. When coverage is thin, you also find it in Settings.
- Tap “Open Shortcuts”.
The steps in Shortcuts depend on your iOS version. You can find it under Settings › General › About. Chronaut shows the matching steps automatically.
iOS 27 and later
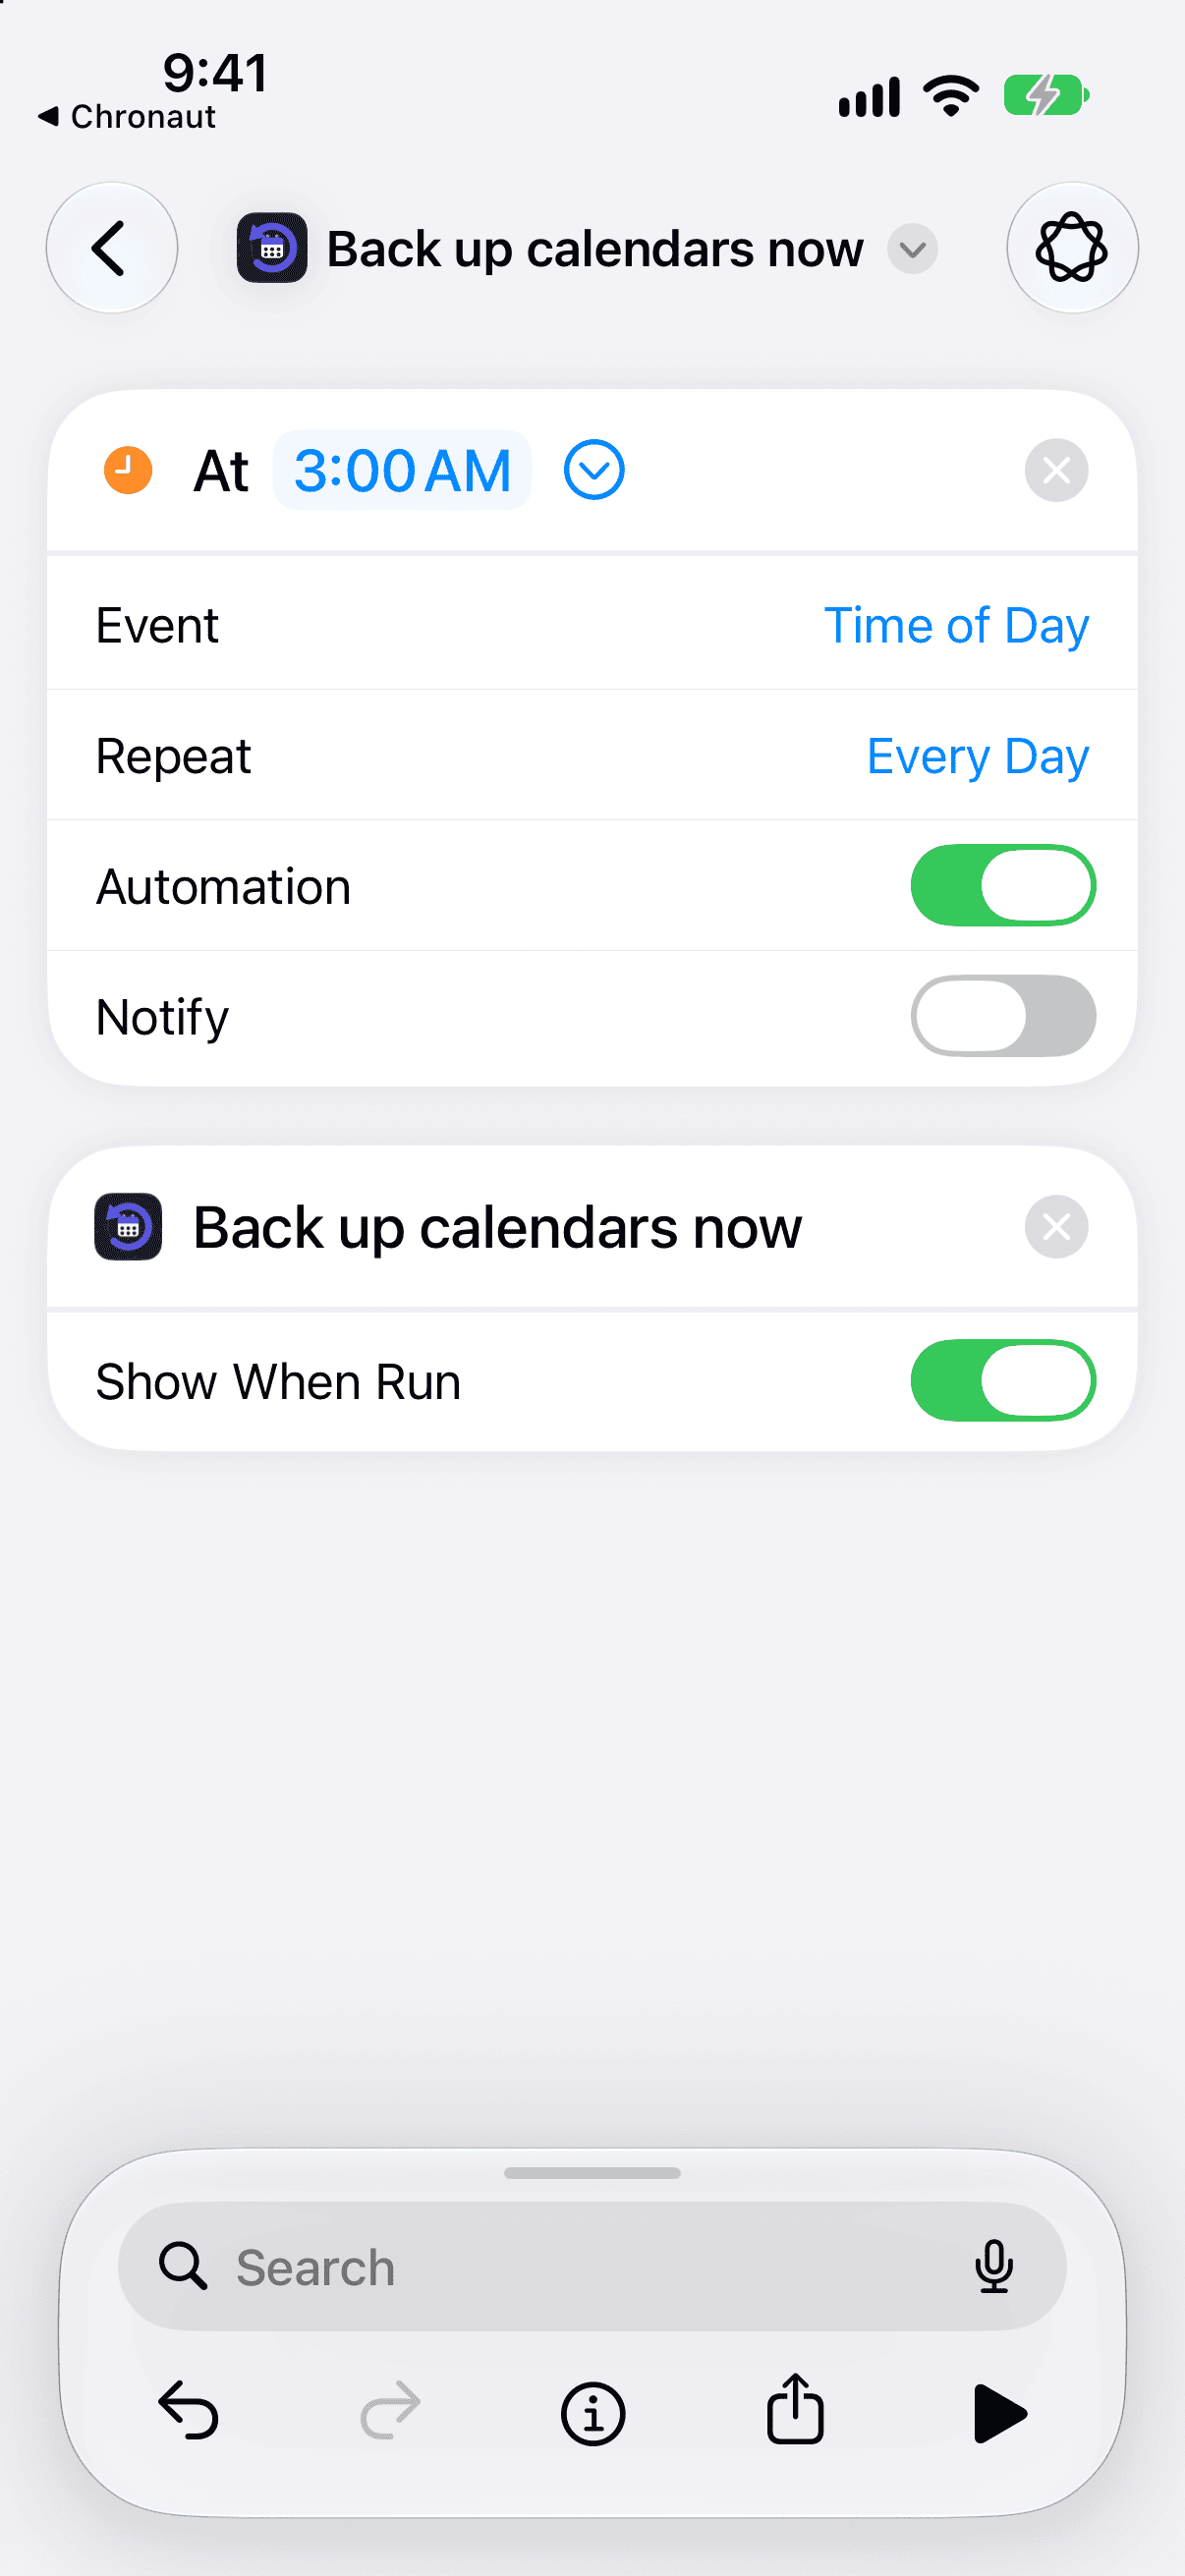
- Go back to the library at the top left, open “Automation” and tap “+” at the bottom. If “Describe a Shortcut” appears, tap “Edit” at the top right.
- At the bottom, choose “Automation”, then “Time of Day”, tap “Time” and set the time. “Repeat: Every Day” is already preset and the “Automation” switch is on.
- Search for “Back up calendars now” at the bottom, tap the action and save with “<” at the top left.
iOS 17 to iOS 26
- Tap “Automation” at the bottom, then “New Automation”. If you already have an automation, tap “+” at the top right.
- Choose “Time of Day” and set the time. “Daily” is preselected. Below it, choose “Run Immediately” – otherwise iOS asks every time. Then tap “Next”.
- In the list, tap “Chronaut”, then “Back up now”. This saves the automation.
Once a day, for example at 03:00, is enough for most people. If your calendar changes often, create two or more automations – for example at 08:00 and 20:00, one for each time. As soon as the automation has run, Chronaut shows “Shortcut last ran: …”.
Battery and background
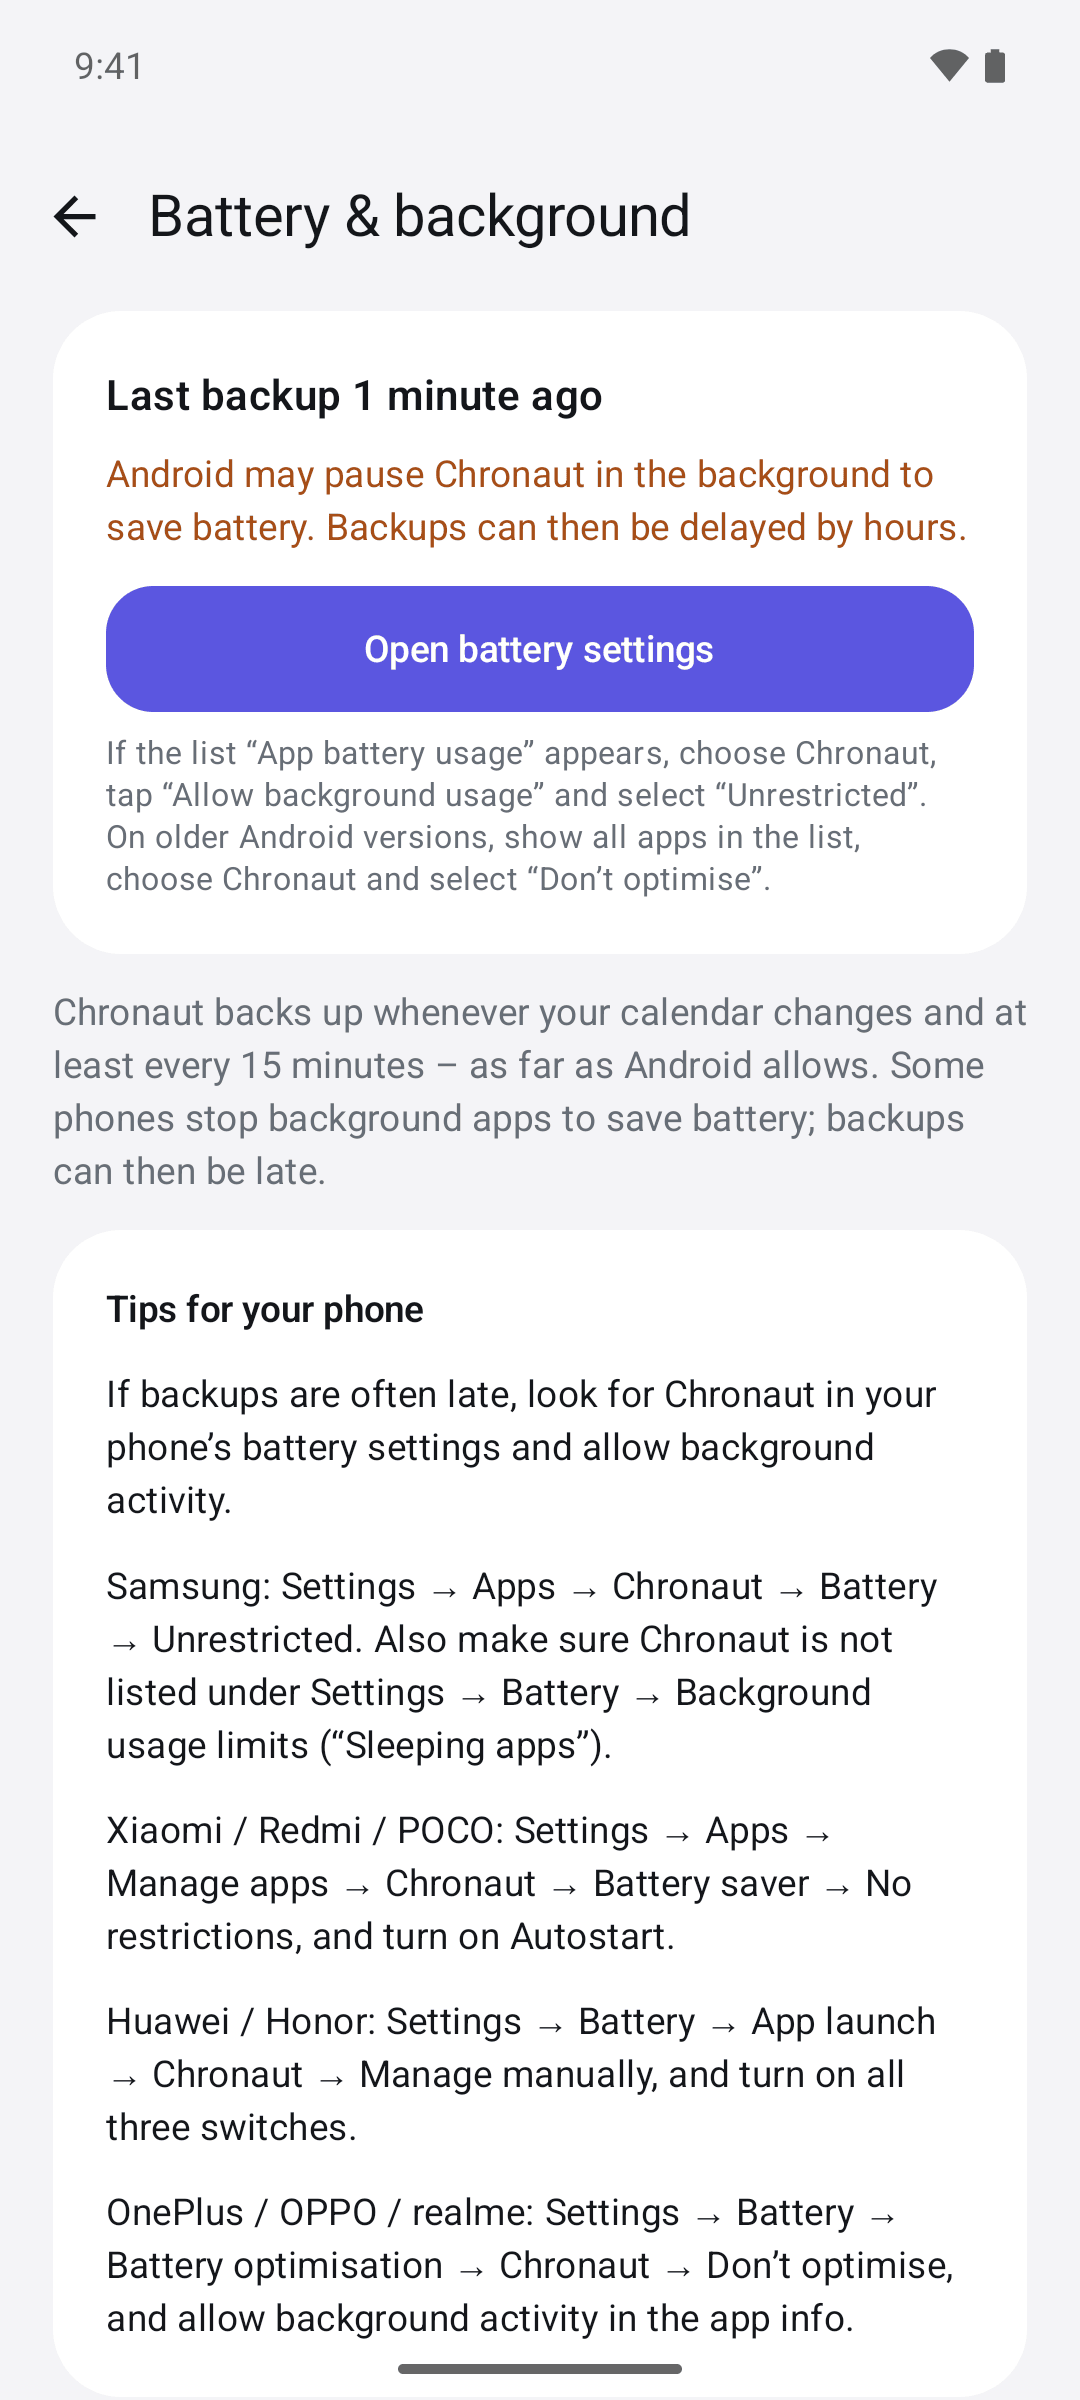
Some phones stop apps in the background to save battery. Backups then arrive late, in the worst case by hours. Chronaut shows you whether this applies to you and takes you to the right setting:
- In the “Status” tab, under “How to make backups even denser”, tap “Battery & background”. You also find it under Settings › Backup › Battery & background.
- At the top you see whether everything is fine (“Battery optimisation is off for Chronaut. …”) or whether Android may pause Chronaut in the background.
- In the second case, tap “Open battery settings”. On Pixel phones with current Android, the list “App battery usage” appears: choose Chronaut, tap “Allow background usage” and select “Unrestricted”. On older Android versions, show all apps in the list, choose Chronaut and select “Don’t optimise”.
- Switch back to Chronaut. The notice now shows that battery optimisation is off.
Under “Tips for your phone”, Chronaut also lists the way for Samsung, Xiaomi, Huawei and Honor as well as OnePlus, OPPO and realme. If the last backup was more than a day ago, the “Status” tab shows “The last backup was more than a day ago” with “Check battery settings”.
App shortcuts
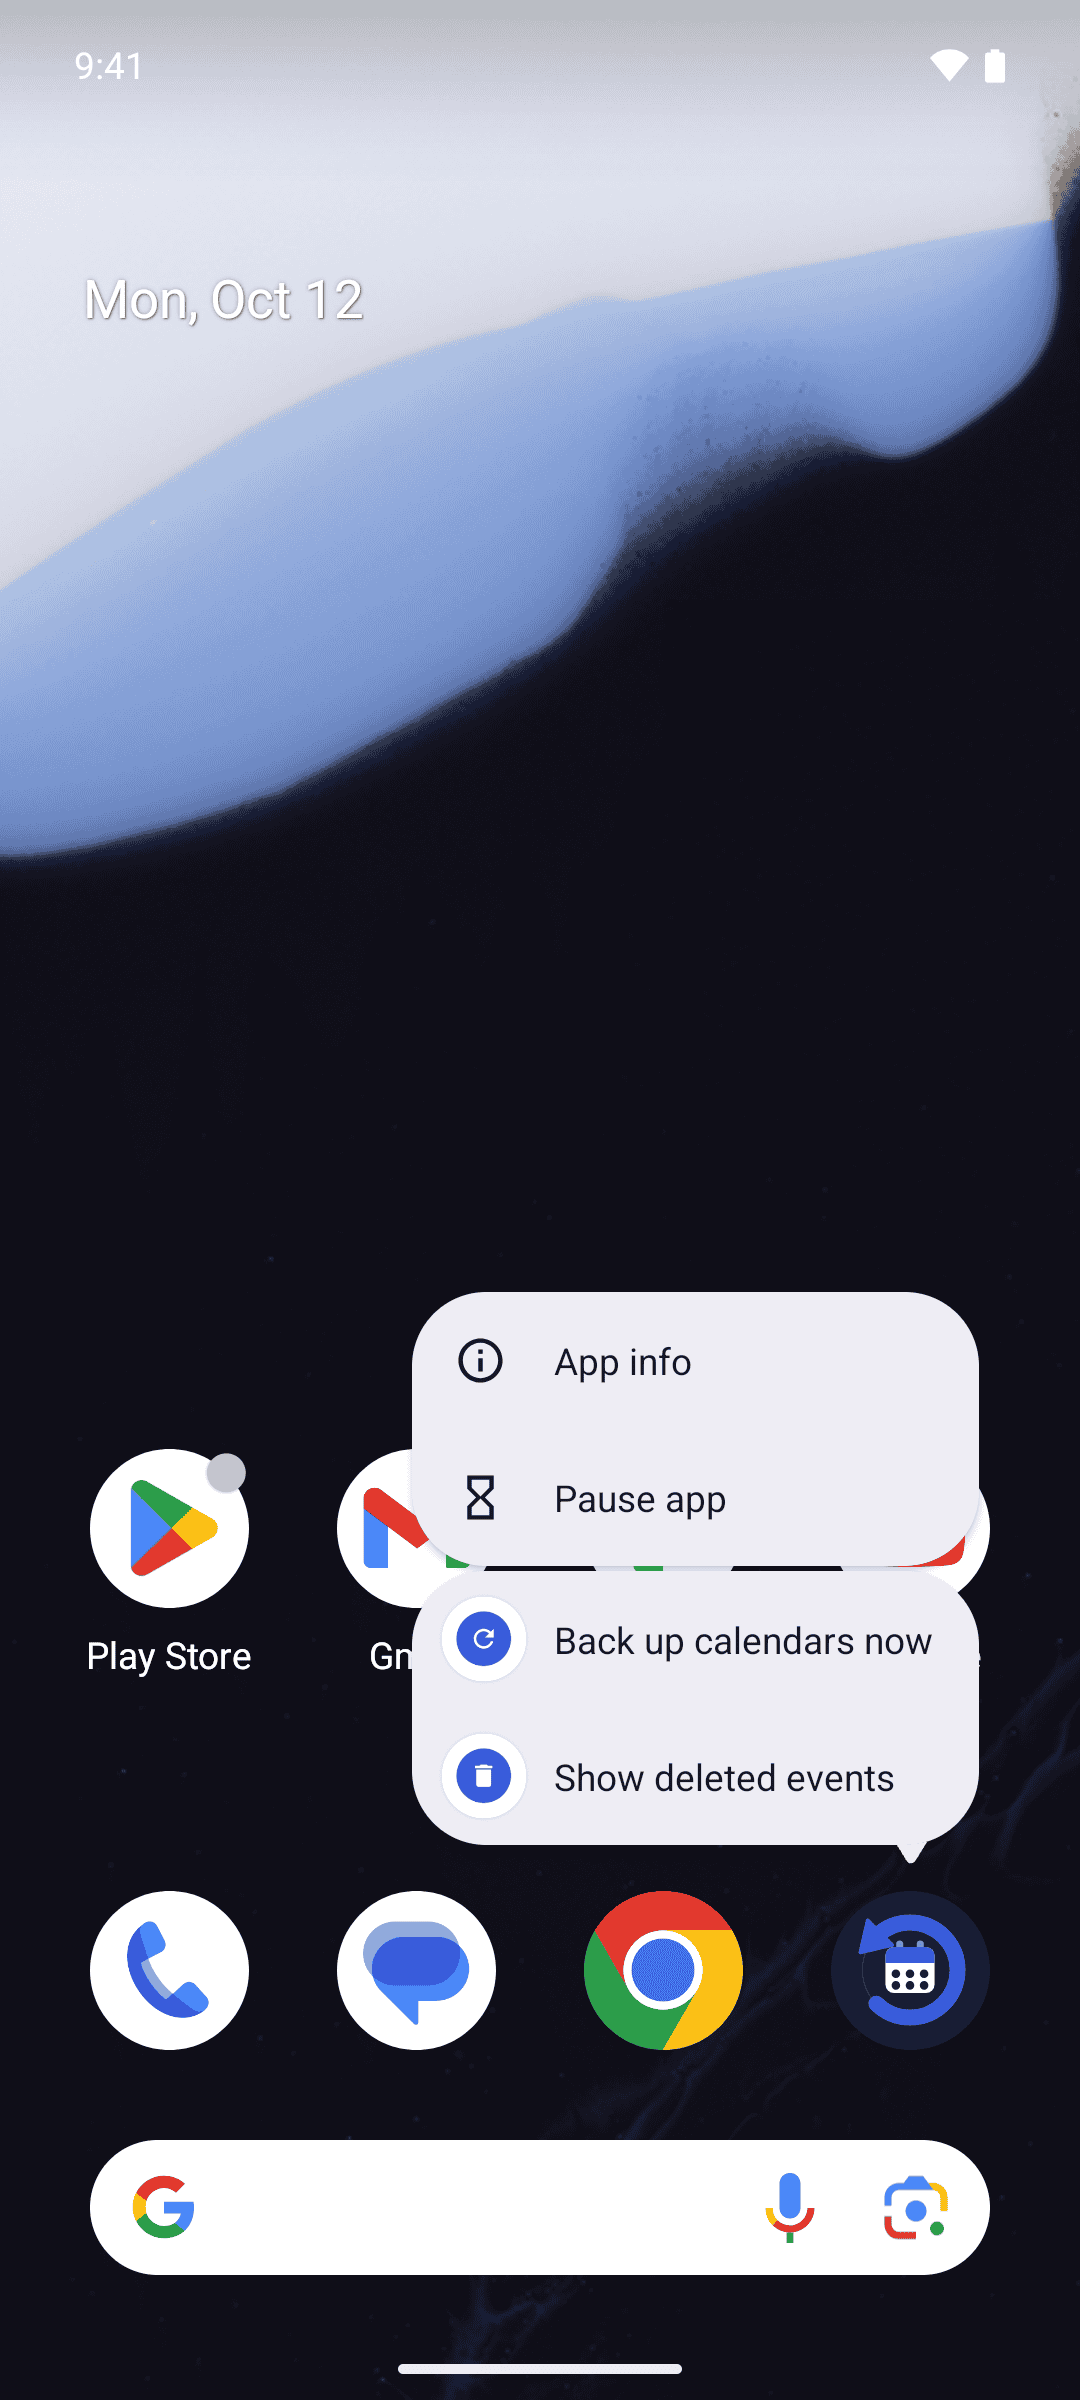
On the home screen, press and hold the Chronaut icon. The menu offers two shortcuts:
- “Back up now” opens Chronaut and starts a backup right away.
- “Trash” opens Chronaut straight in the trash.
Understanding the overview
On the iPhone, Chronaut has four tabs at the bottom: “Status”, “Trash”, “Changes” and “Settings”. On iPad and Mac, the same items sit in the sidebar.
Chronaut has four tabs at the bottom: “Status”, “Trash”, “Changes” and “Settings”.
Trash: deleted events
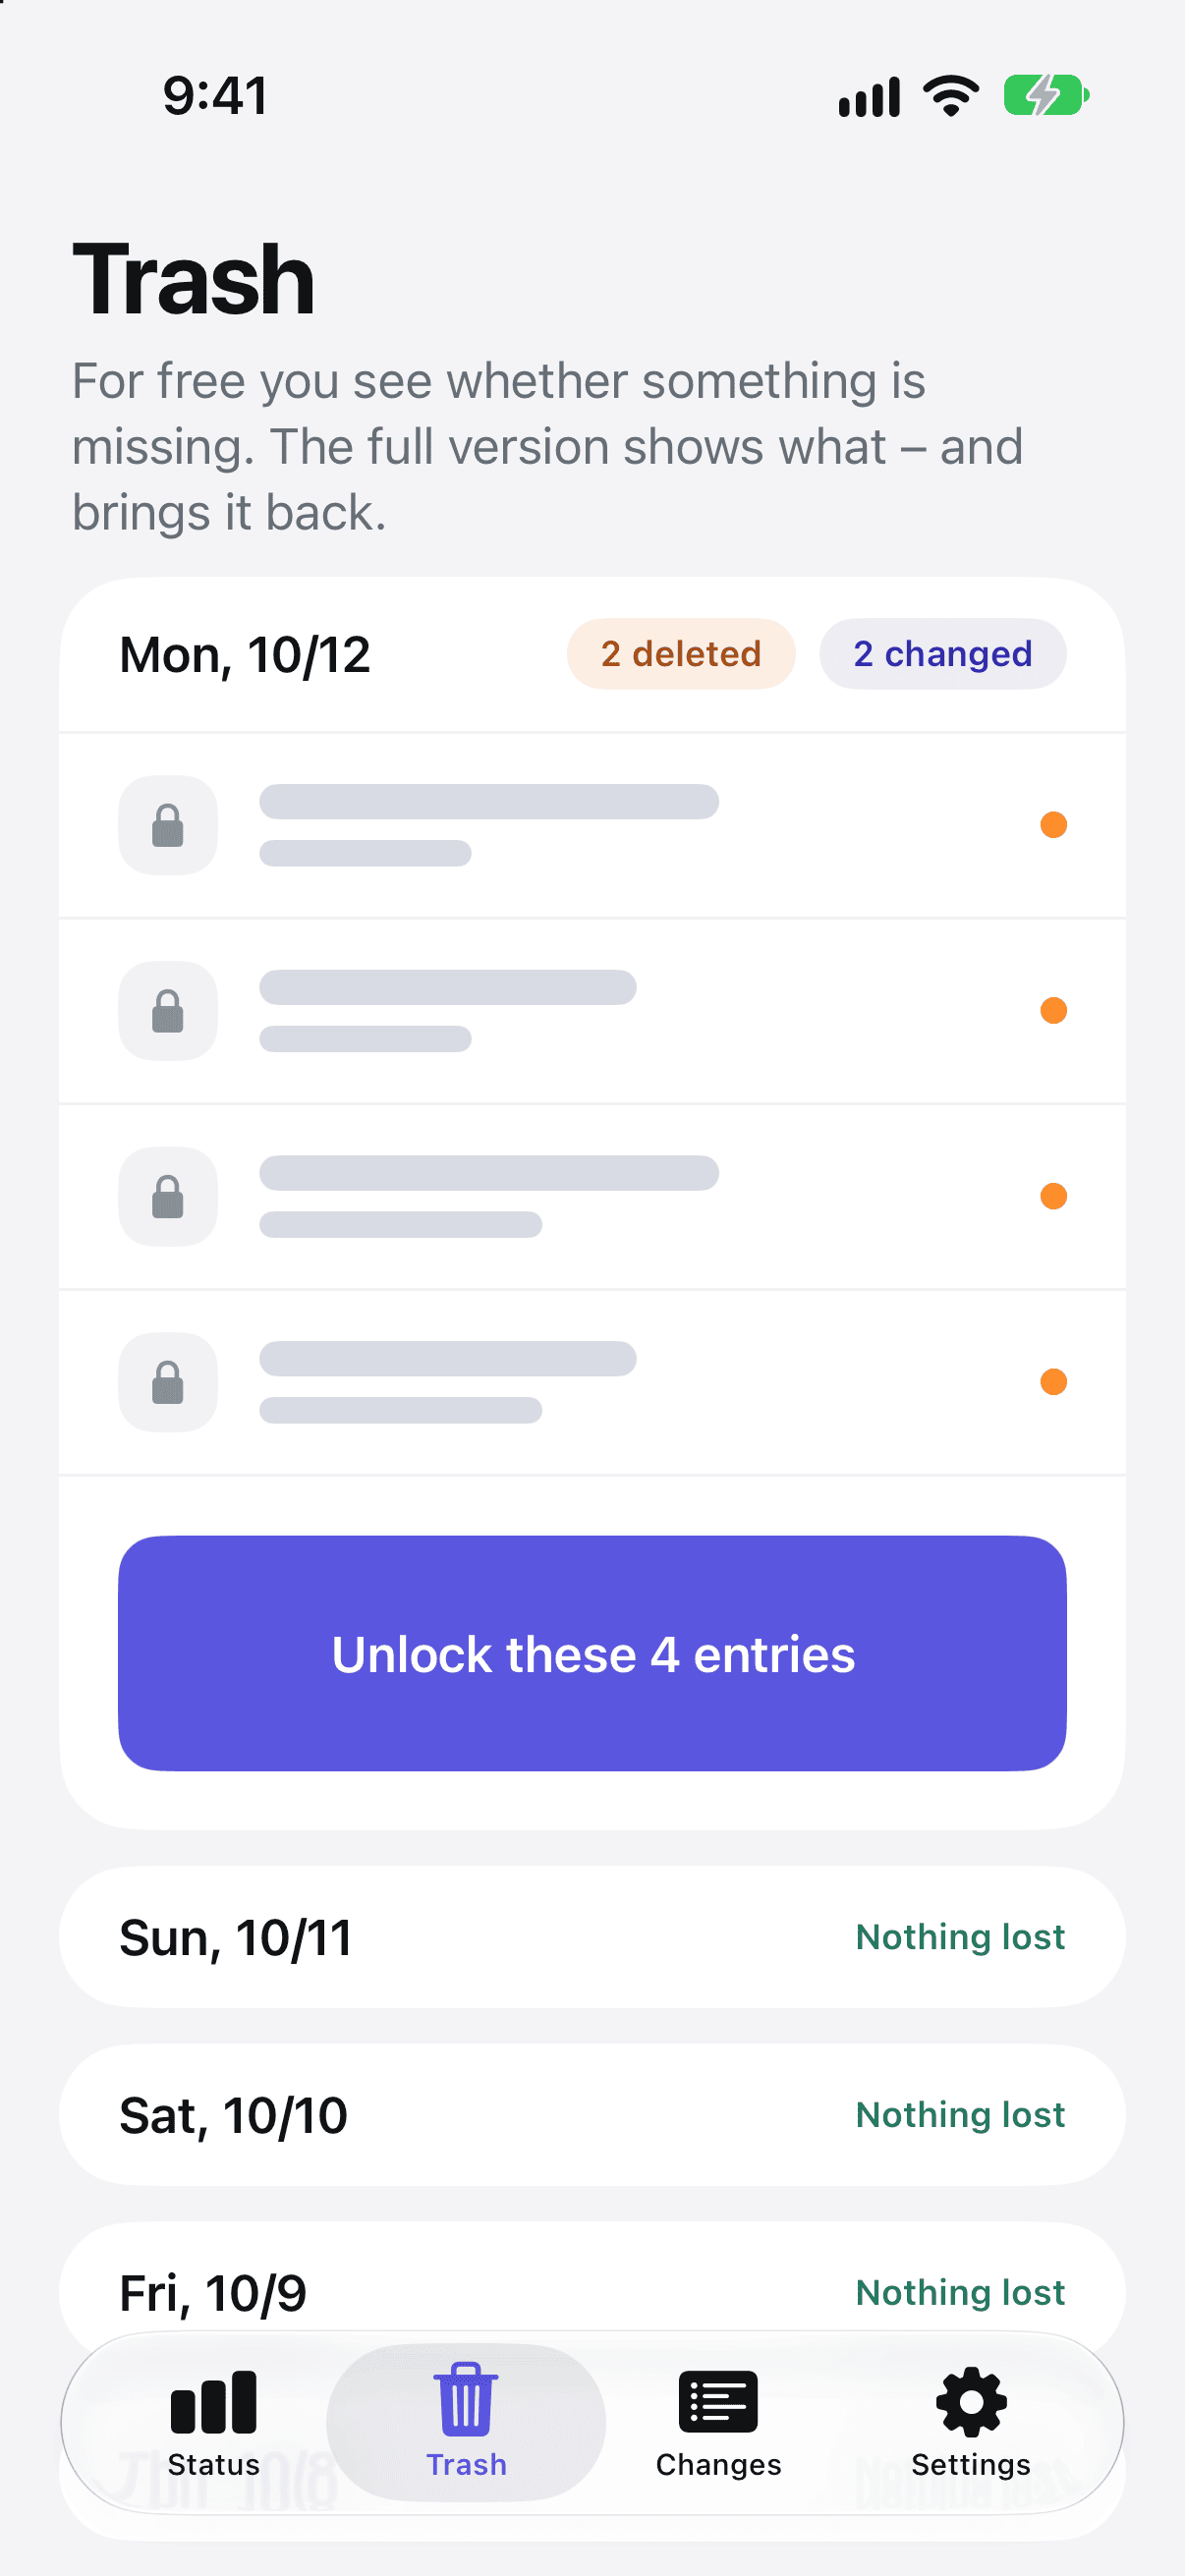
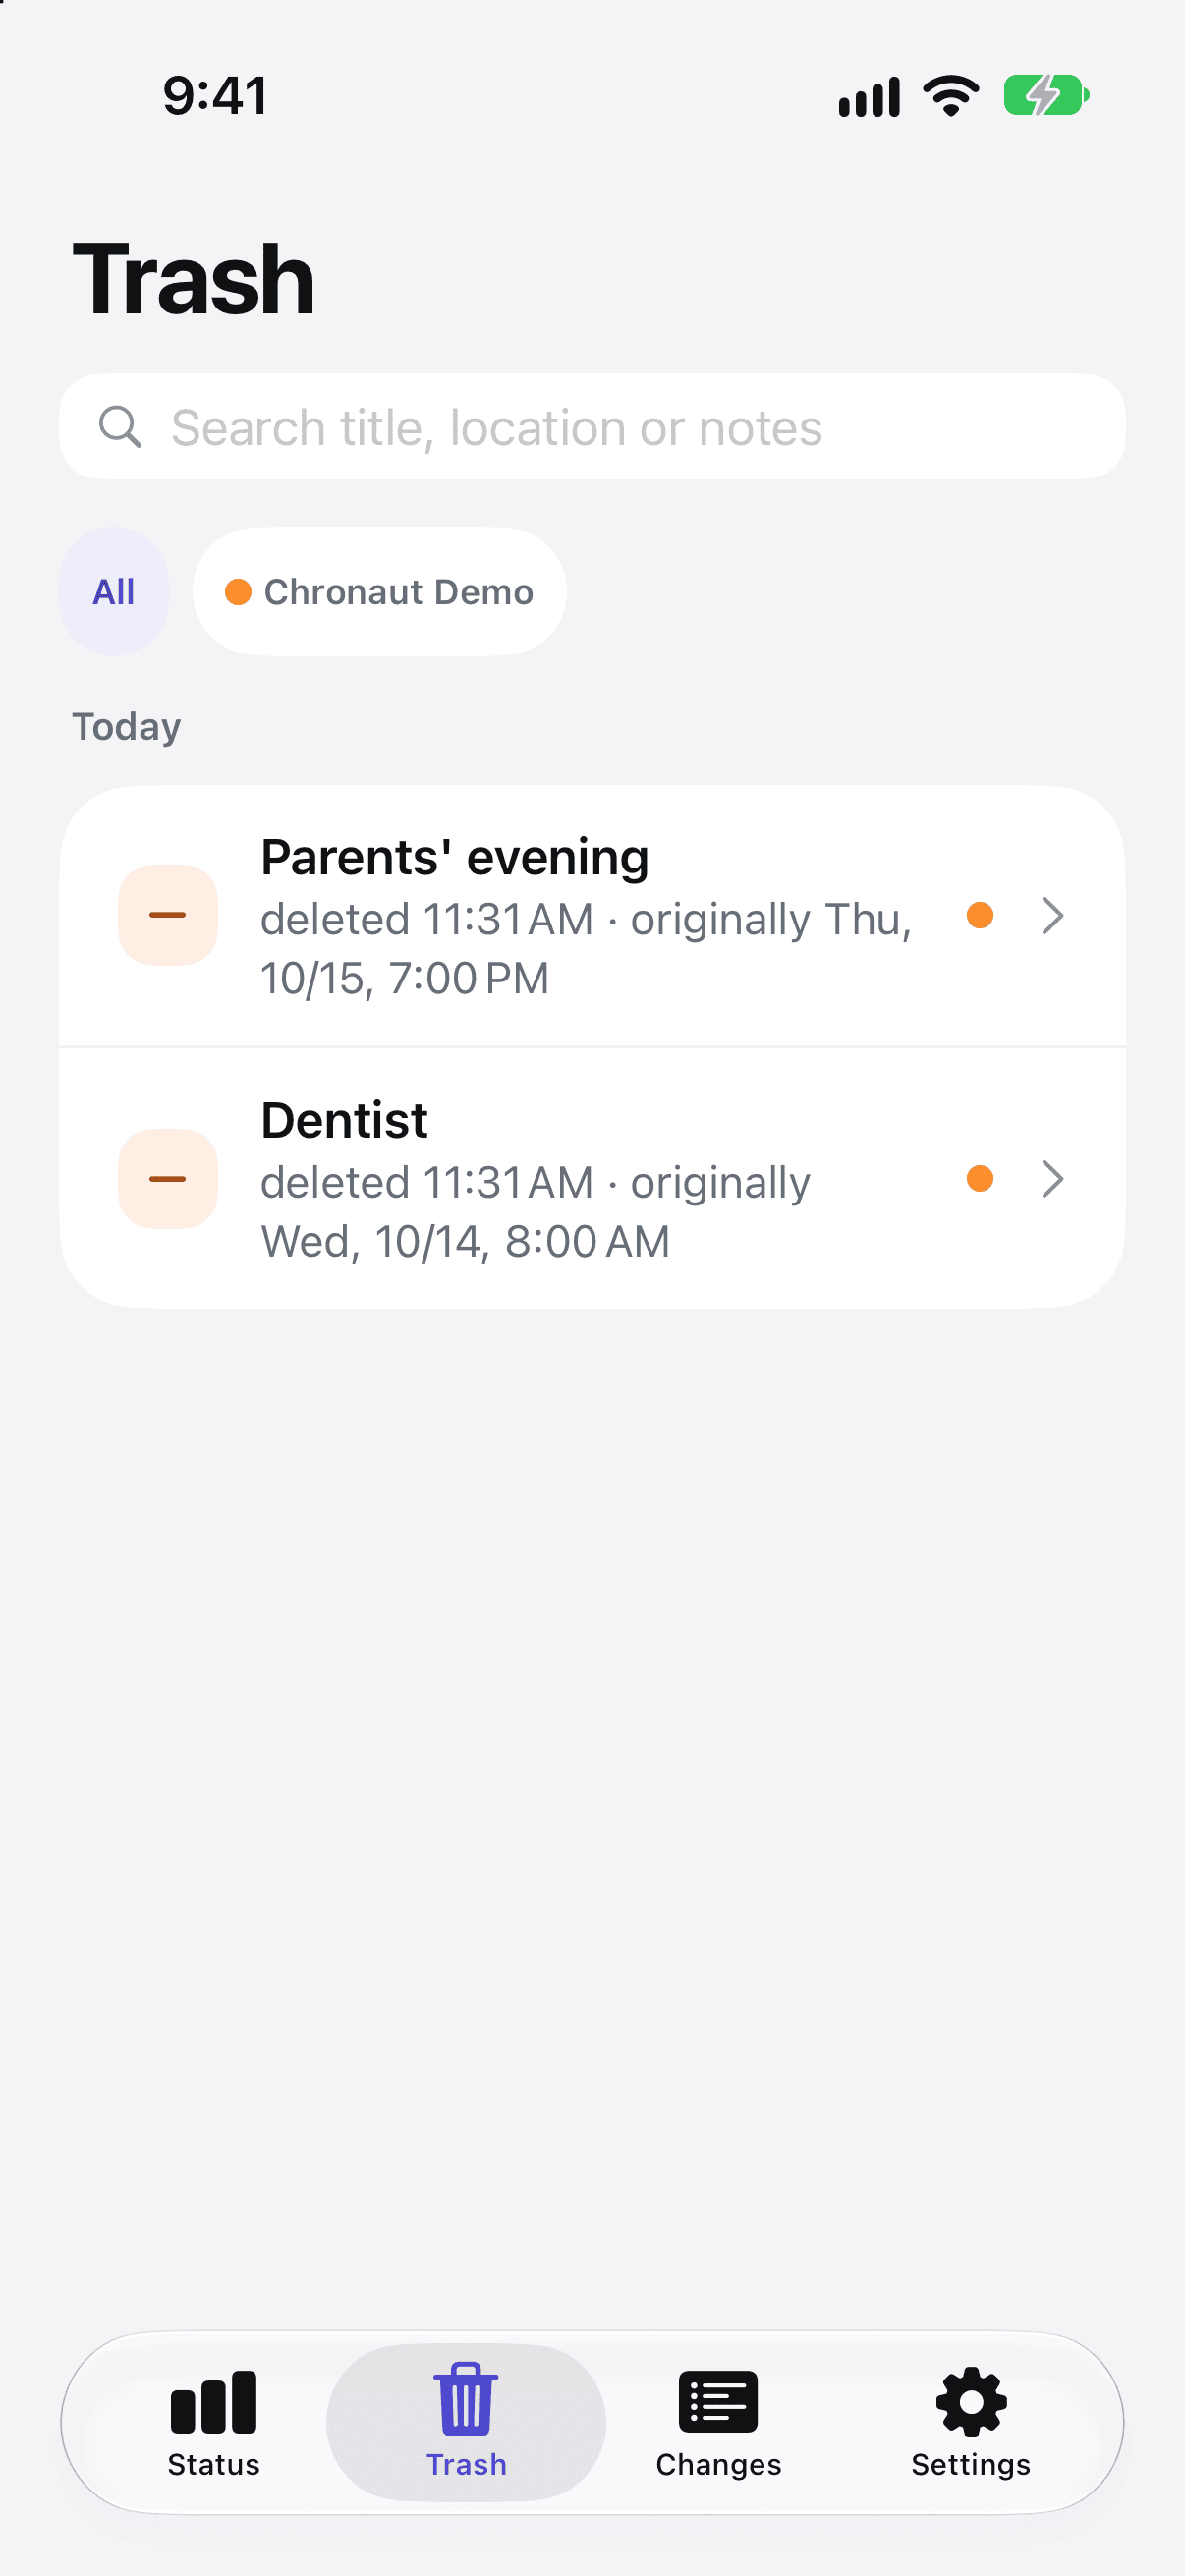
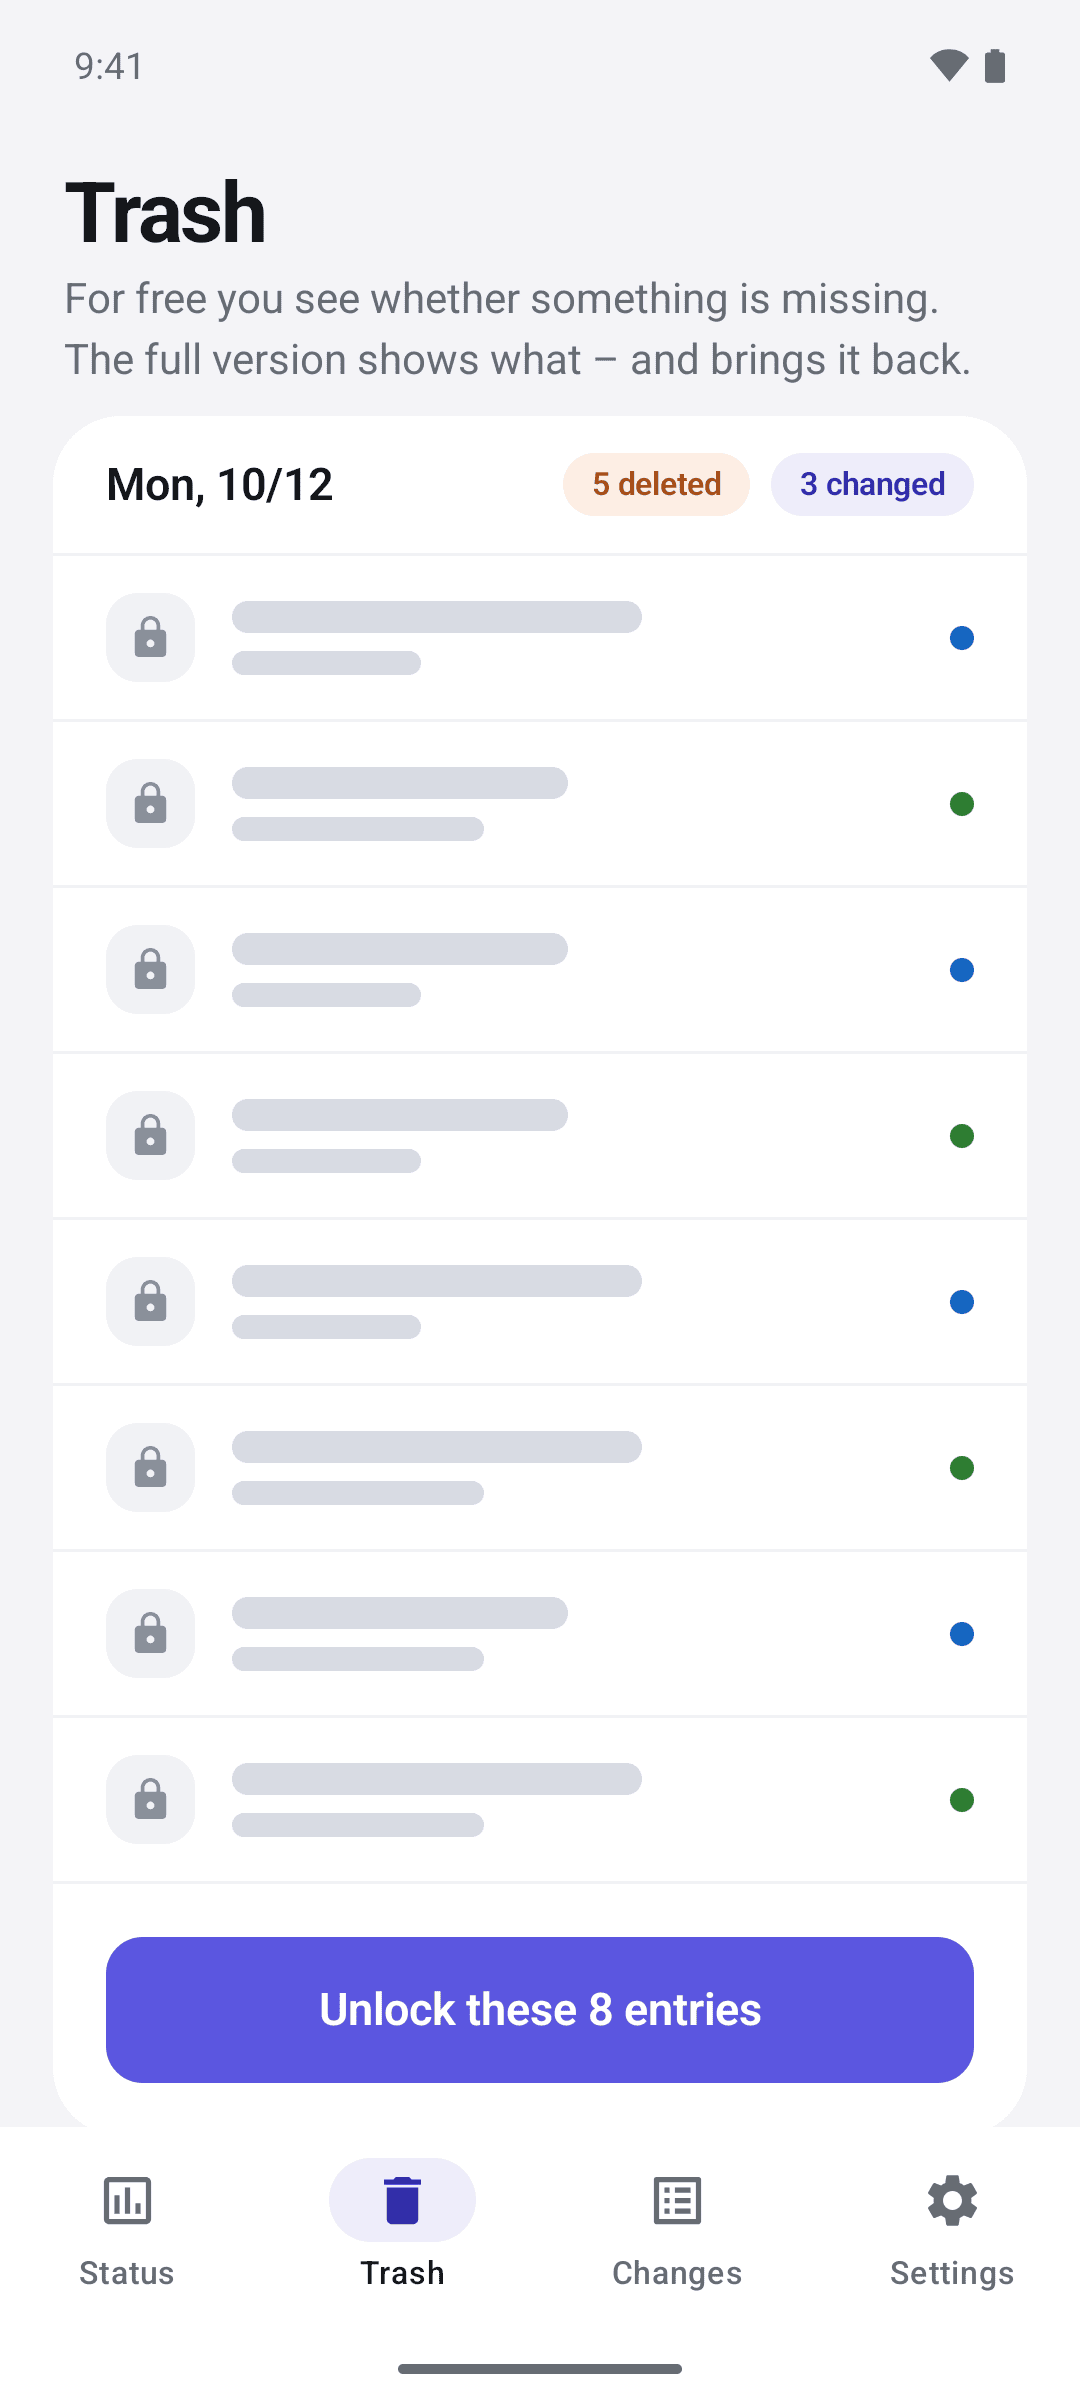
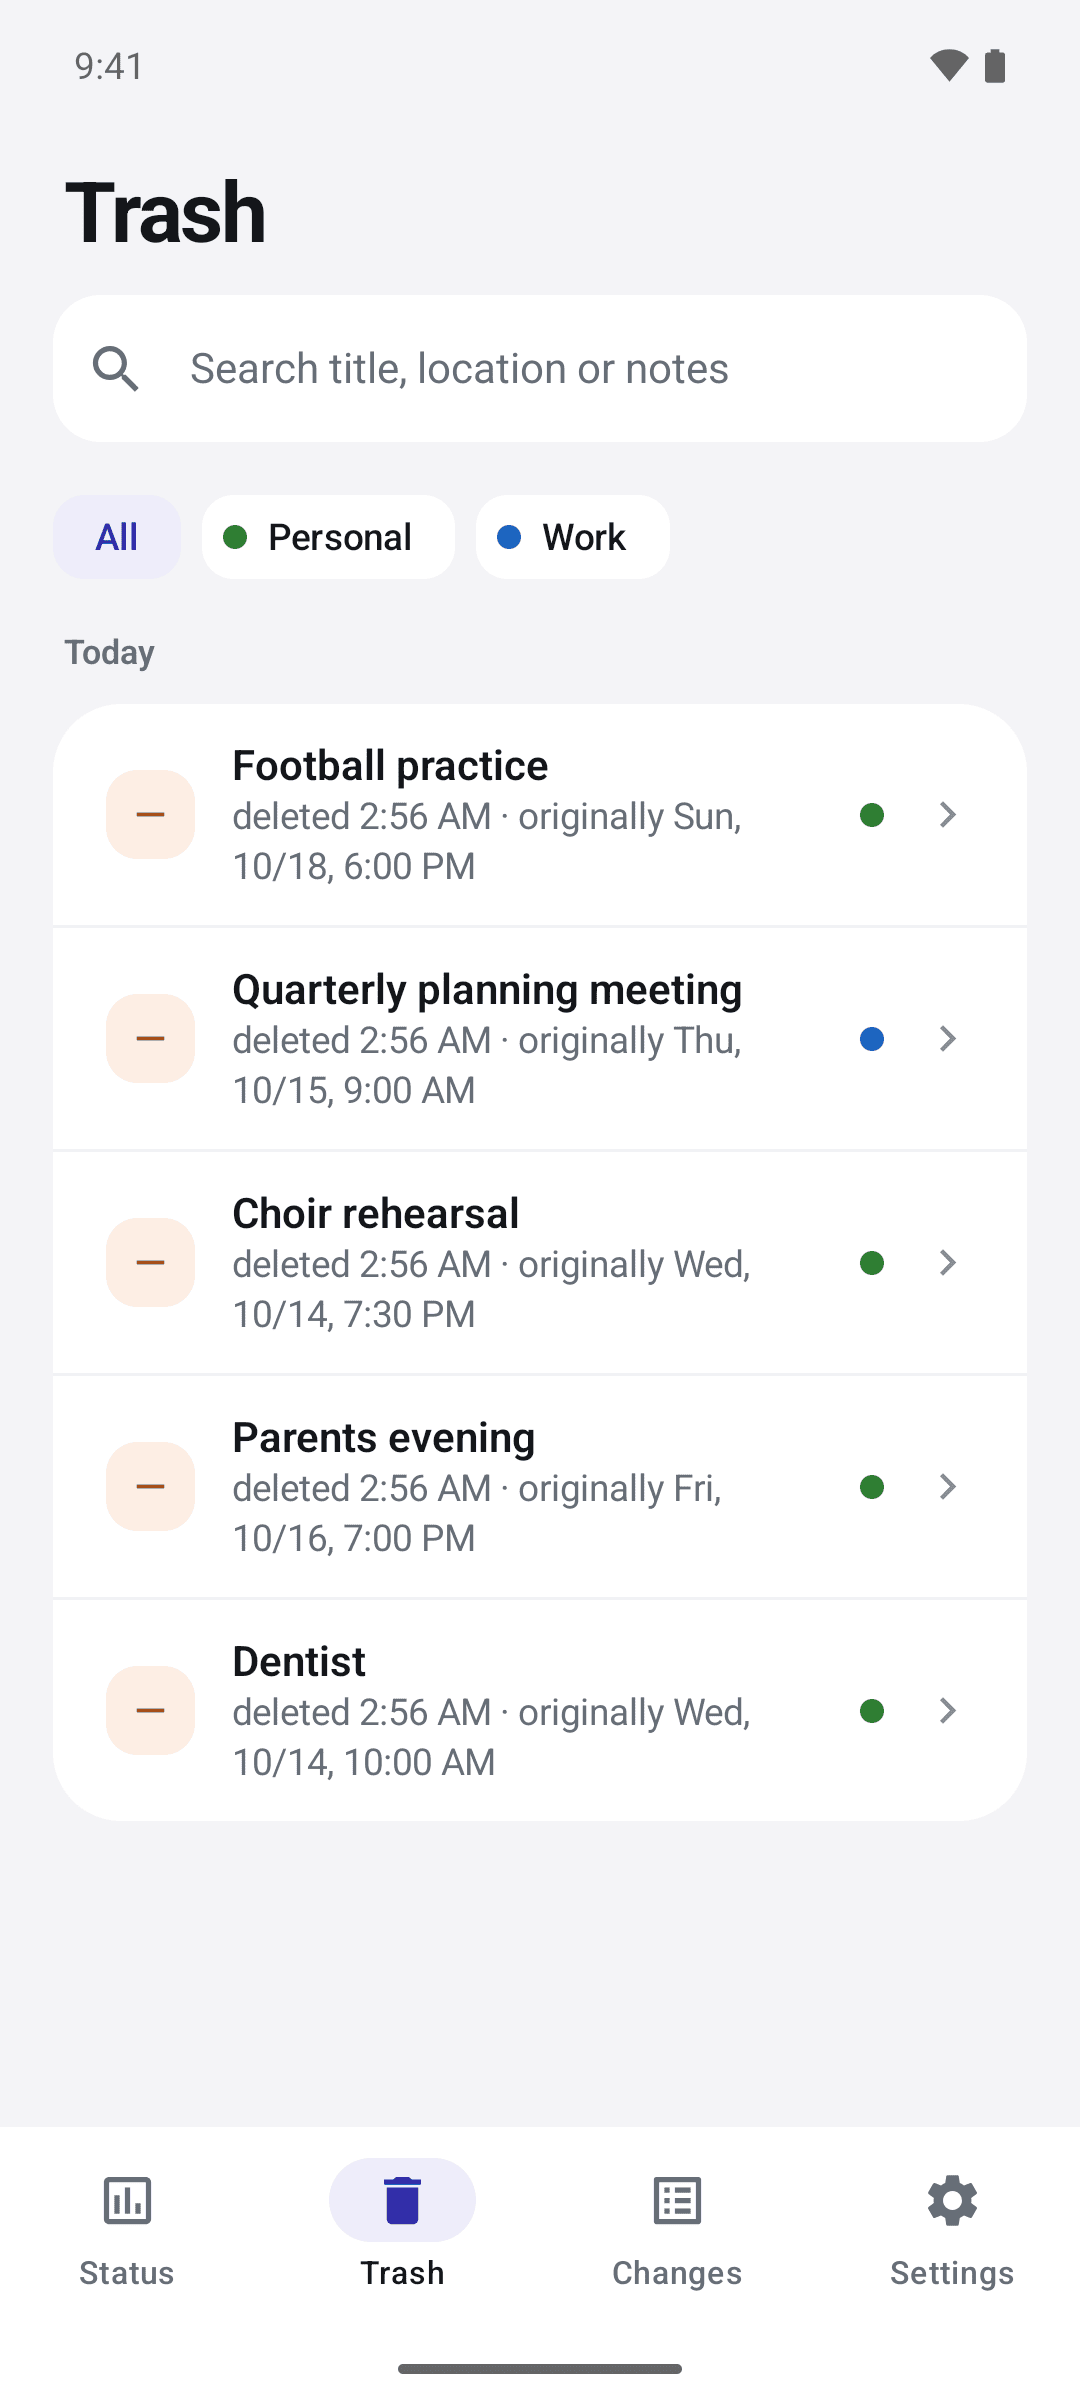
The “Trash” lists events that have disappeared from your calendar.
- For free you see the last seven days, day by day. Each day shows how many events were deleted or changed, for example “2 deleted” or “1 changed”. The entries themselves are locked. Days without a loss show “Nothing lost”.
- With the full version you see every deleted event with its title, the time it was deleted and the original date, grouped by “Today”, “Yesterday”, “This week”, “Last week”, “This month” and older months. At the top you can search (“Search title, location or notes”) and filter by calendar.
Changes: day, week, month
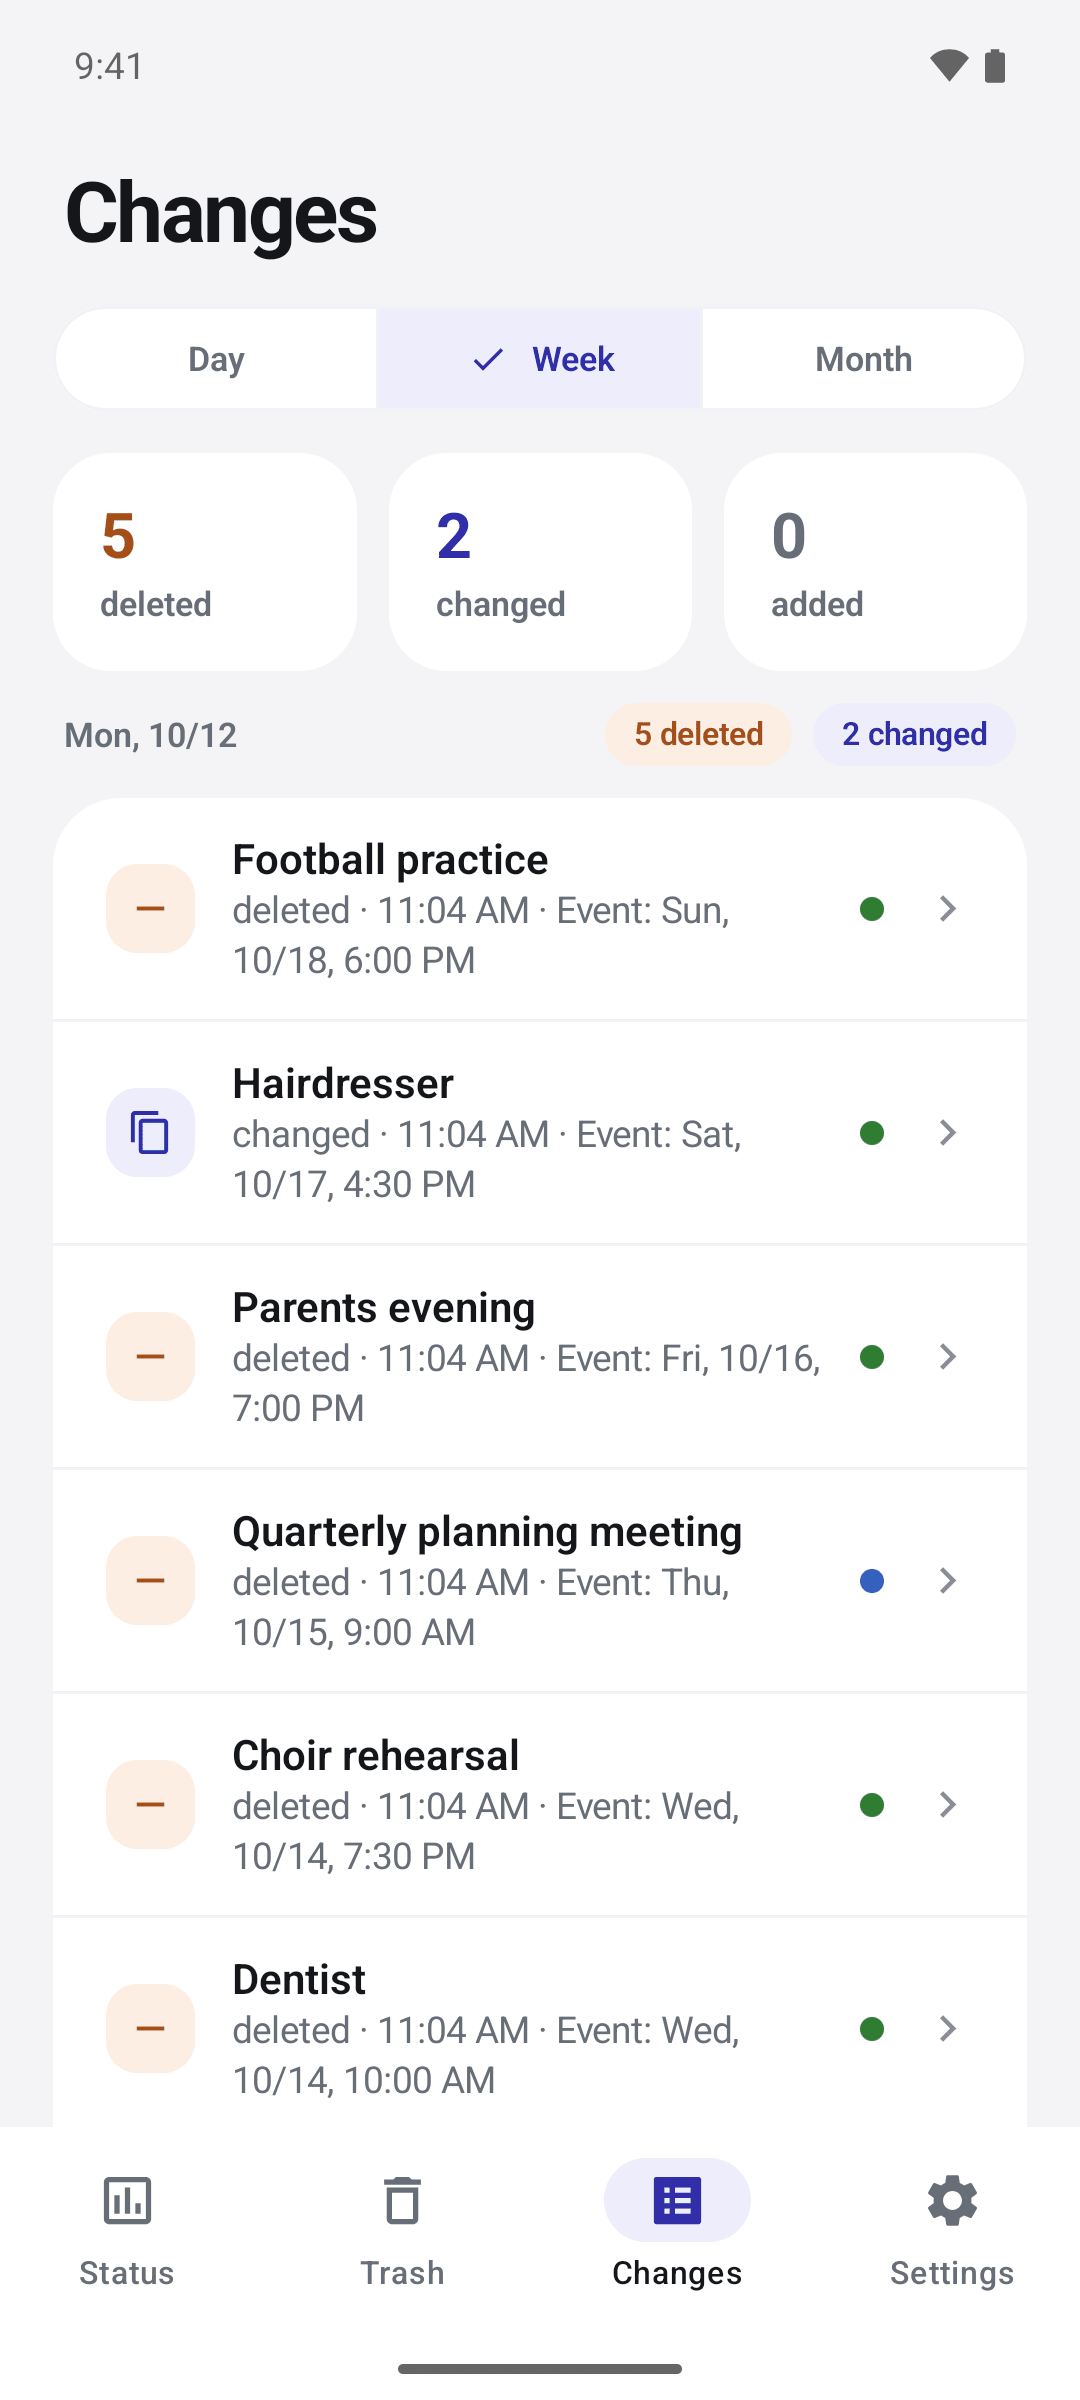
In the “Changes” tab, choose “Day”, “Week” or “Month” at the top. Below, three tiles count what was “deleted”, “changed” and “new”“added” in that period.
- Deleted means: the event has disappeared from the calendar.
- Changed means: the event is still there, but for example its title, start, end, location or notes have changed. Moving it to another calendar also shows up here as “moved”.
- NewAdded means: the event was newly added.
With the full version, every entry is listed below the tiles, sorted by day. For free you only see the counters of the last seven days and the notice “The full version shows what changed”. For free you only see the counters for the chosen period and the notice “The full version shows what changed”.

Which calendars are backed up
Under Settings › Backup › Select calendars you decide which calendars Chronaut backs up. Calendars listed under “Read-only”, such as subscribed calendars, holidays or birthdays, “can be backed up, but not restored”. Under “Time window” you set which period is backed up. The default is one year back to three years ahead.
To check in your calendar what Chronaut has restored, tap “Open Calendar app” under Settings › Backup.
Viewing and restoring an event
Viewing details and restoring are part of the full version.
Viewing details
- Tap an entry in “Trash” or “Changes”.
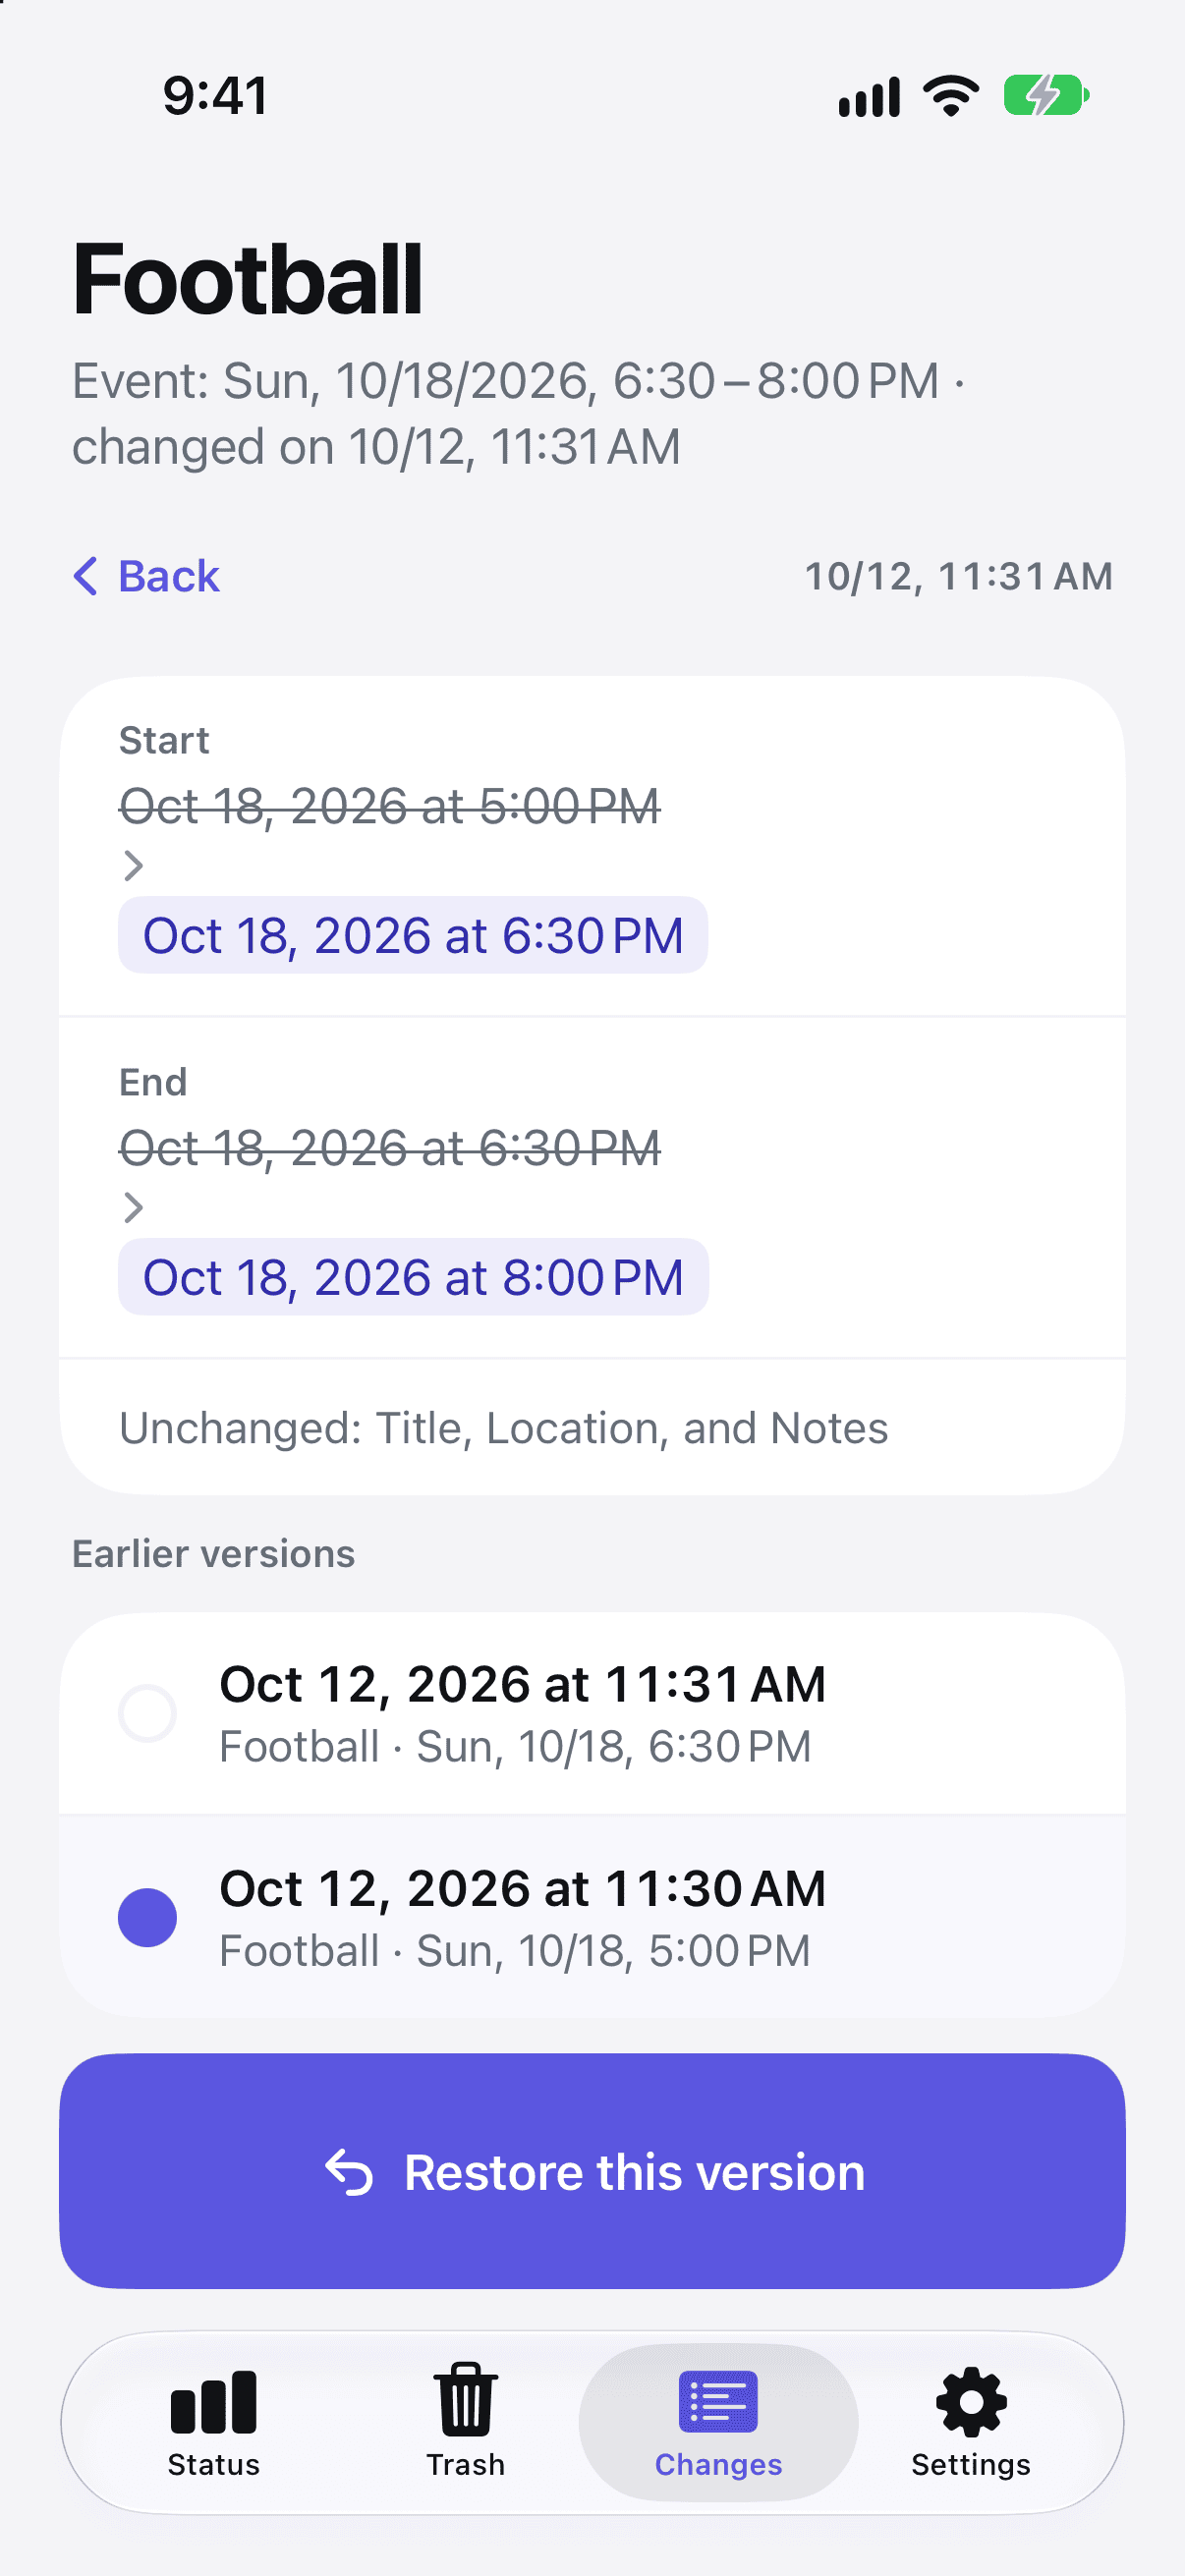
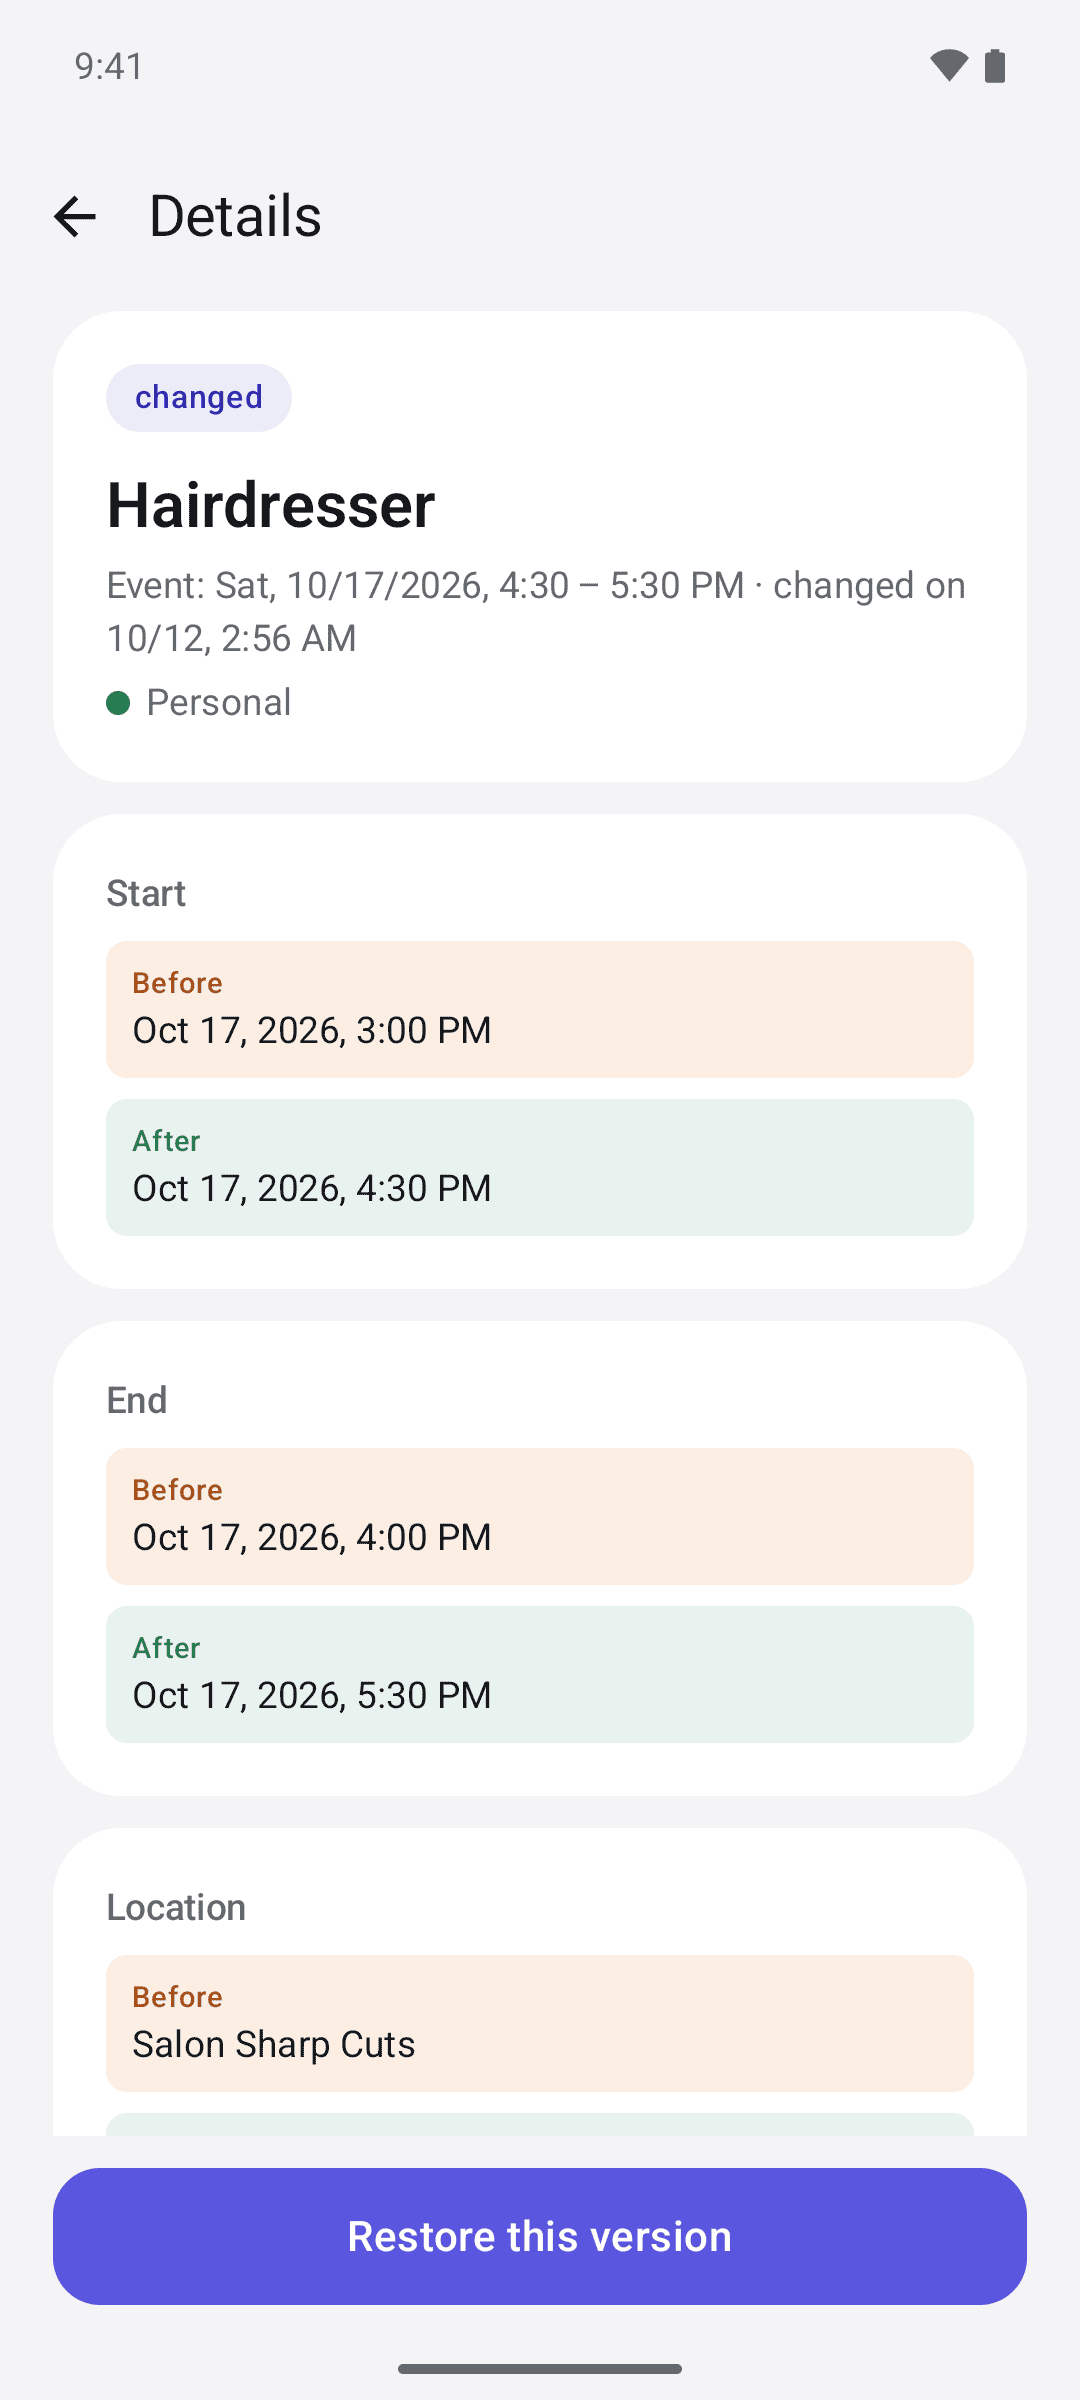
- The detail view shows at the top when the event takes place and when it was deleted or changed.
- Below, you see the old and the new value for every changed field. Fields without a change are collected under “Unchanged: …”.
- If there are several states, they are listed under “Earlier versions”. Tap a version to select it.
- Tap an entry in “Trash” or “Changes”.
- The detail view shows at the top the title, when the event takes place, when it was deleted or changed, and the calendar.
- For a changed event you see the value under “Before” and “After” for every changed field.
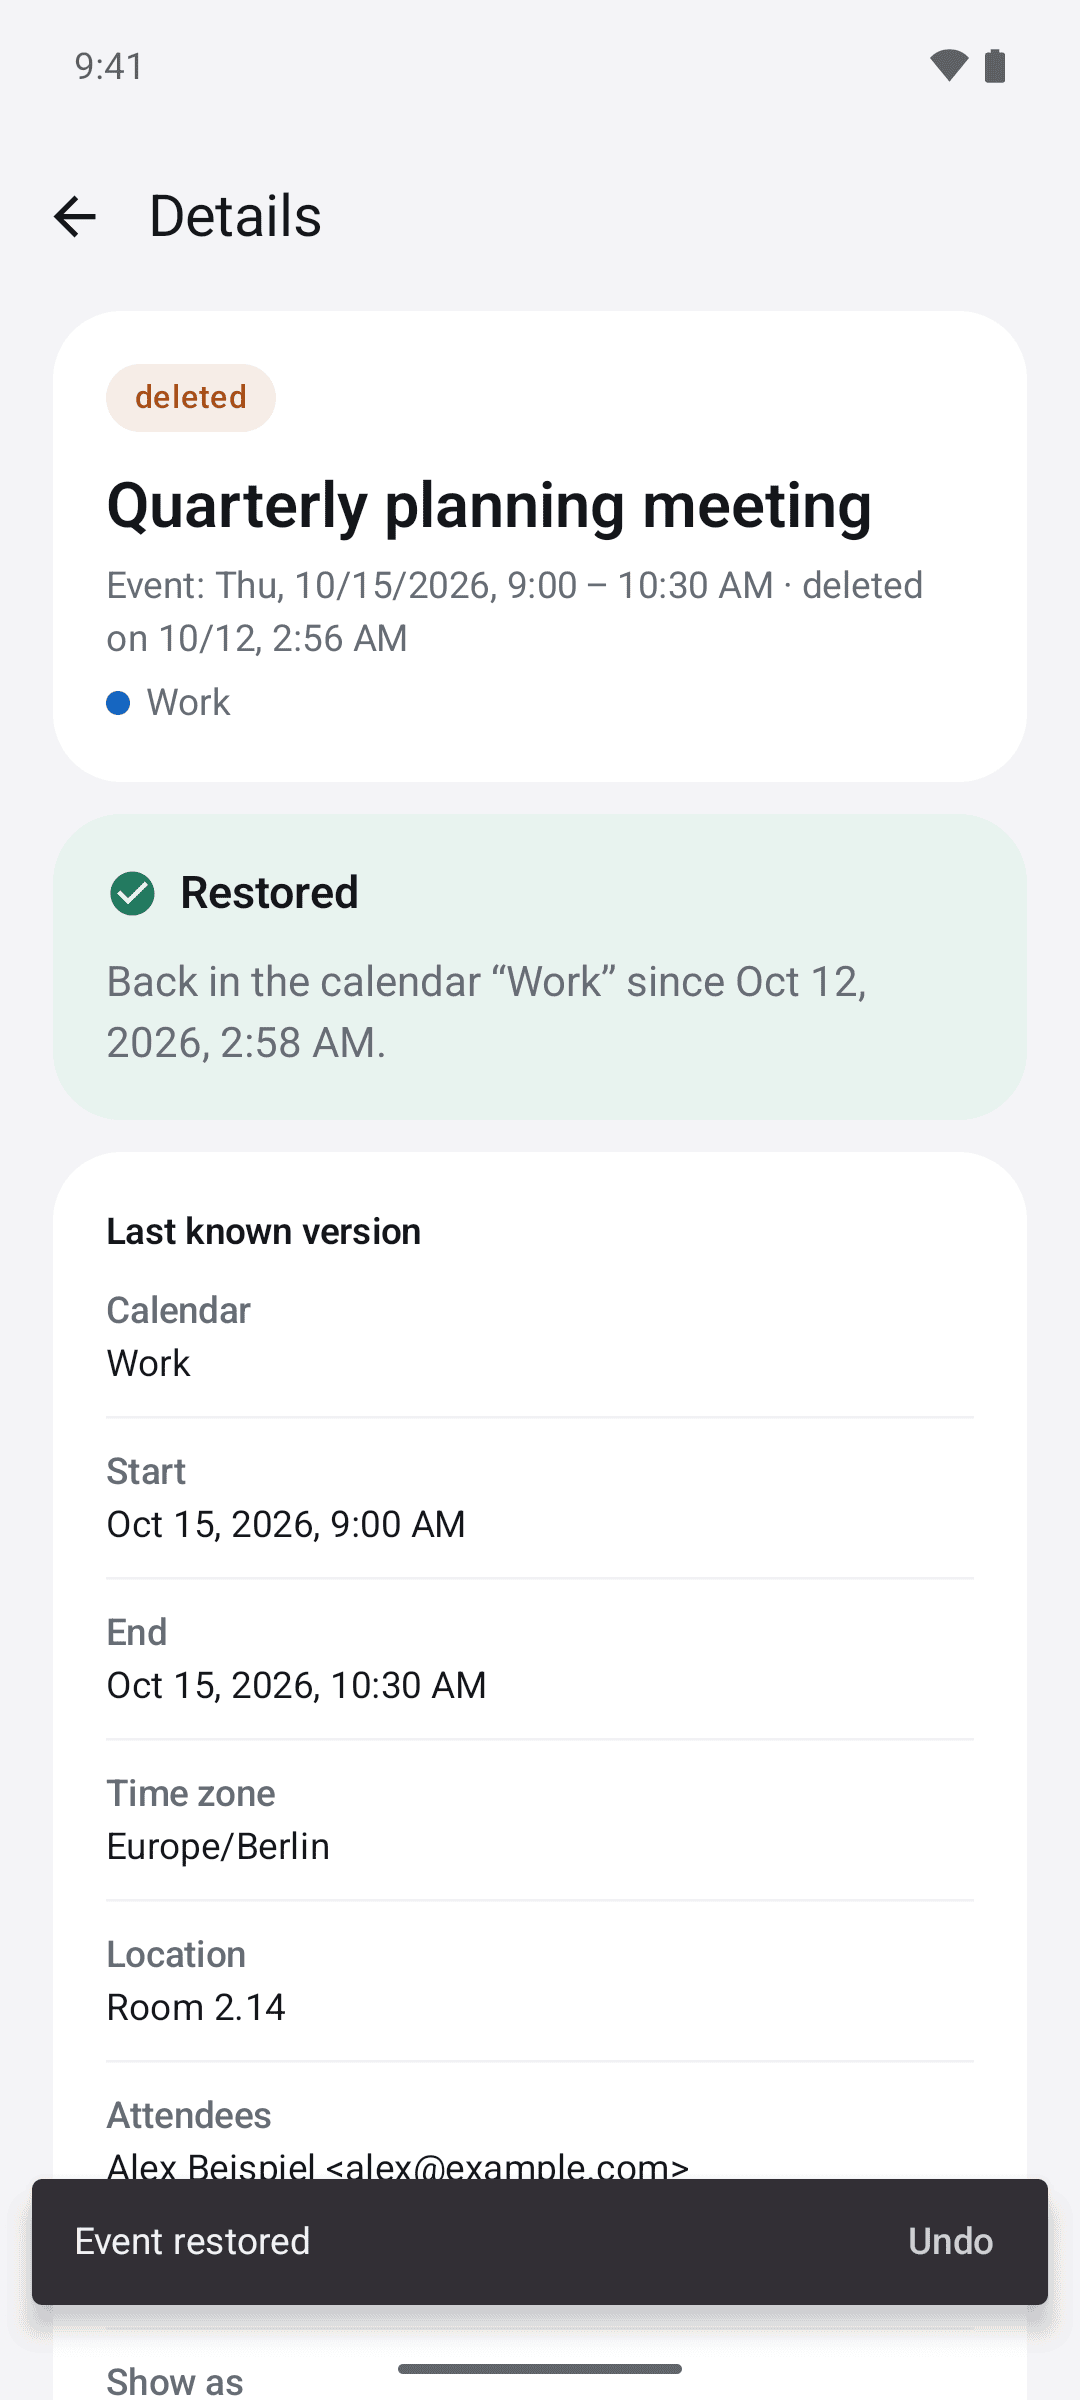
- For a deleted event, Chronaut shows everything that was last backed up under “Last known version”.
Restoring
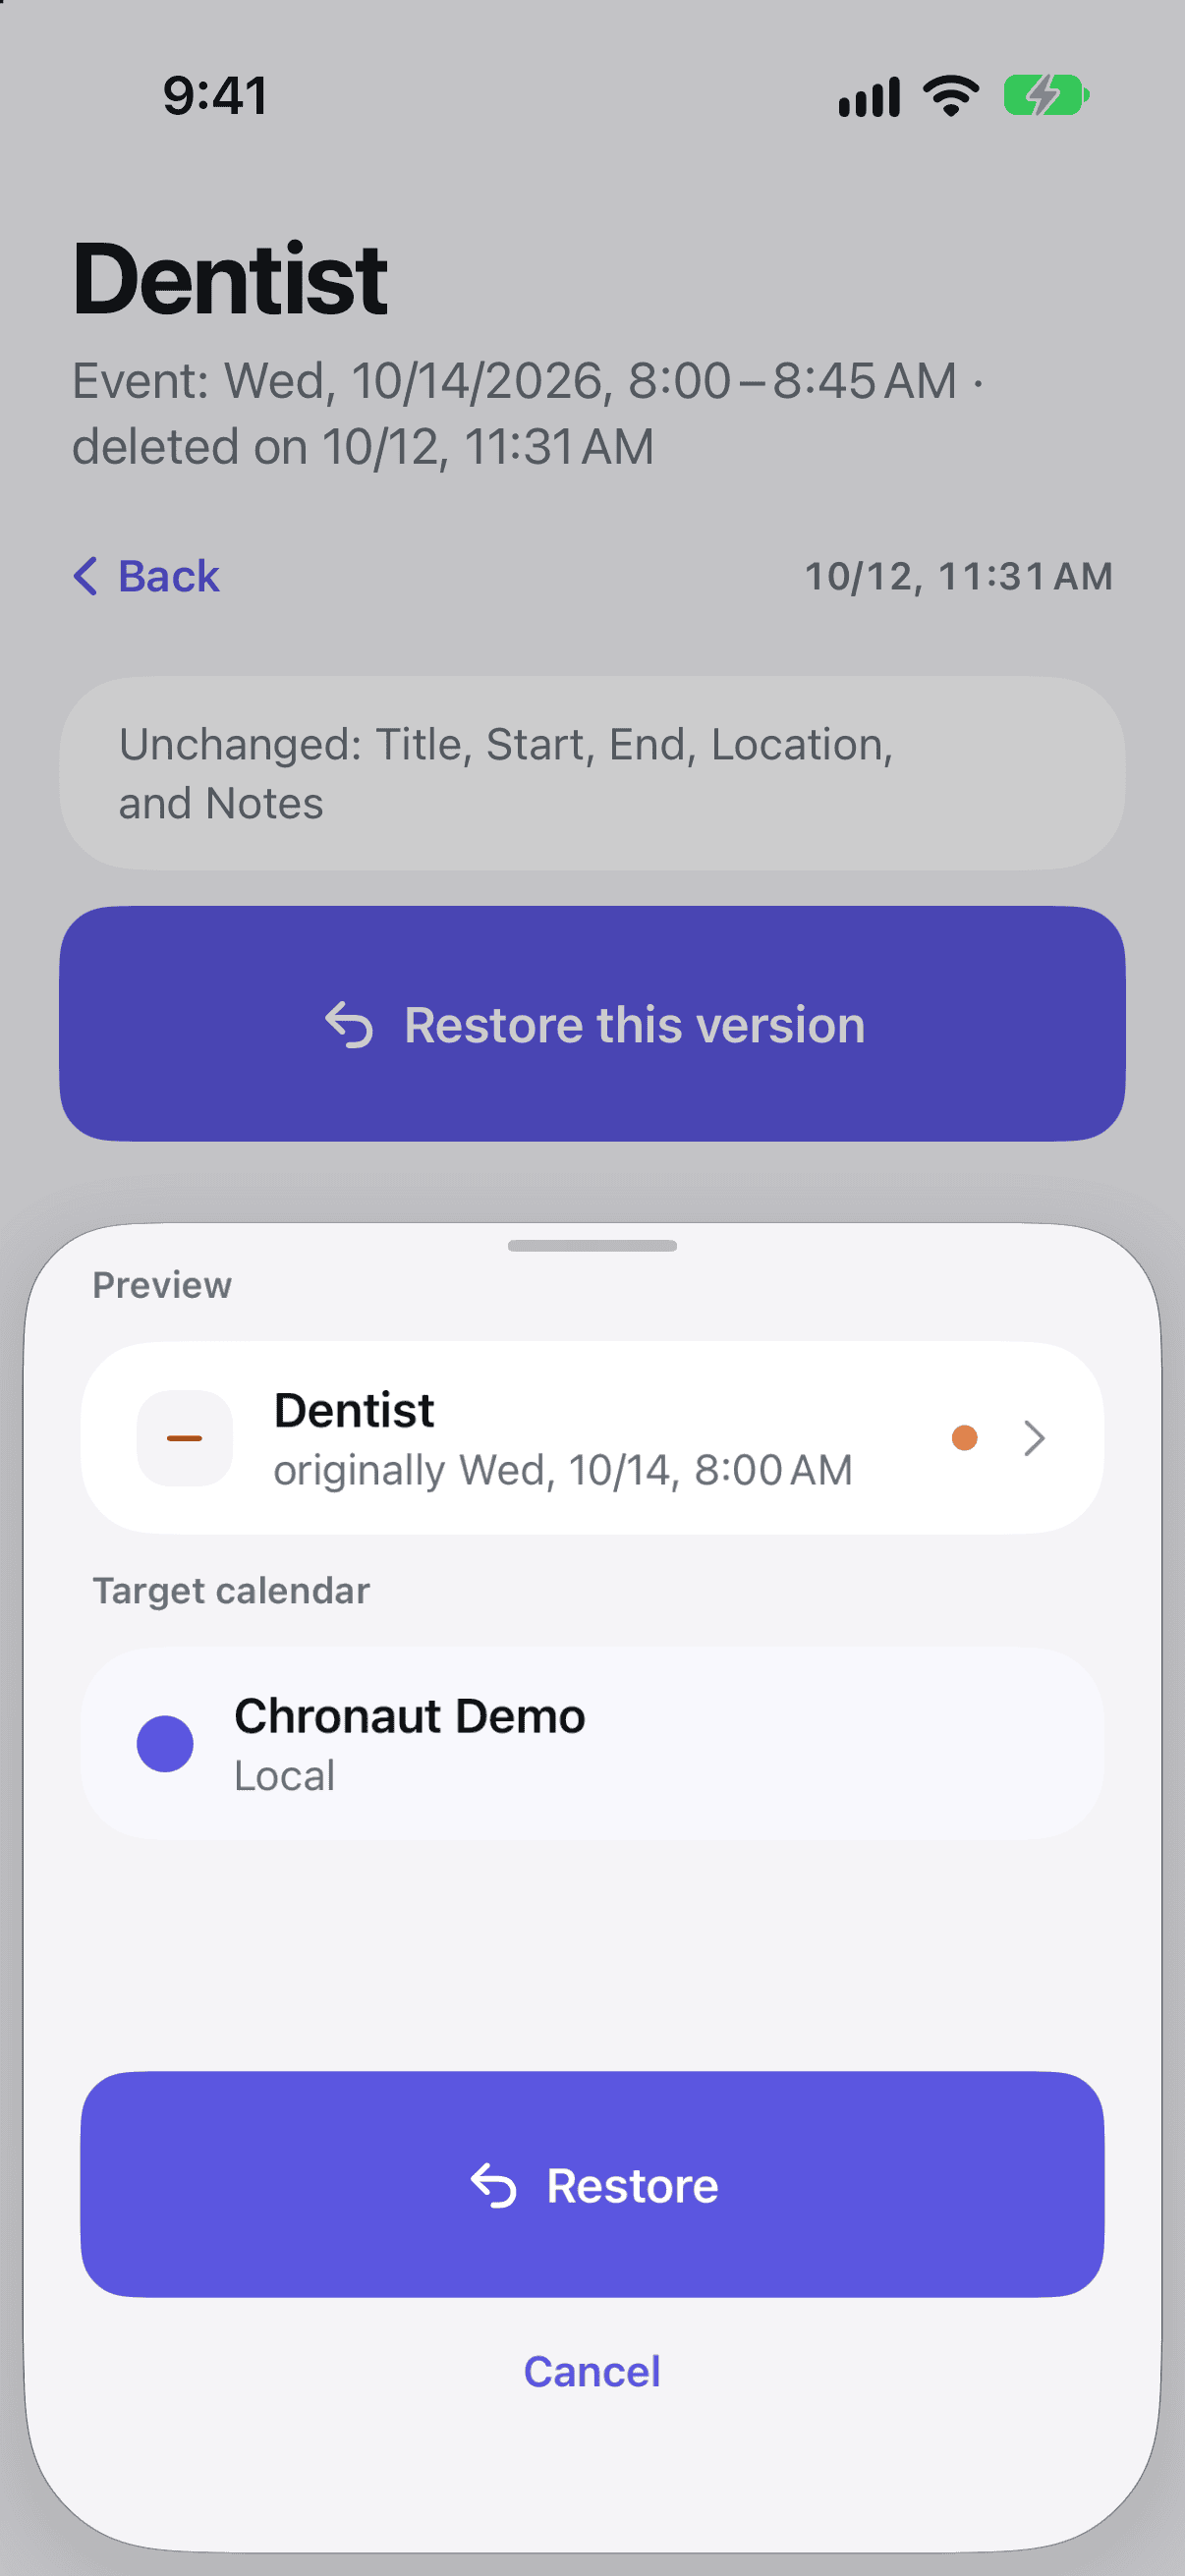
- In the detail view, tap “Restore this version”.
- Under “Preview”, check that it is the right event.
- Under “Target calendar”, choose the calendar the event should go into. The original calendar is preselected if it still exists.
- For a recurring event, choose under “Scope”: “This event only” or “This and all following”.
- Tap “Restore”.
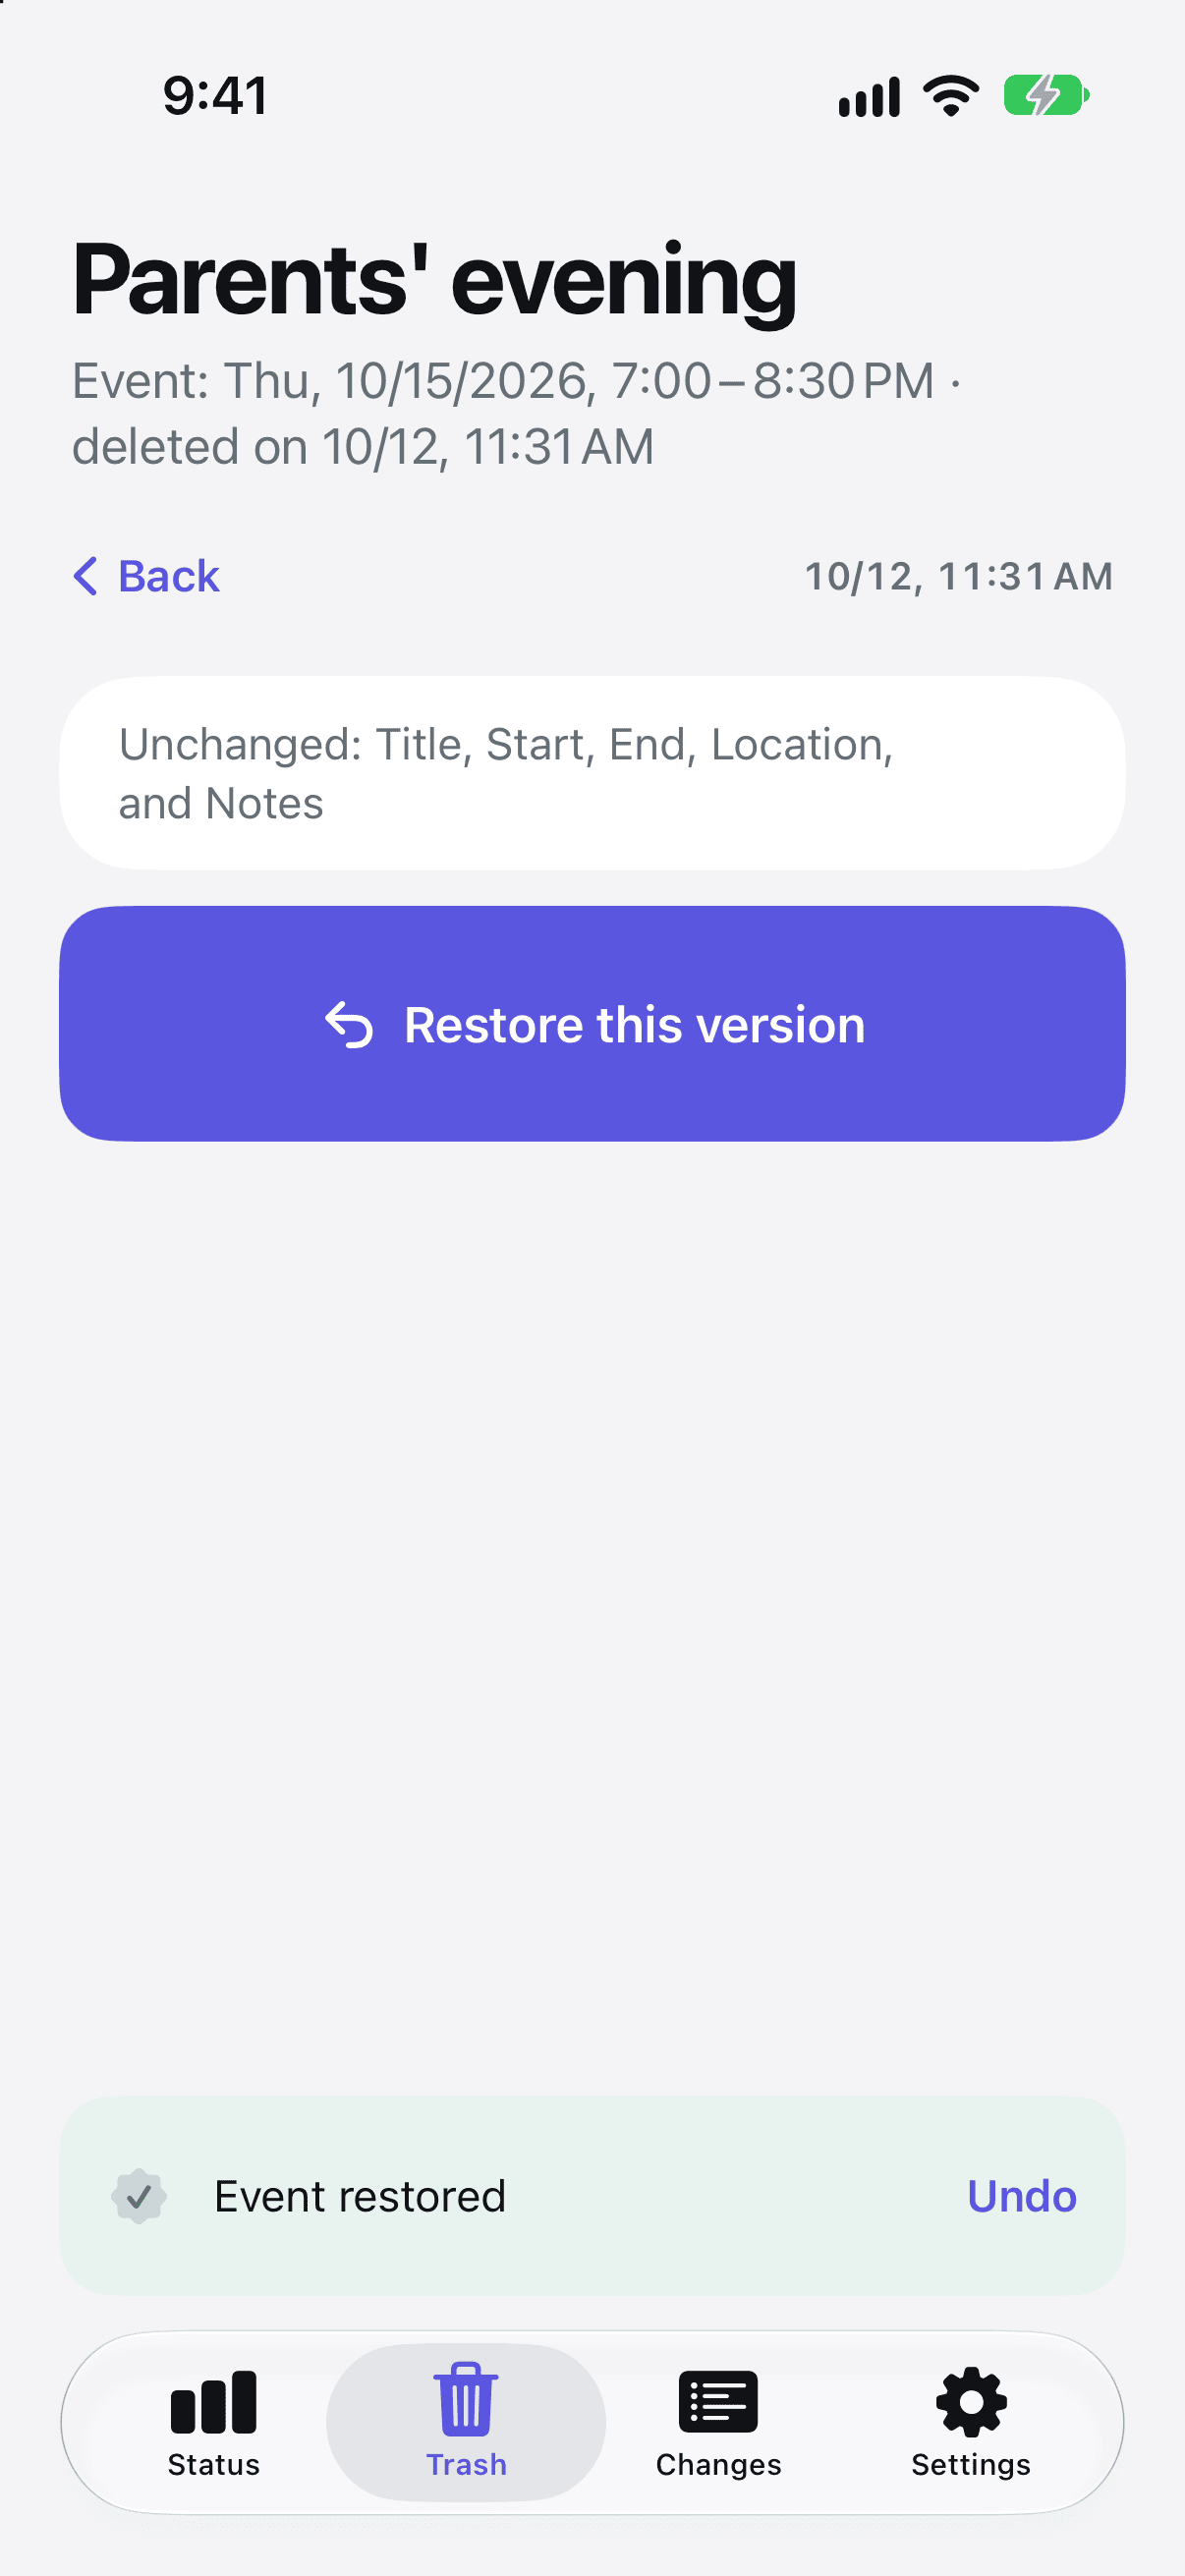
“Event restored” appears at the bottom for a few seconds, with “Undo”. A deleted event is created again; “Undo” removes it again. An event that still exists but was changed is reset to the chosen version; “Undo” brings back the state before.
- In the detail view, tap “Restore” at the bottom (deleted event) or “Restore this version” (changed event).
- The first time, Chronaut asks “Allow write access?”. Tap “Continue”. Because write access belongs to the “Calendar” permission, Android usually grants it without another prompt; otherwise confirm with “Allow”. If you allowed calendar access in the Android settings, write access is already included and this question does not appear.
- If the original calendar no longer exists or is read-only, choose under “Target calendar” where the event should go.
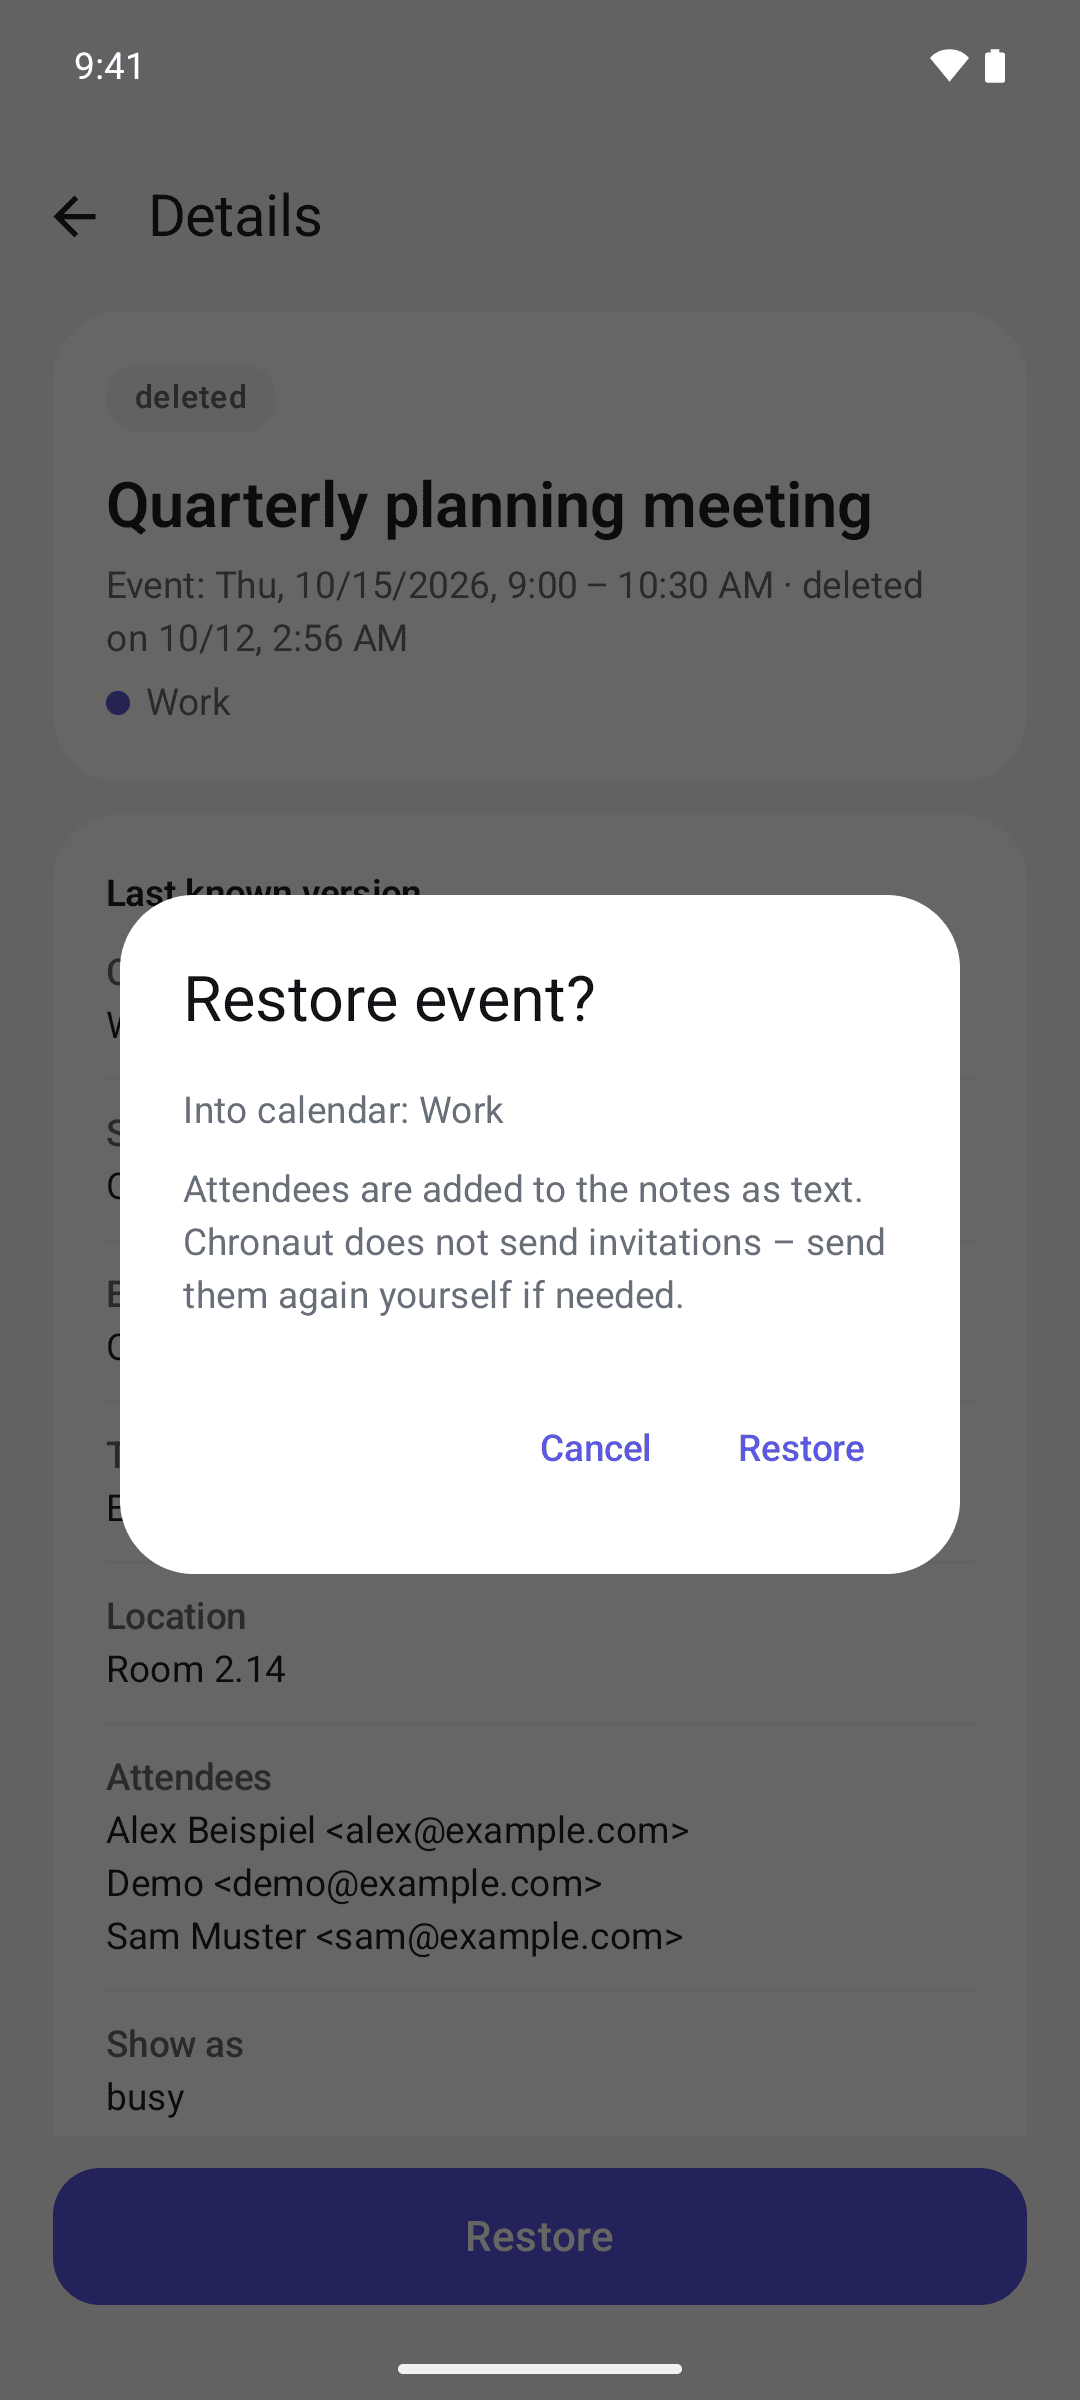
- If the event has attendees or belongs to a series, Chronaut asks once more (“Restore event?”) and names the target calendar. Tap “Restore”. If the event already exists, the question is “This event already exists” (see Good to know).
Without such special cases, Chronaut puts the event straight back into its original calendar. “Event restored” appears at the bottom, with “Undo”. A deleted event is created again. An event that still exists but was changed is reset to the backed-up version. The detail view then shows “Restored”, and under “Changes” the event appears as “restored”. For a changed event, “Restore this version” disappears until you tap “Undo” or the event changes again.
Getting there faster
- Long press: In the trash, press and hold an entry. The menu offers “Restore” and “Hide”. “Hide” removes the entry from the trash; your calendars are not touched.
- Swipe: In the trash, swipe an entry to the right to restore it or to the left to hide it. This works with the full version as soon as there is at least one deleted event in the trash.
- Swipe in “Changes”: Swipe a deleted event to the right to restore it straight from the list. Other entries do not have a swipe action.
- Swipe back: On iPhone and iPad, swipe from the left edge of the screen to the right to leave a detail page – the same as tapping “Back”.
Good to know
- Participants cannot be added back on iPhone, iPad and Mac. Chronaut appends them as text to the event’s notes. No invitations are sent. You see the hint “Please send the invitations again”.
- Attendees are added to the event’s notes as text. Chronaut does not send invitations – send them again yourself if needed.
- If the event already exists, for example because another device brought it back, Chronaut shows “This event already exists”. “Do not restore” marks the entry as “already restored”, “Restore anyway” creates it regardless.
- If the event already exists, for example because another device brought it back, Chronaut shows “This event already exists”. “Do not restore” cancels, “Restore anyway” creates it regardless.
- Recurring events: For a deleted series, the whole series is restored; earlier changes to single occurrences are not restored. A single deleted occurrence of a series comes back as a separate event, not as part of the series. For a changed series, “Restore this version” resets the whole series to the earlier state; individually changed occurrences stay as they are.
- Moved events, that is events that switched to another calendar, are only shown. Chronaut does not move them back.
- Read-only calendars such as subscribed calendars, holidays or birthdays cannot be written to. That is why they are not offered as a target calendar.
Free and full version
Backups work the same in both cases: in the background, for all selected calendars. The difference is what you can see and do.
Free
- Chronaut backs up your calendars and keeps the history for one year.
- For the last seven days, you see how many events were deleted or changed.
- Titles, details and restoring are locked.
Full version (one-time purchase)
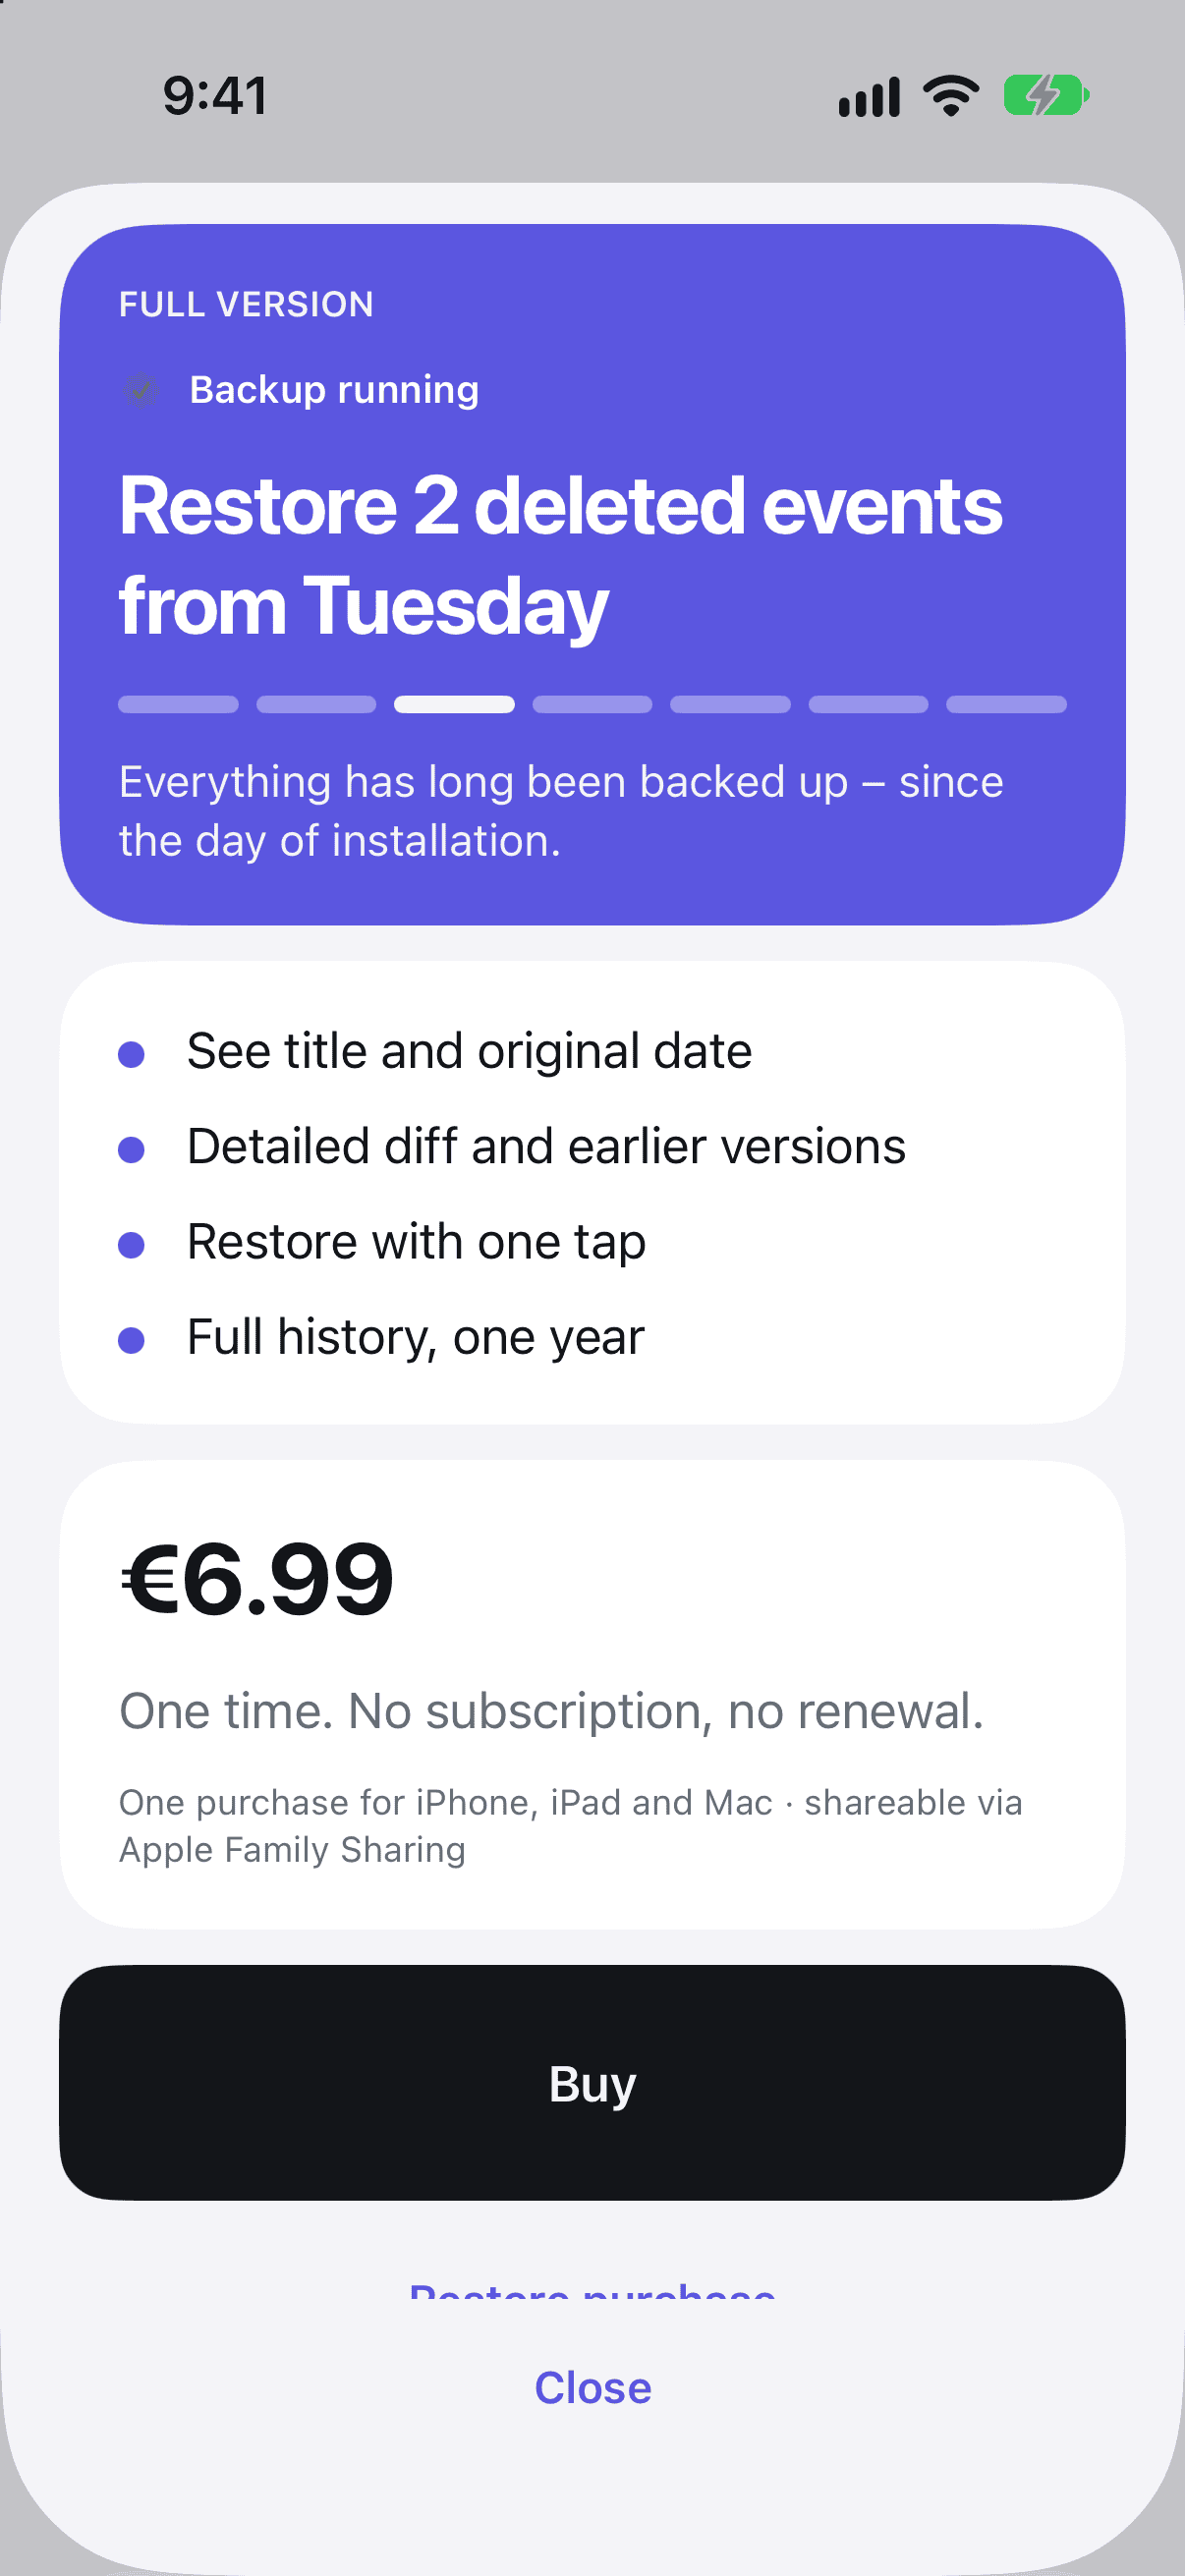
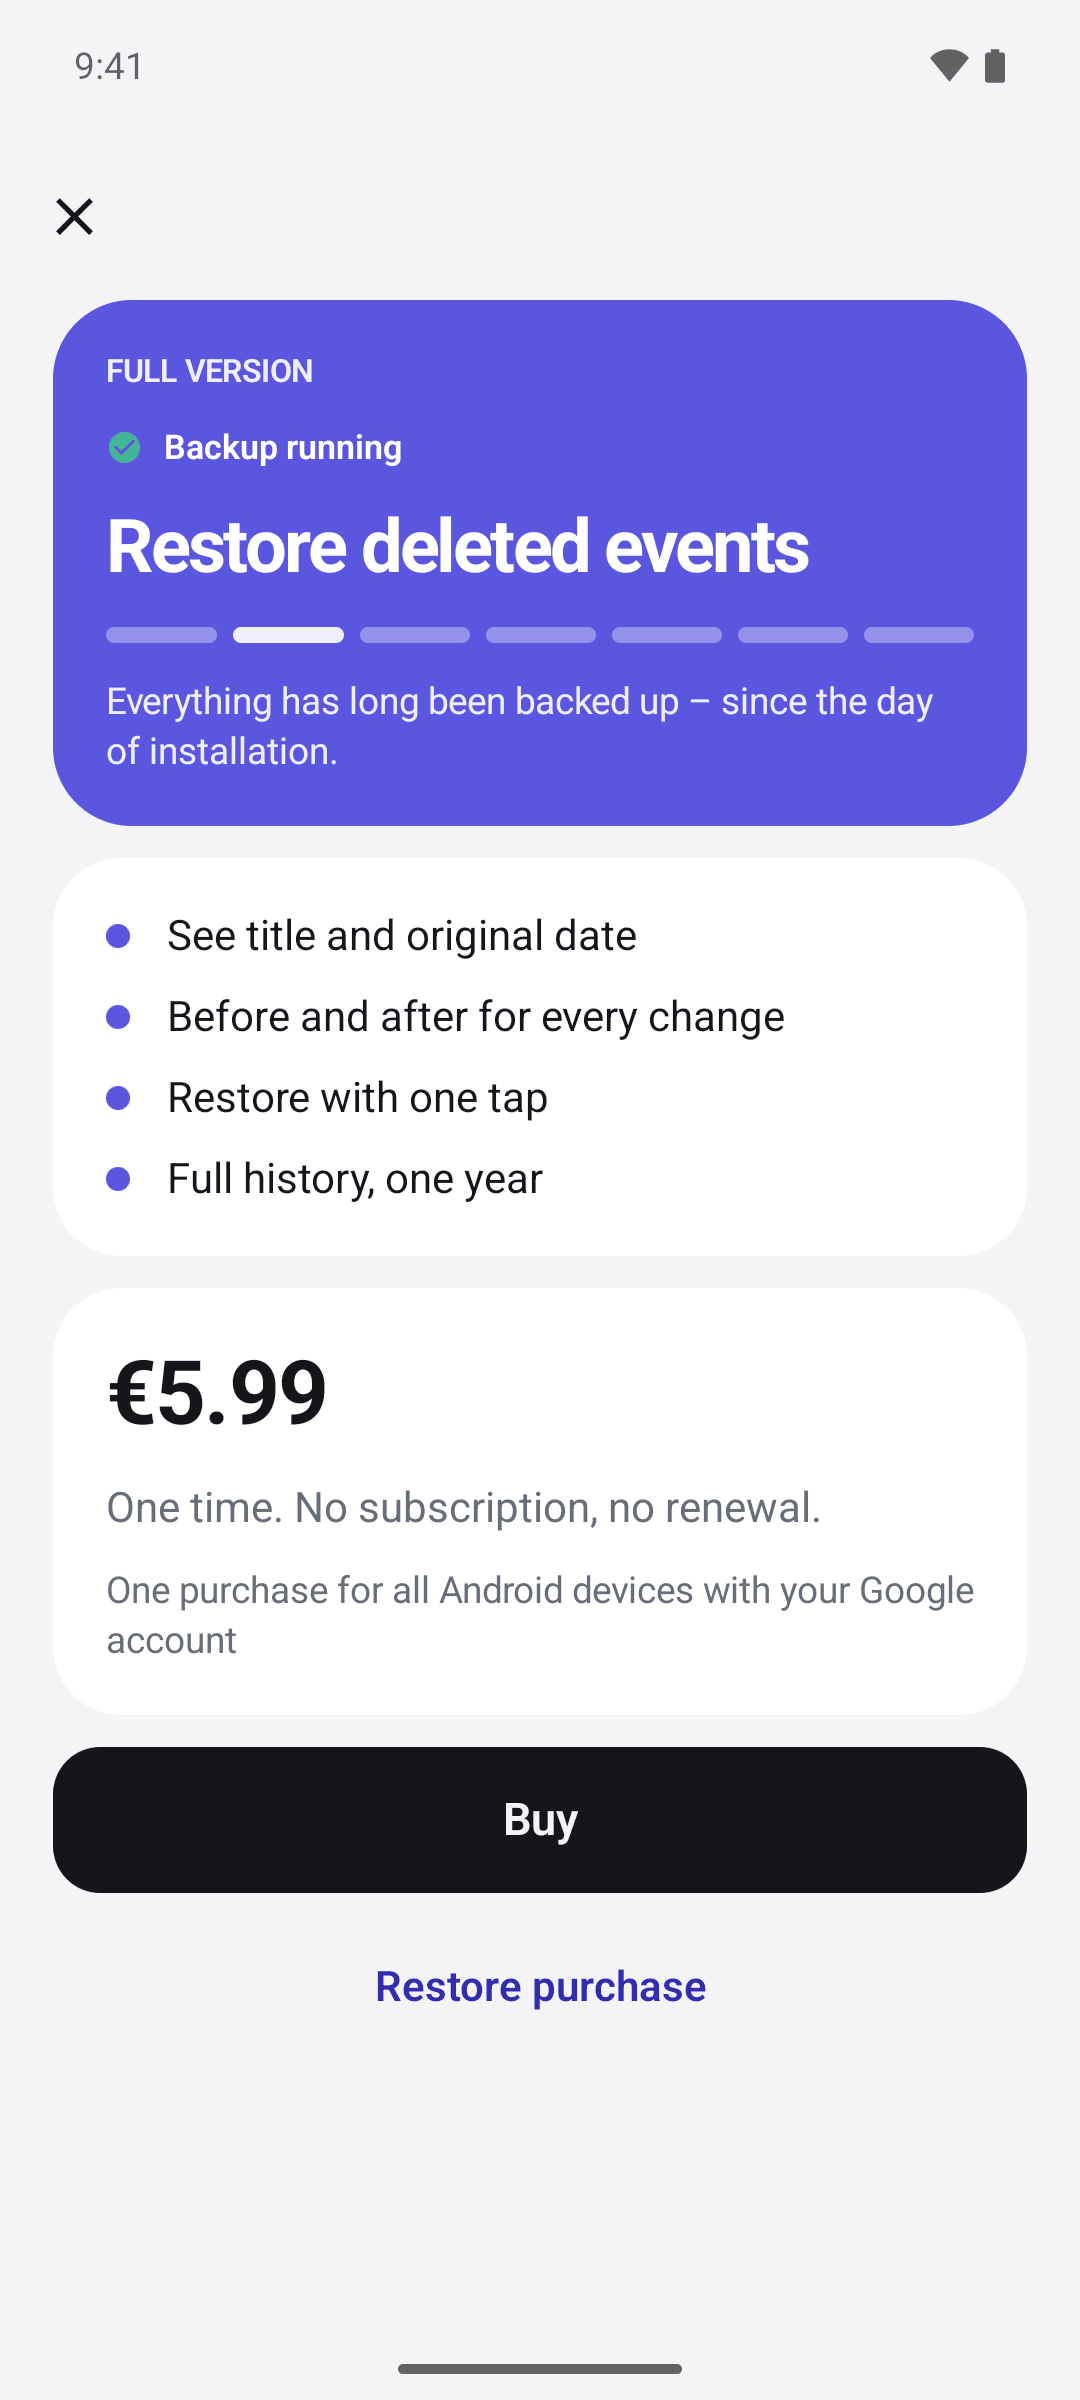
- See title and original date.
- Detailed diff and earlier versions.
- Before and after for every changed field.
- Restore with one tap.
- Full history, one year.
- Search in the trash and filter by calendar.
- One purchase for iPhone, iPad and Mac, shareable via Apple Family Sharing.
- One purchase for all Android devices with your Google account.
Because Chronaut backs up everything even for free, the whole history since installation becomes visible right after the purchase – up to one year back. The Mac app follows the same rules.
Buying the full version and restoring purchases
Buying the full version
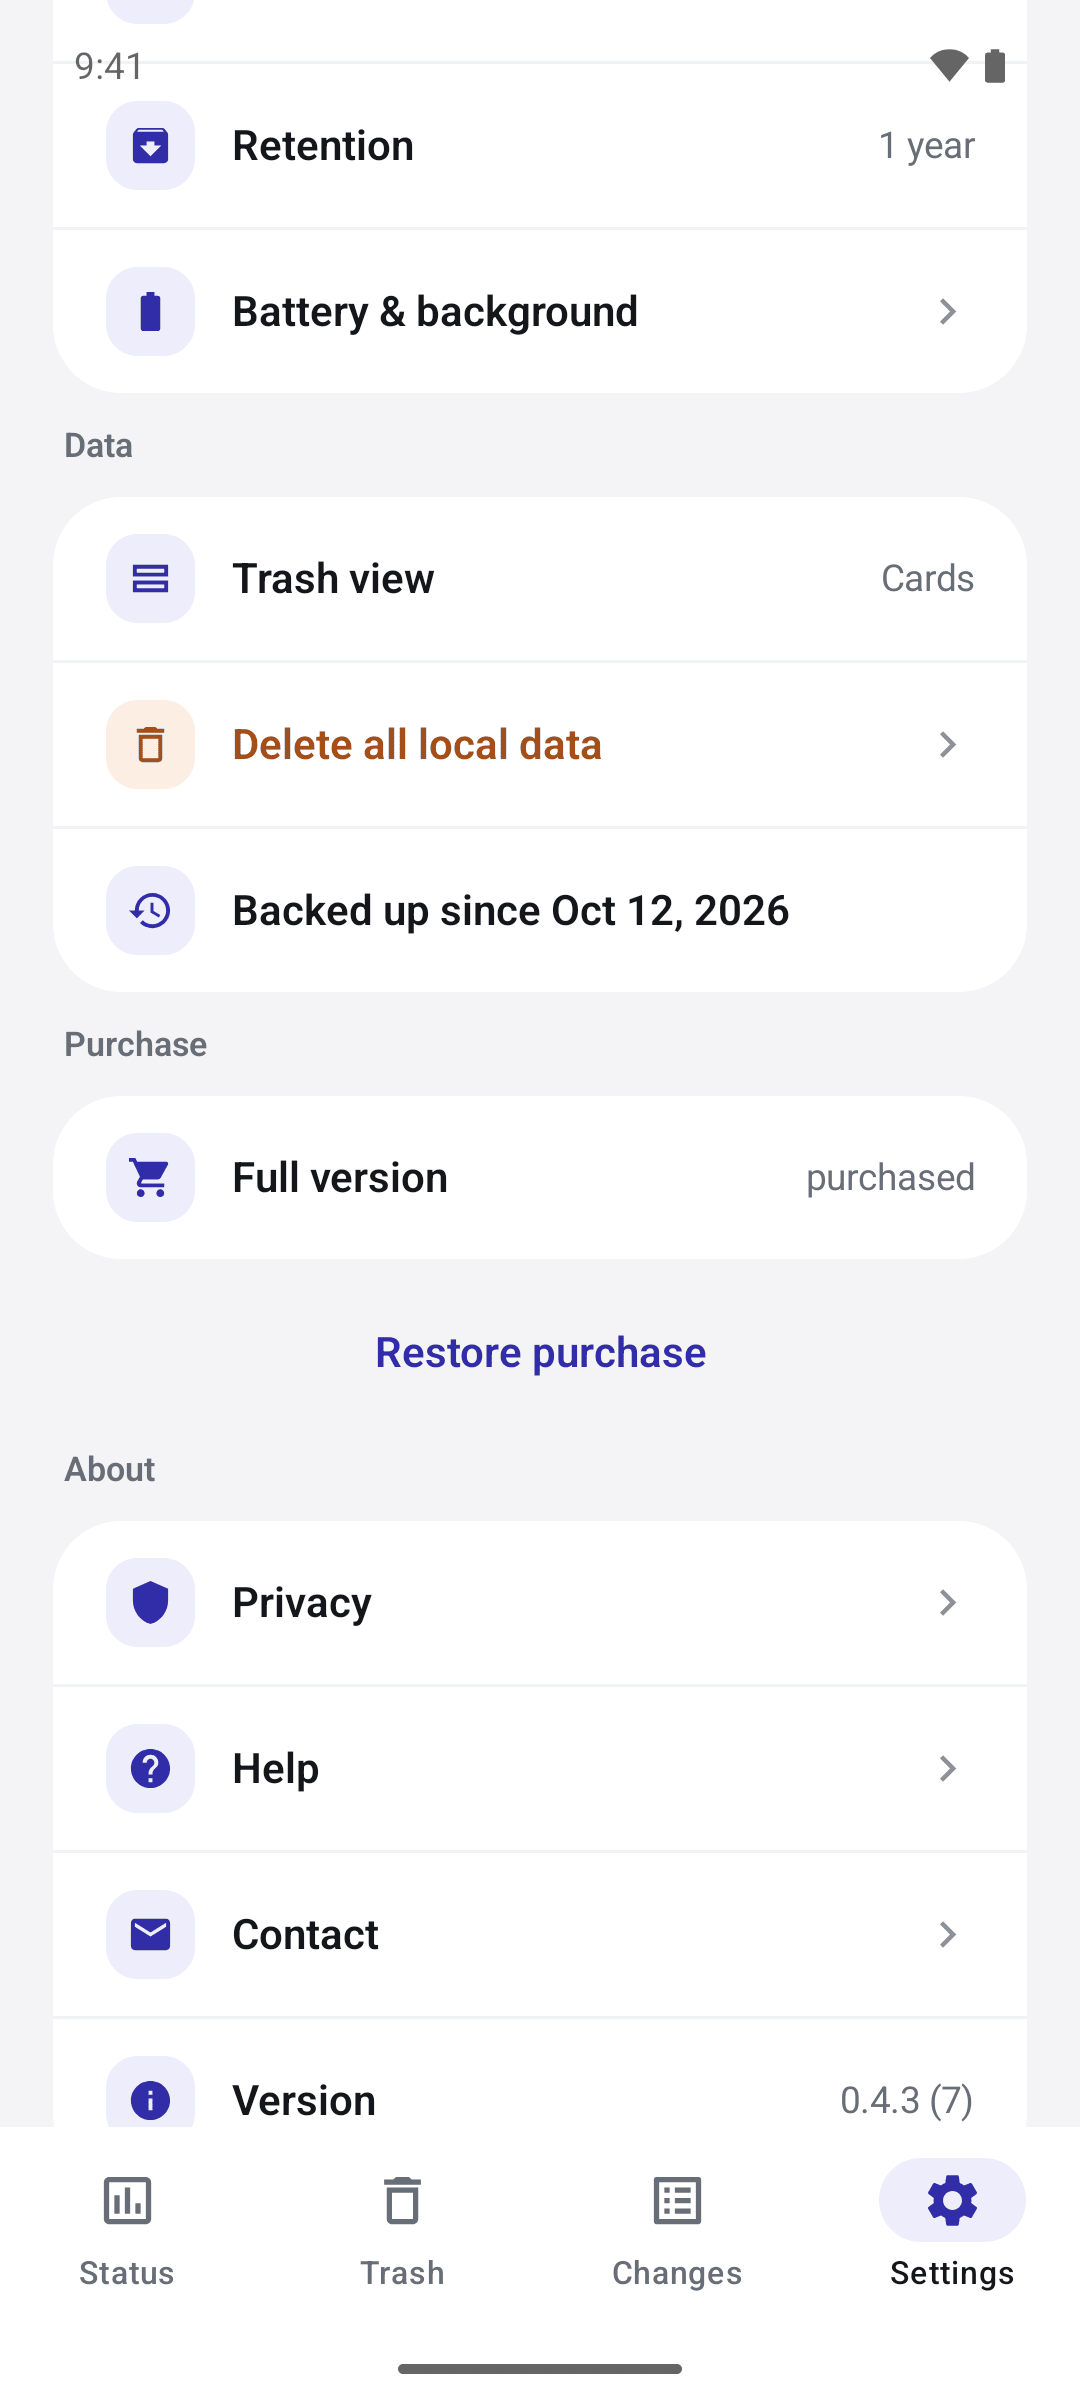
- Tap a locked entry, “Unlock this entry” or “Unlock these … entries”, or “View full version”. You also find the purchase under Settings › Purchase › Full version.
- The “FULL VERSION” sheet shows what you get and the price. The price comes straight from the App Storefrom Google Play and is the one valid in your country – it can differ from country to country and change over time.
- Tap “Buy” and confirm the purchase with the App Storein Google Play as usual.
- Chronaut shows “Thank you – unlocked”. The locked entries are now visible.
It is a one-time purchase, with no renewal and no recurring cost.
If Google Play confirms the payment only later, Chronaut shows “The purchase is not complete yet” and unlocks as soon as the payment is confirmed. If the price is missing, Google Play is not available right now. Then check that you are signed in to the Play Store and try again later.
Restoring purchases
On a new device, after reinstalling or on a second device you do not pay again.
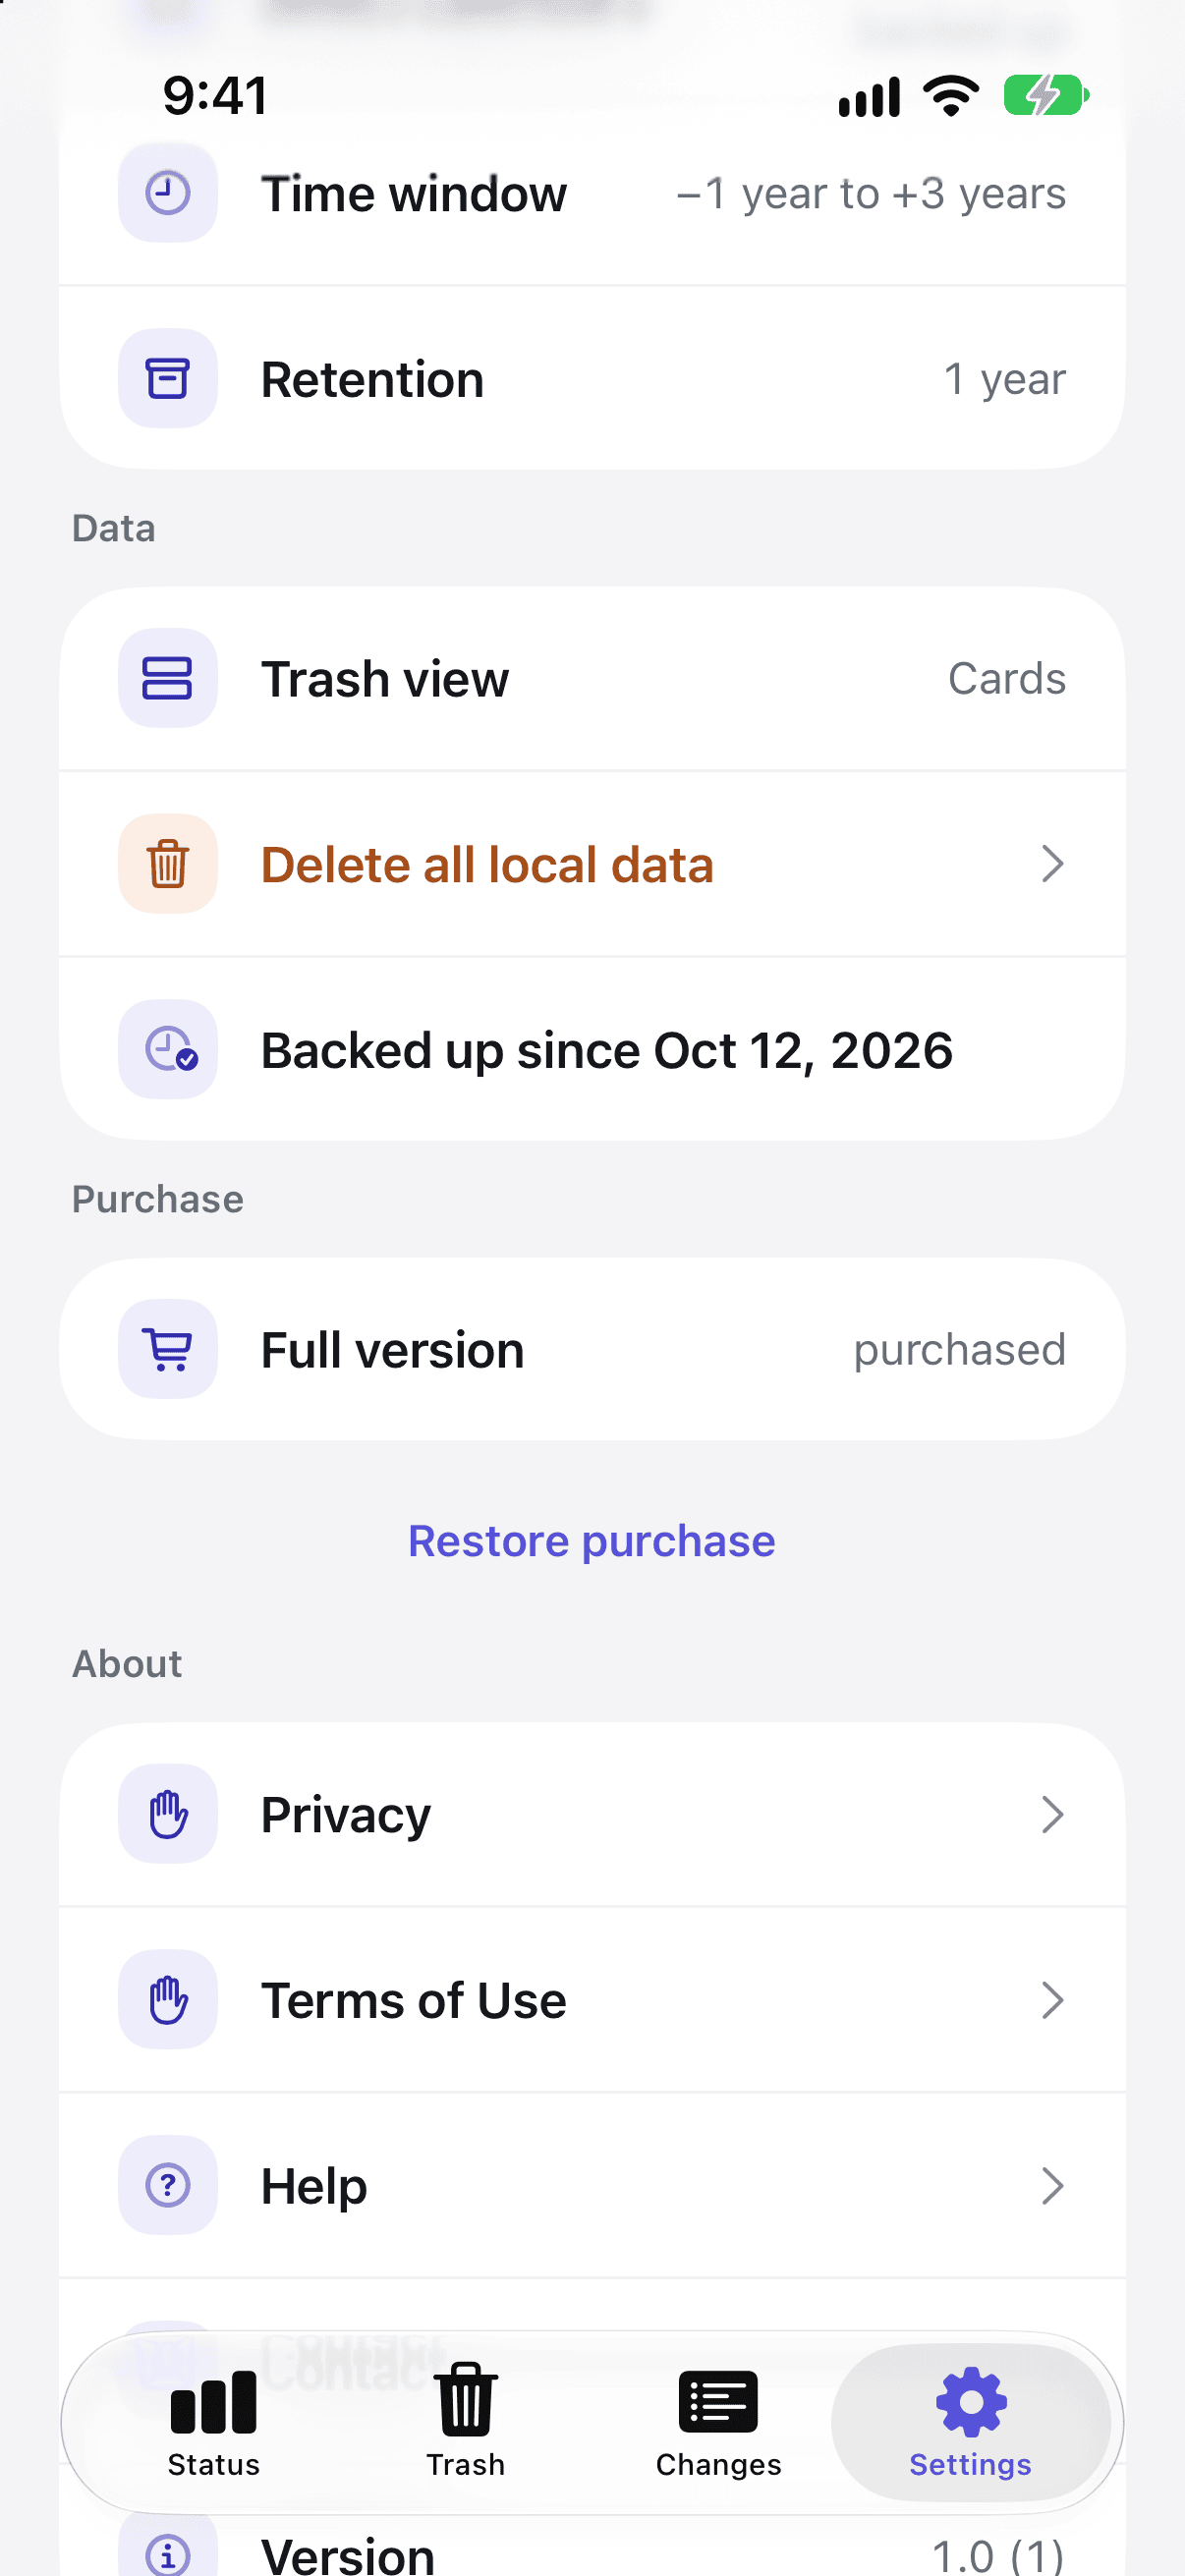
- Open Settings › Purchase.
- Tap “Restore purchase”.
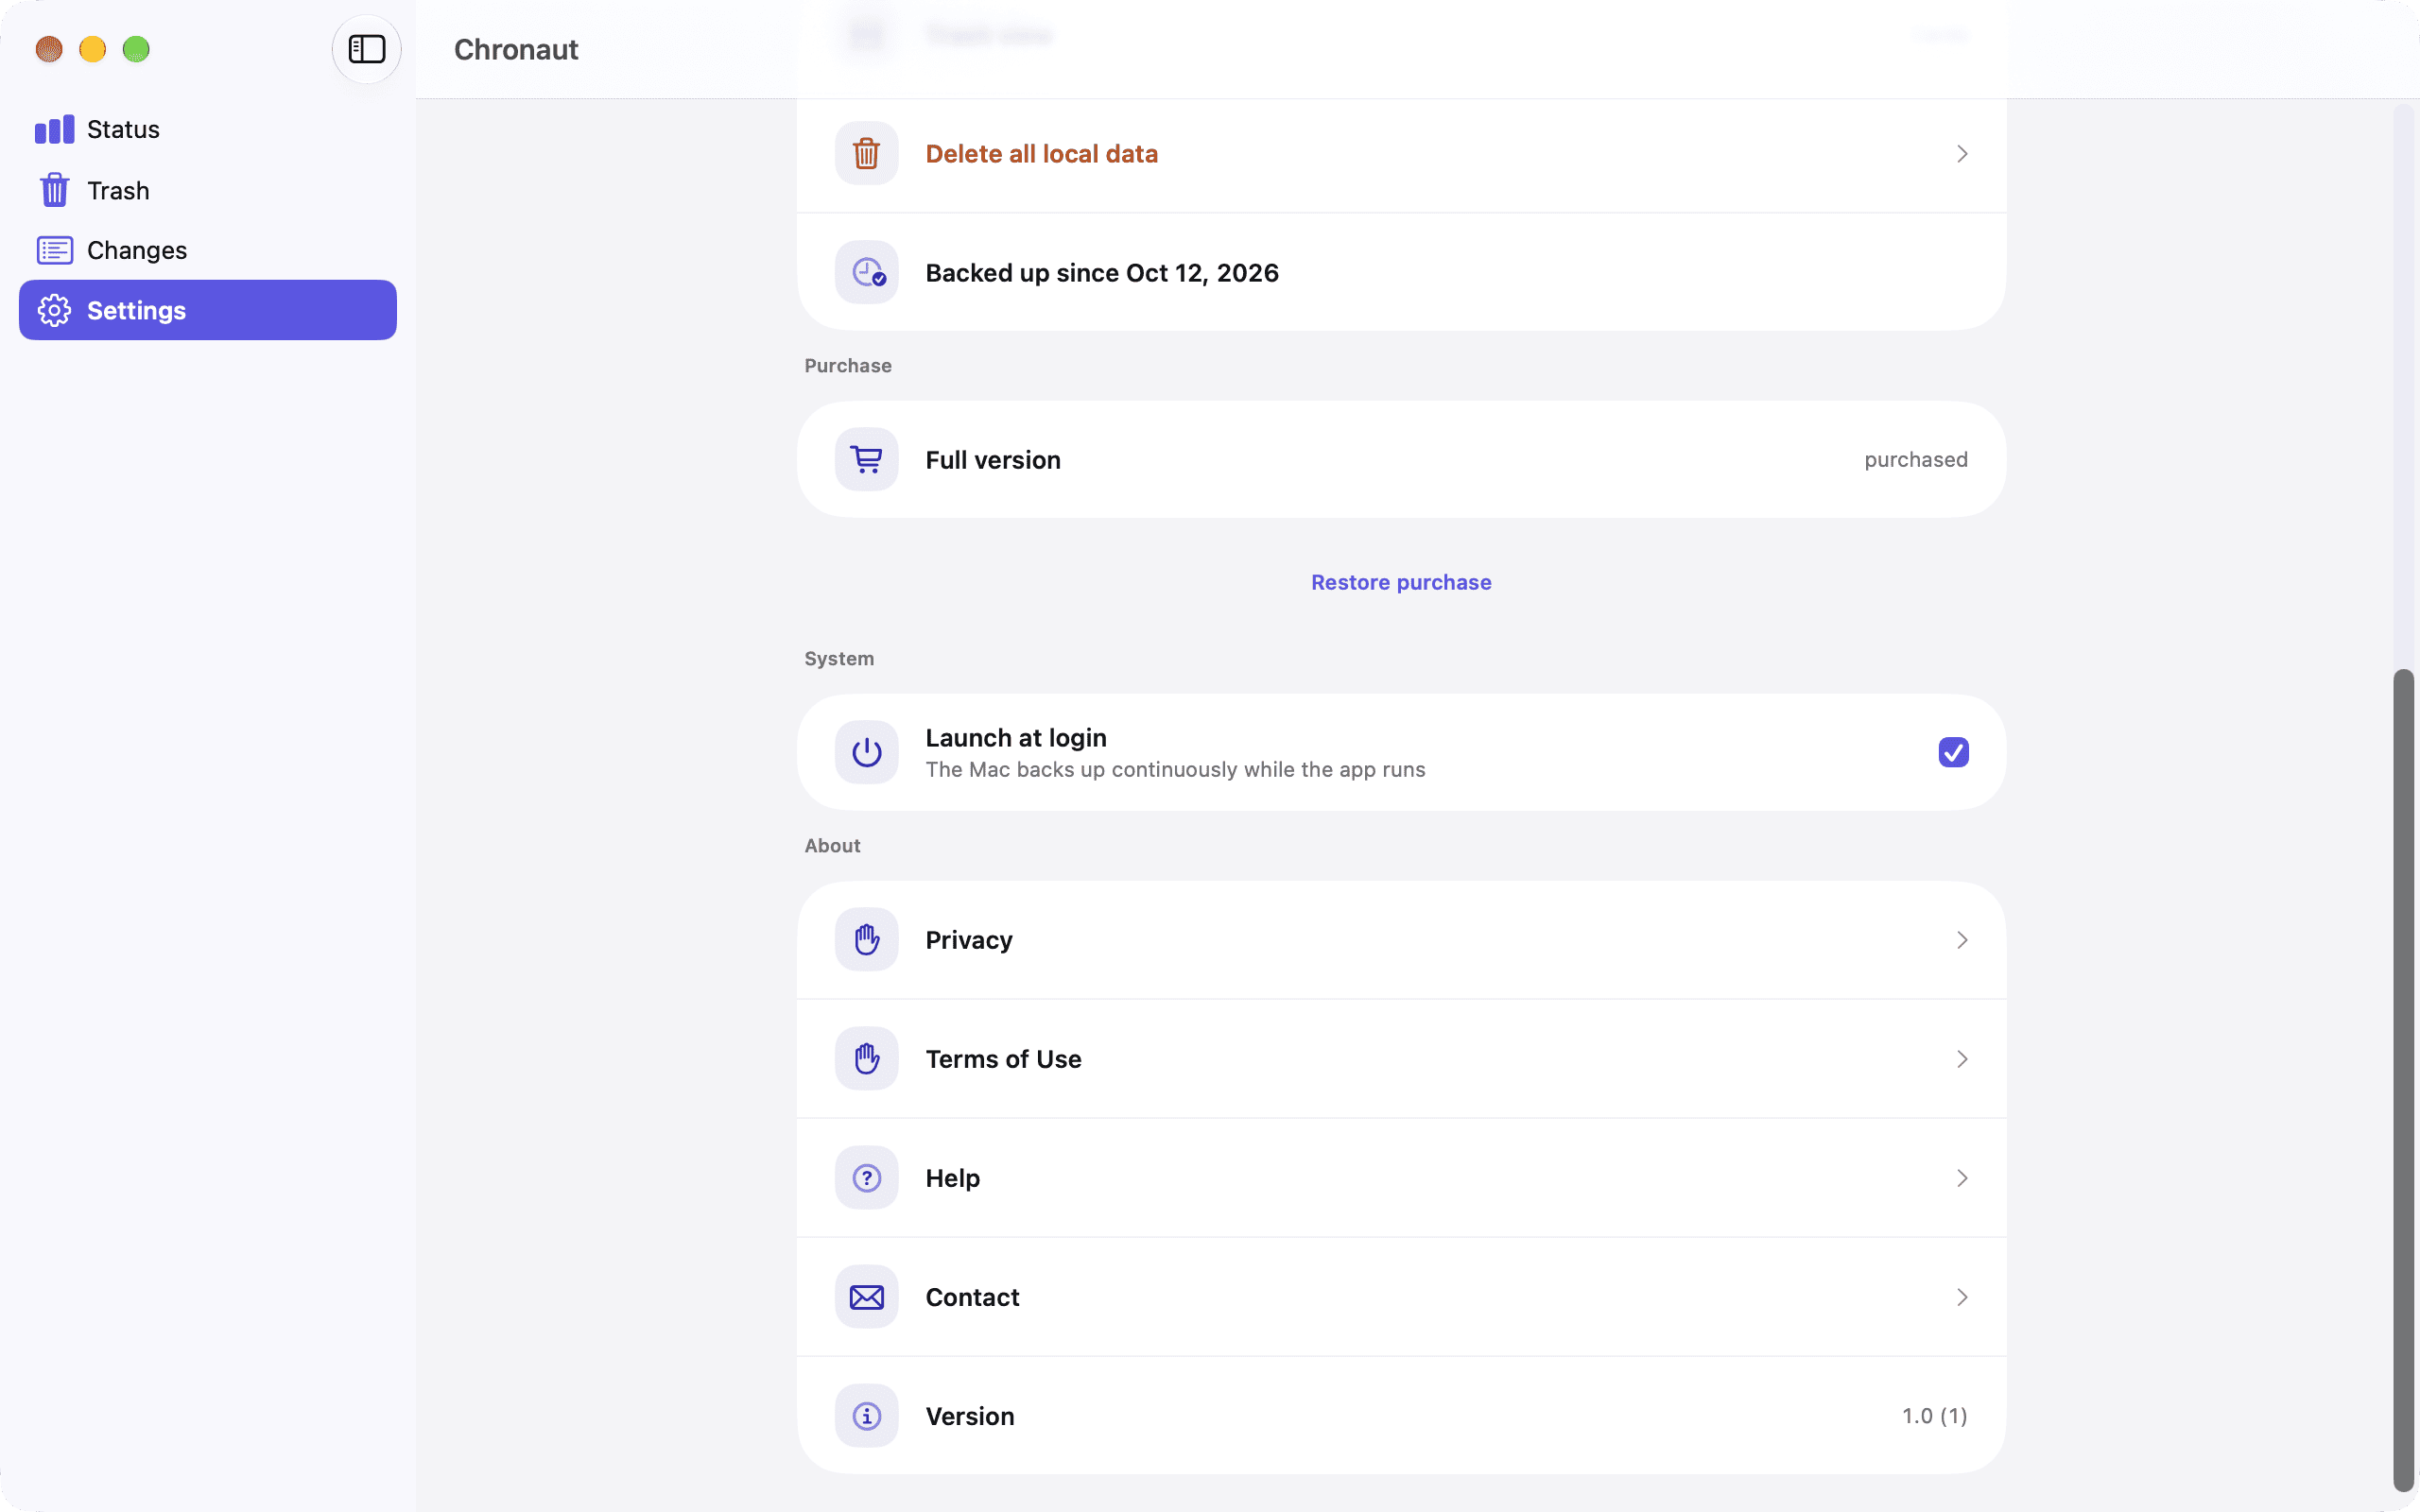
- Chronaut reports “Purchases updated”“Purchase restored”. “Full version” then shows “purchased”.
If “No purchase found” appears, check that you are signed in with the same Apple Account you bought with.
If “No purchase was found for this Google account.” appears, check that the Play Store is signed in with the same Google account you bought with. If Chronaut reports “Google Play is not available right now. Please try again later.”, you are not signed in to the Play Store or Google Play is not responding at the moment. Chronaut also checks your purchases with Google Play every time it starts.
Family Sharing
The full version can be shared through Apple Family Sharing. If purchase sharing is on for your family, its members can use the purchase on their own devices.
- The family member installs Chronaut on their device.
- They open Settings › Purchase in Chronaut and tap “Restore purchase”.
Whether purchases are shared in the family is set by the family organizer in the iOS, iPadOS or macOS settings under “Family”. If a child buys with “Ask to Buy”, Chronaut shows “Purchase is waiting for approval” until a parent agrees.
Every family member has their own history. Calendar data is not shared through Family Sharing.
On the iPad
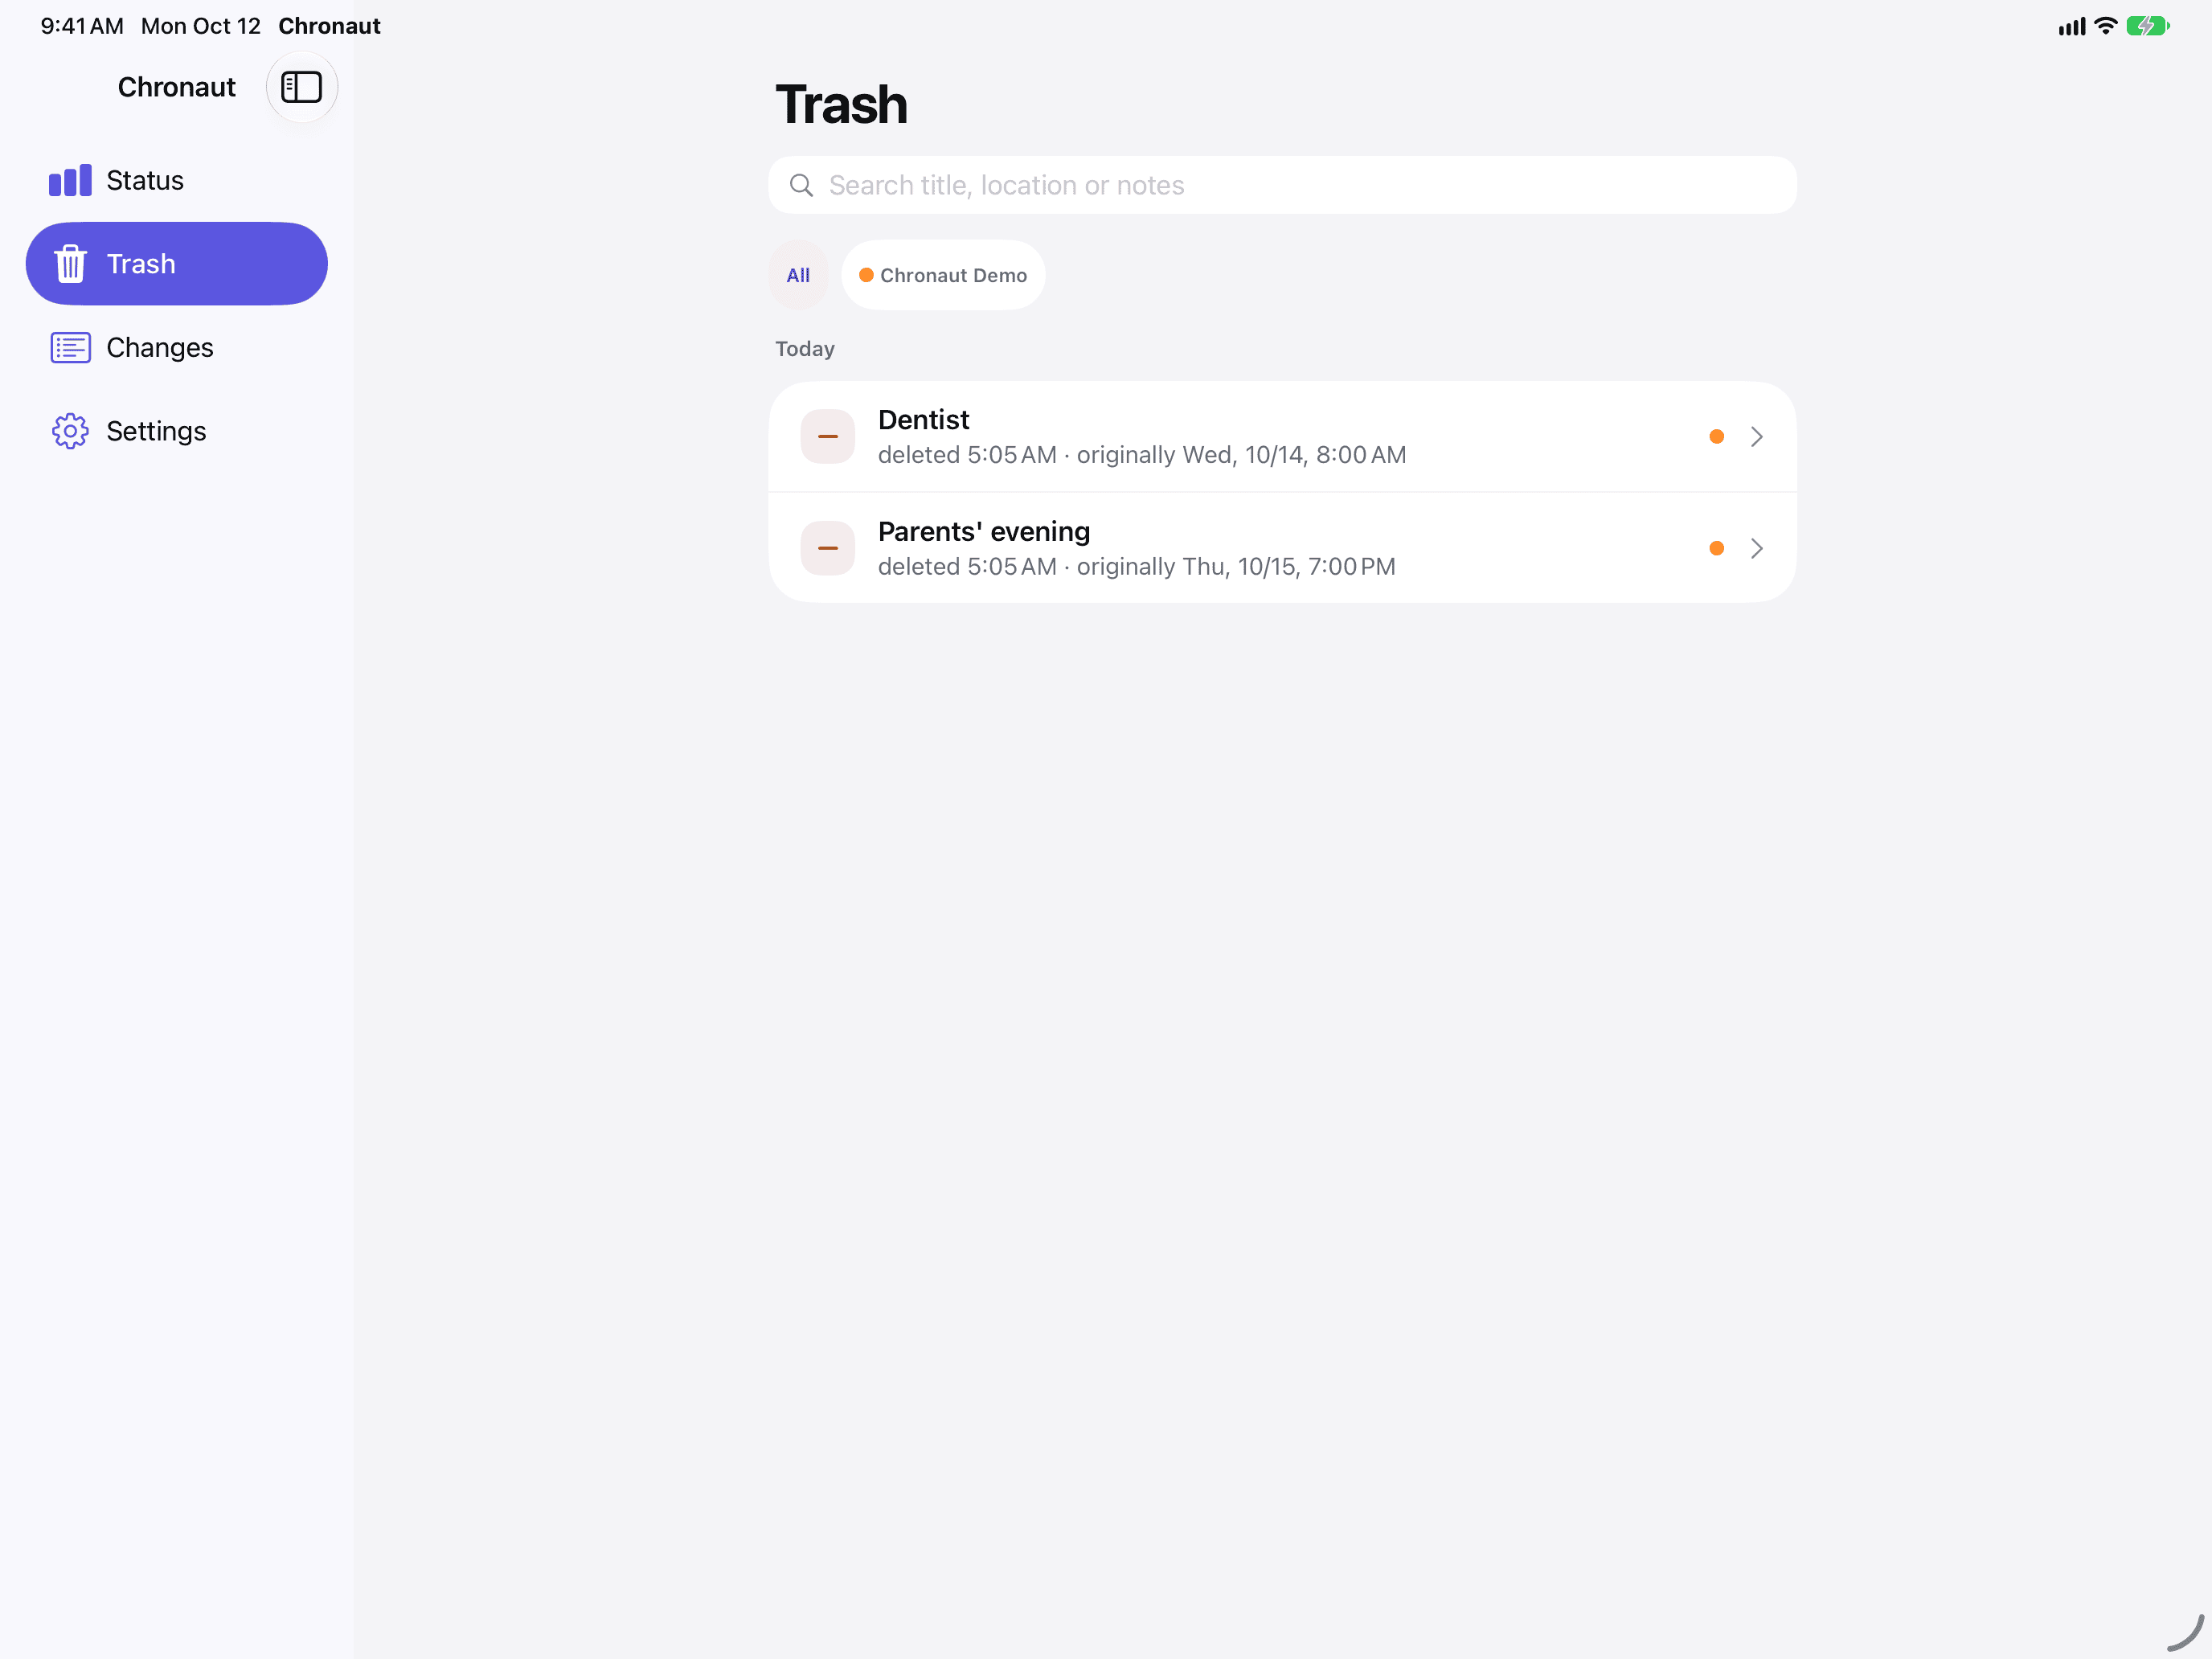
- Instead of tabs at the bottom, Chronaut has a sidebar on the left with “Status”, “Trash”, “Changes” and “Settings”.
- If the window is narrow, for example in Slide Over or a narrow Split View half, the tabs appear again, as on the iPhone.
- The iPad backs up on its own and keeps its own history, separate from iPhone and Mac.
- On the iPad, too, an automation in Shortcuts helps keep gaps rare (see Daily backup via Shortcuts).
- The full version also applies on the iPad. Tap “Restore purchase” there once.
On the Mac
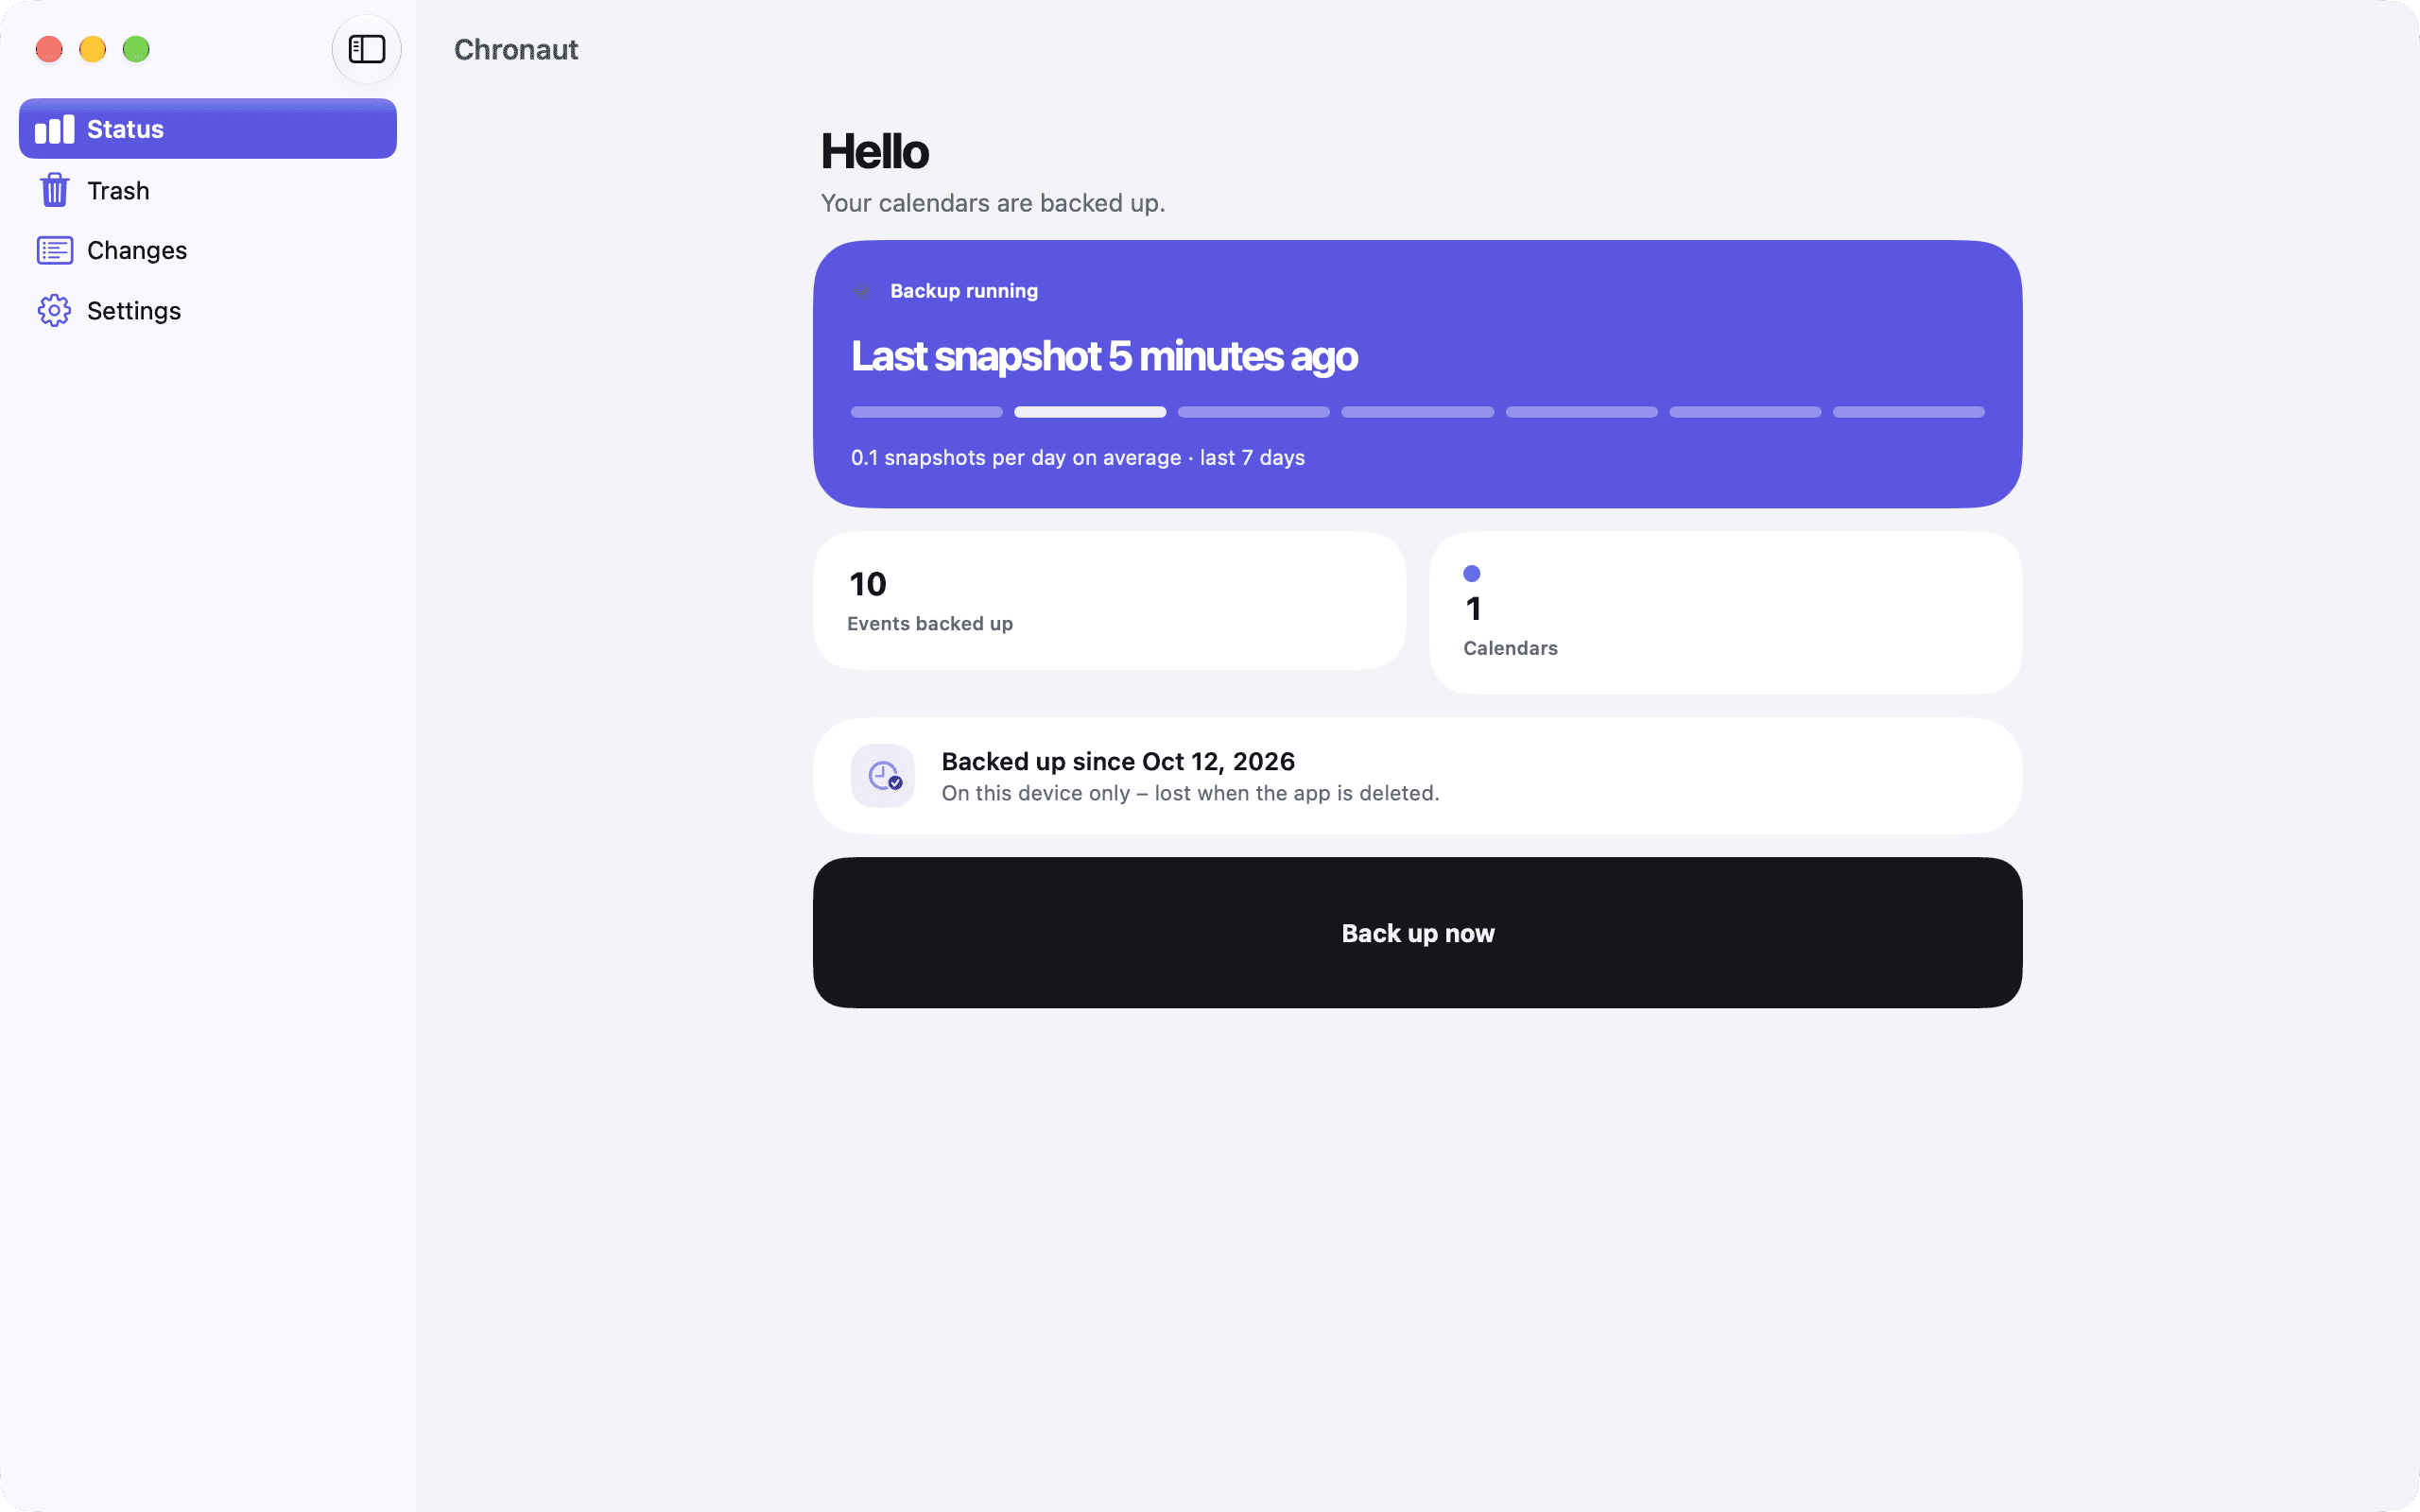
- Continuous backups: No automation is needed on the Mac. The app backs up continuously while it runs and picks up a change within a few seconds.
- Launch at login: Turn on the switch under Settings › System › Launch at login. Chronaut then keeps running after every restart. If macOS asks for approval, “Allow in System Settings” appears.
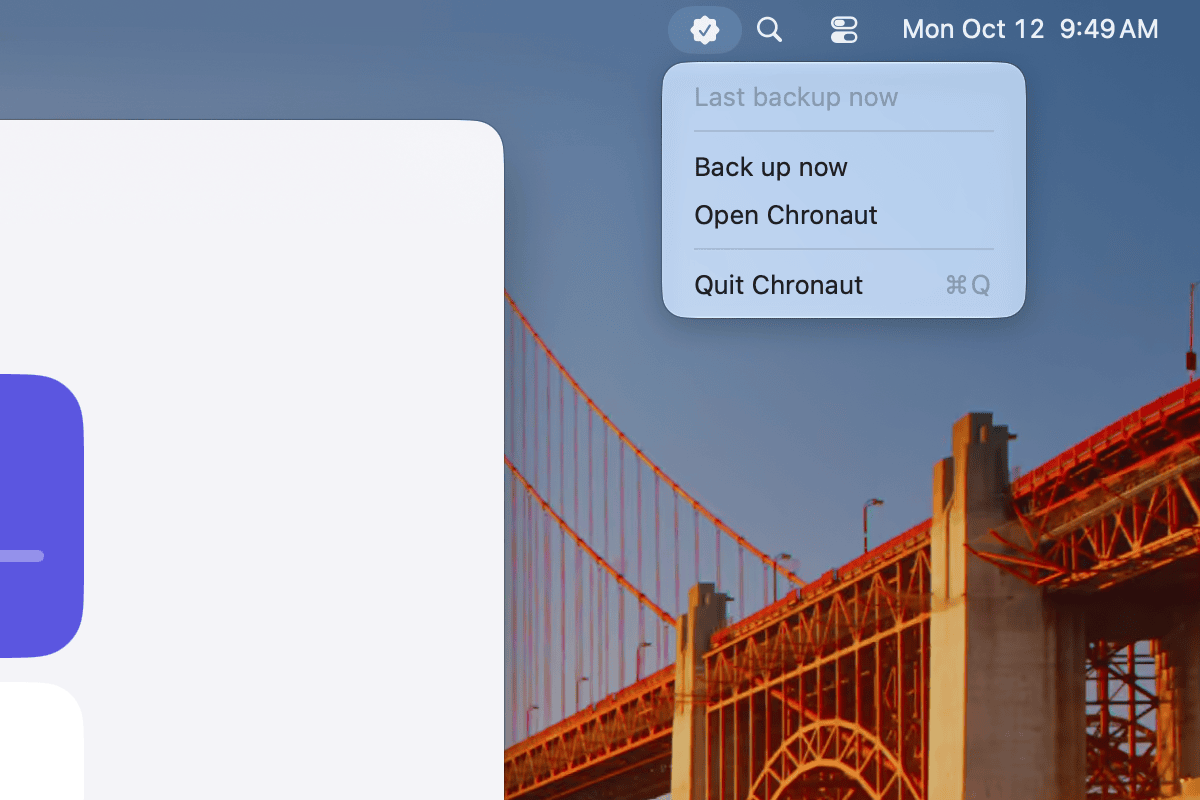
- Menu bar: Chronaut has an icon in the menu bar. It shows when the last backup ran and offers “Back up now”, “Open Chronaut” and “Quit Chronaut” (⌘Q).
- Window: The sidebar on the left holds “Status”, “Trash”, “Changes” and “Settings”. Click an entry in the trash to open it; “Restore” and “Hide” are also available with a right-click.
- Calendar access: The way leads through System Settings › Privacy & Security › Calendars (see If you declined access).
- Same rules: The Mac app is free and follows the same rules as on iPhone and iPad. The full version applies here too; click “Restore purchase” on the Mac once.
Privacy in plain words
- Your events stay on your device. No calendar content leaves it.
- There is no account, no server run by us and no analytics or tracking service.
- Chronaut only writes to your calendar when you restore an event yourself.
- The app has no internet access. Its data is excluded from Android backup, so it is neither in the Google backup nor transferred to a new device.
- Purchases go through Apple’s App Store. We do not see any calendar data in the process.
- Purchases go through Google Play. We do not see any calendar data in the process.
- Under Settings › Data › Delete all local data you remove the whole history at once. Your calendars stay untouched. If the app is deleted, the history goes with it.
All details are in the privacy policy.
All details are in the section “Chronaut for Android” of the privacy policy.
Frequently asked questions
Why don’t I see events from before the installation?
Chronaut can only compare what it has backed up itself. The first backup runs as soon as you allow calendar access. Anything deleted or changed before that is invisible to Chronaut.
Why is a deleted event missing from the trash?
Chronaut only sees what is in the calendar at the moment of a backup. If an event is created and deleted again between two backups, it never existed for the app. Other reasons: the event lies outside the “Time window”, its calendar is deselected under “Select calendars”, or you removed the entry from the trash with “Hide”.
How do I get backups with as few gaps as possible?
Open the app now and then, keep Background App Refresh on for Chronaut (Settings › General › Background App Refresh) and set up an automation in Shortcuts. In Low Power Mode, apps run in the background less often. The Mac app backs up most densely, because it runs continuously.
Open the app now and then and exclude Chronaut from battery optimisation (see Battery and background). In Battery Saver mode, apps run in the background less often.
What happens if I remove a calendar from syncing?
If a whole calendar disappears from the device, for example because you remove an account or turn off calendar syncing for an account, Chronaut shows it as one grouped entry “Calendar “…” removed” with the number of affected events. With the full version you can restore these events into another, writable calendar.
What happens if I deselect a calendar in Chronaut?
A deselected calendar does not count as deleted. Chronaut simply stops backing it up. Its history so far is kept, and its events do not end up in the trash.
What happens if I delete the app?
Then the system also deletes the whole history. It lives only on your device. After reinstalling, backups start from scratch. You get your purchase back with “Restore purchase”.
I use several devices. Do they all see the same history?
No. Every device backs up on its own and keeps its own history. If one device brings an event back, the other usually recognises it as present and shows “already restored”. In the trash, you show such entries with the “Include matched” filter.
No. Every device backs up on its own and keeps its own history. If another device brings a deleted event back and it returns to this device through syncing, Chronaut shows it under “Changes” as “back again”.
How long is the history kept?
One year, in the free version and in the full version. Chronaut cleans up older entries by itself. You find the value under Settings › Backup › Retention.
I bought the full version, but it is not active.
Tap “Restore purchase” under Settings › Purchase. Make sure you are signed in with the same Apple Account.Make sure the Play Store is signed in with the same Google account. If that does not help, write to us (see Support).
I restored the wrong thing.
Tap “Undo” right afterwards. If the notice has already gone, delete a newly created event in your calendar like any other. If you reset an existing event to an earlier version, restore the state before from its detail view under “Earlier versions”. The history in Chronaut is not affected.
Why can’t I restore an event from a subscribed calendar?
Subscribed calendars, holidays and birthdays are read-only. Chronaut backs them up but cannot write to them. Such events appear in the history, but can only be put back into another, writable calendar.
How do I delete all of Chronaut’s data?
Under Settings › Data › Delete all local data. This deletes the whole history on this device. Your calendars stay untouched.
Support and contact
Do you have a question, found a bug or have a wish? Write to us at info@npi-brandenburg.de. In the app you reach us through Settings › About › Contact.
It helps if you include your device, system version and the Chronaut version. The version is under Settings › About › Version.
Provider: NPI Brandenburg GmbH, Eichspitzweg 5c, 14772 Brandenburg an der Havel. More details in the imprint.